This article shows how to solve all the pressure plate puzzles in Seirai Island of Inazuma. Seirai Island was introduced in Genshin Impact 2.1 update on 1st September 2021. There are a total of 6 Pressure Plate Puzzles on Seirai island.
#1. Amakumo Peak Pressure Plates Puzzle
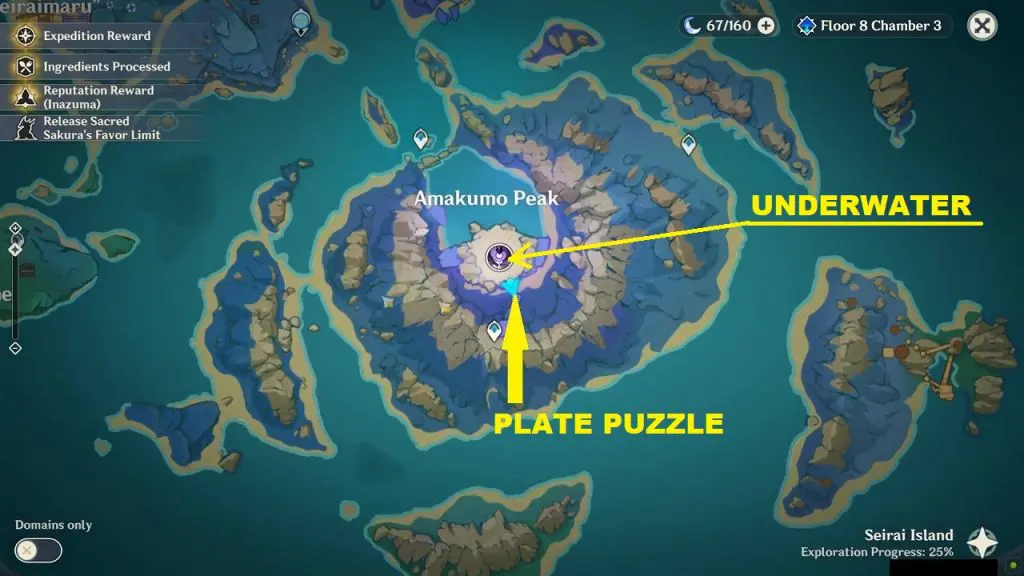
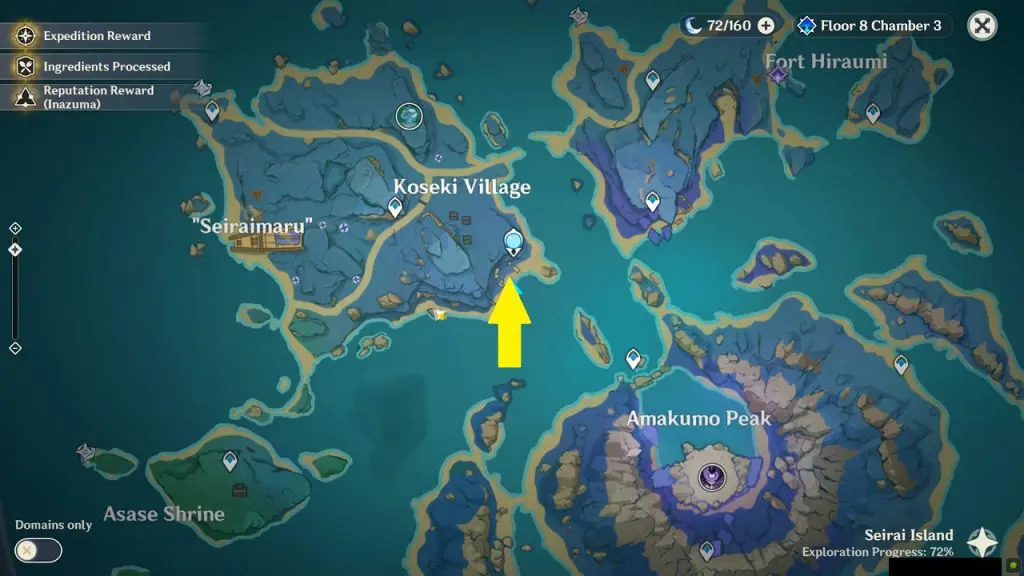
The pressure plate puzzle is south of the underwater area (See the picture below for location). Solving the puzzle lowers the water and lets you go to the underwater area. To solve the puzzle you will need to light the four plates highlighted in the second picture below. This will unseal the mechanism beside the puzzle. Interact with the mechanism to drain out the water halfway and allow you to go to the underwater area.
Click here to see the underwater area walkthrough
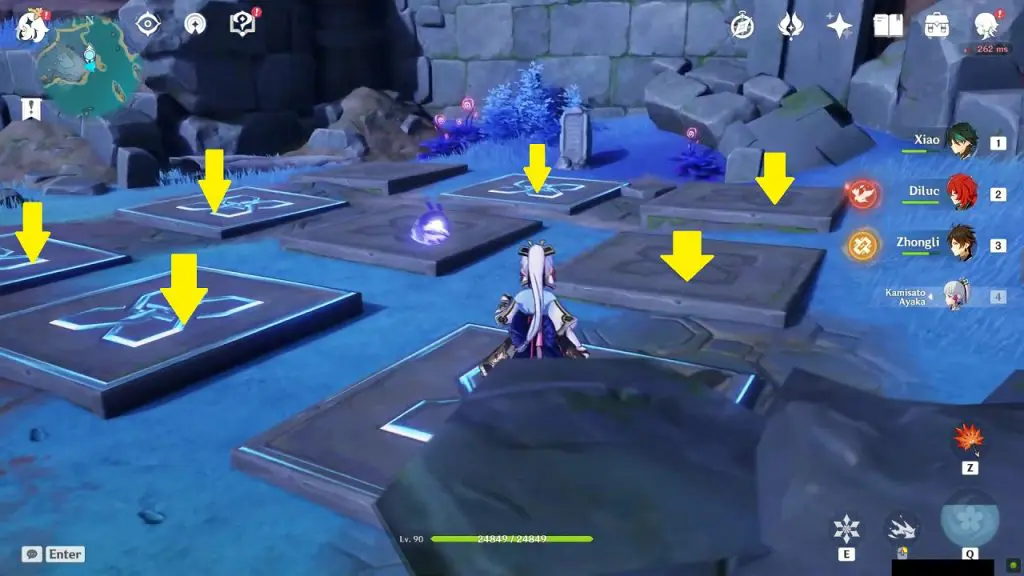
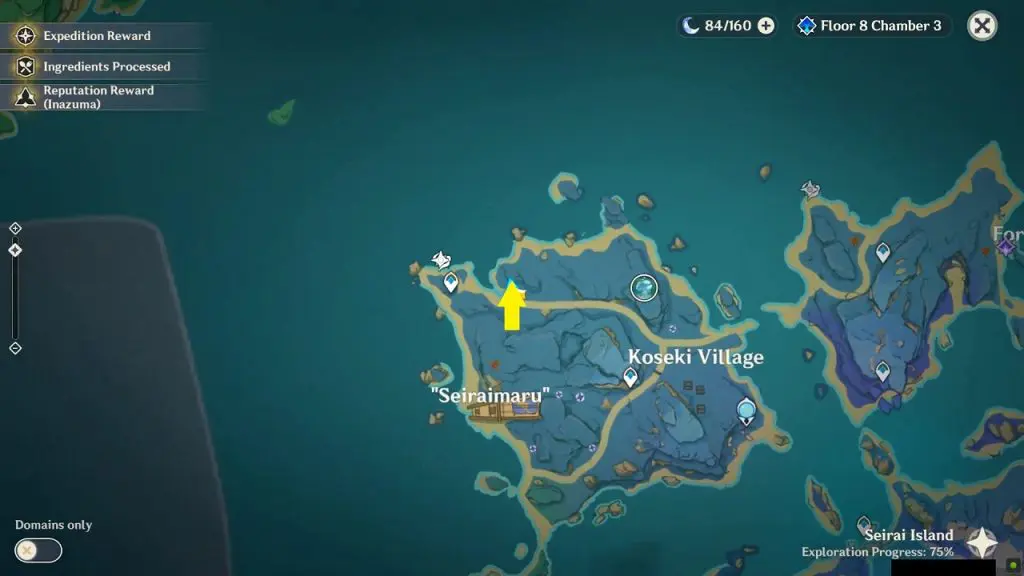
#2 Koseki Village Pressure Plates Puzzle
This puzzle is the southern beach of Koseki Village. To solve the puzzle, you have to light the six pressure plates as marked in the picture below. Solving the puzzle reveals an exquisite chest.
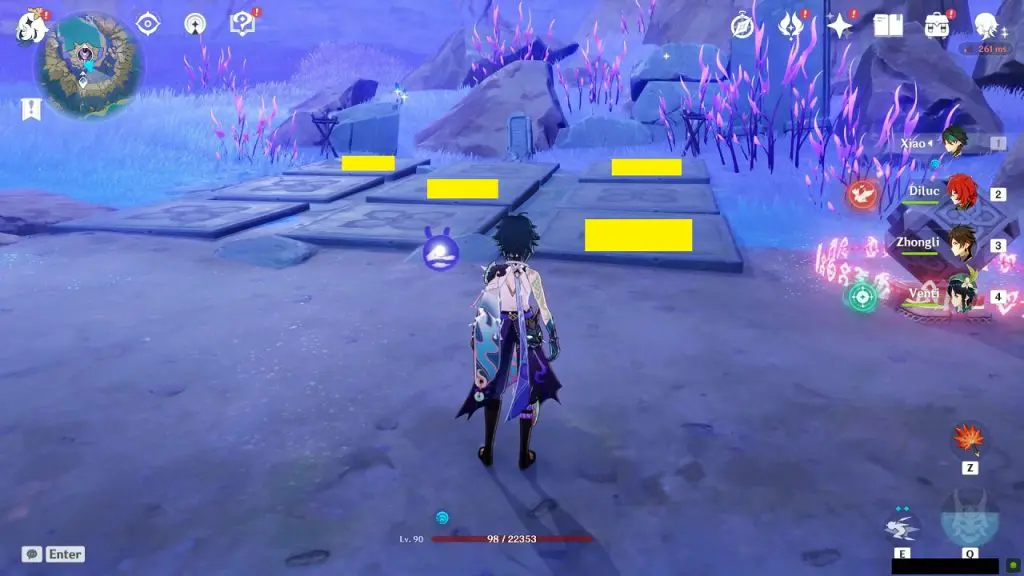
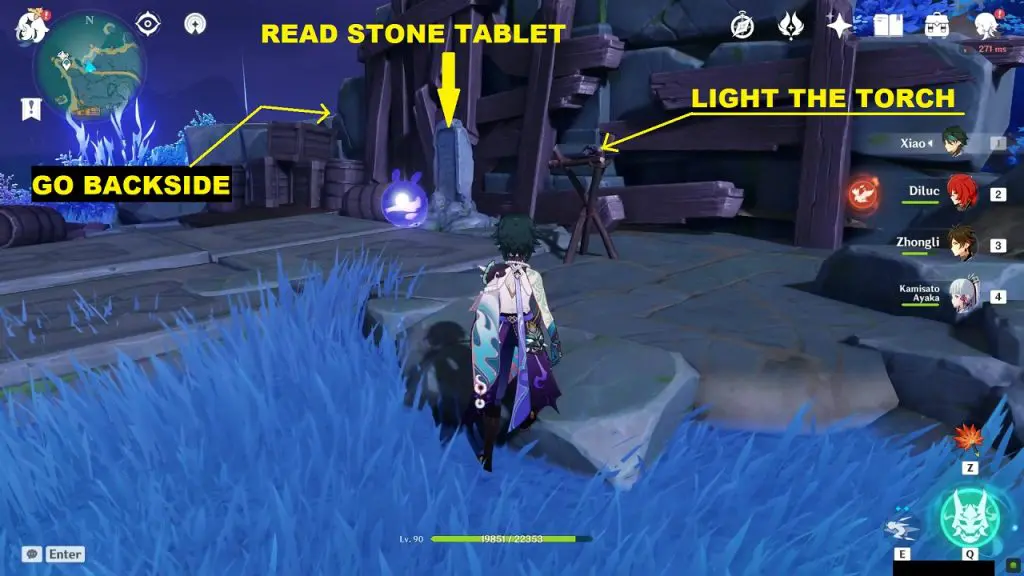
#3 Same Form Same Light Stone Plates Puzzle
This pressure plate puzzle is at the northwest side of Koseki Village as shown in the picture below.
Read the stone tablet in front of the pressure plates. The stone tablet says, “Same form, Same light”. Light the torch near the plates and go behind the wall north of the plates to see another set of plates.
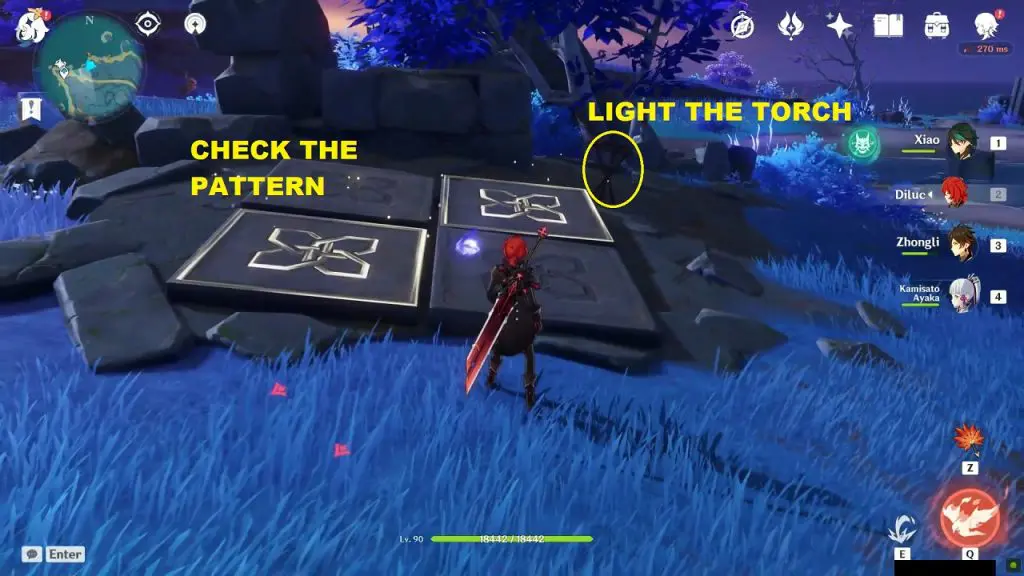
Check the pattern of the plates on the opposite side of the wall. You will have to light the pressure plates in the same pattern on the main pressure plates. Don’t forget to light the torch here.
Go back to the main plates and light the pressure plates as shown in the picture below to solve the puzzle. Solving the puzzle reveals an exquisite chest.
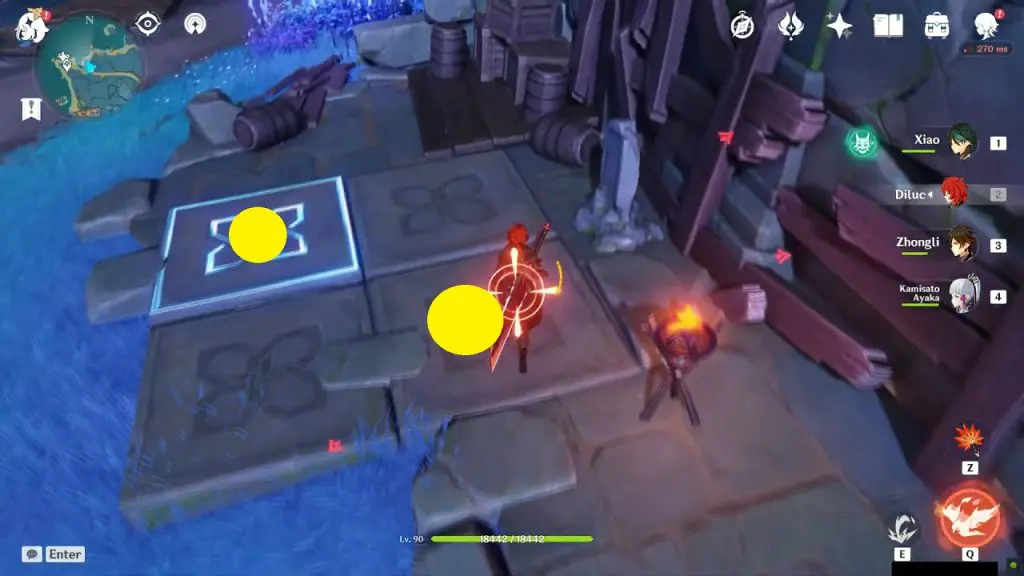
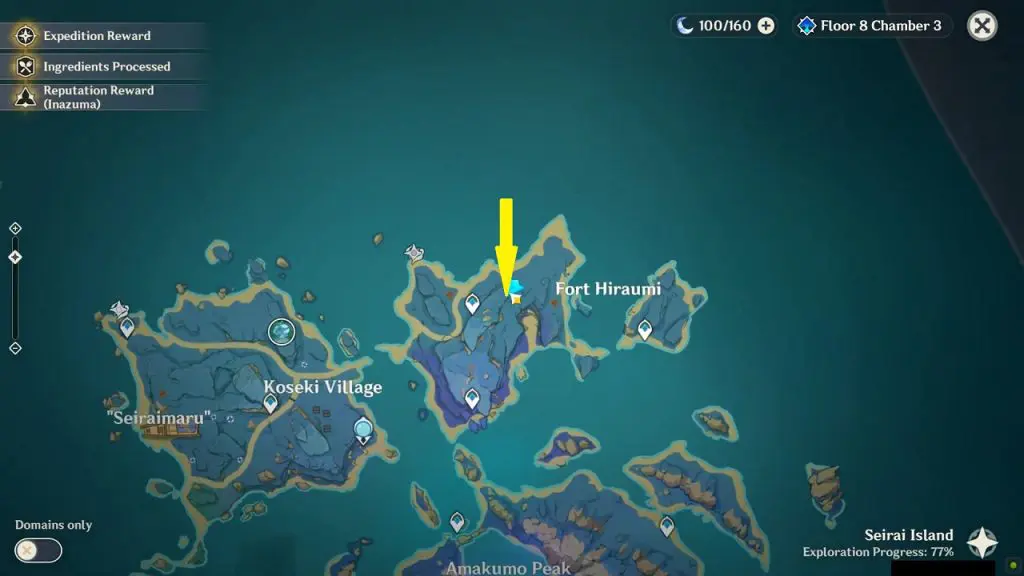
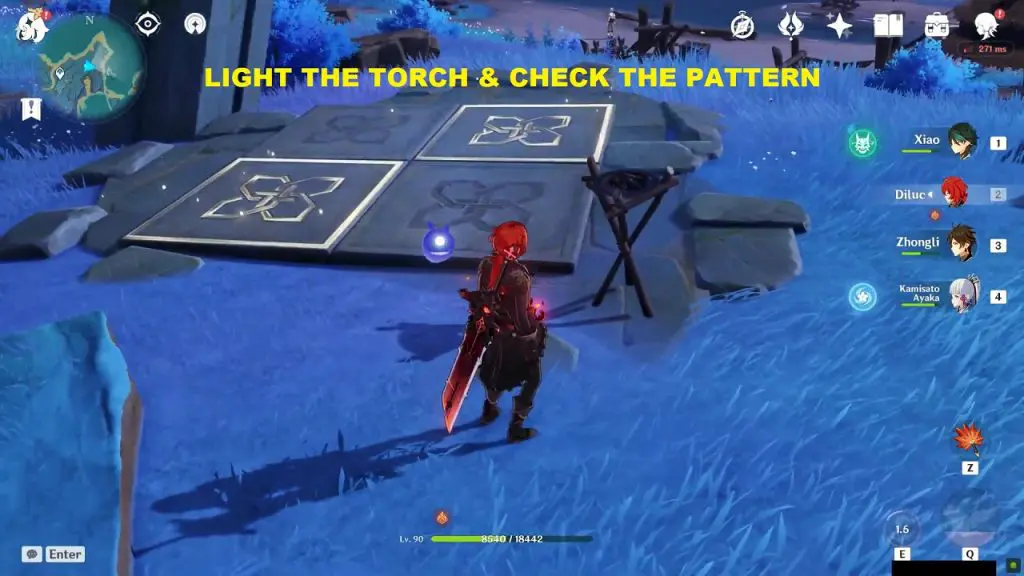
#4 Fort Hiraumi Same Form Same Light Stone Plates Puzzle
This pressure plate puzzle is at the north portion of Fort Hiraumi as shown in the picture below.
Just like the previous puzzle, read the stone tablet in front of the pressure plates. The stone tablet says, “Same form, Same light”. Light the torch near the plates and check the other set of plates on the east side. Check the pattern of the plates on the duplicate set of plates and light the torch there.
Go back to the main plates and light the pressure plates as shown in the picture below to solve the puzzle. Solving the puzzle reveals a common chest.

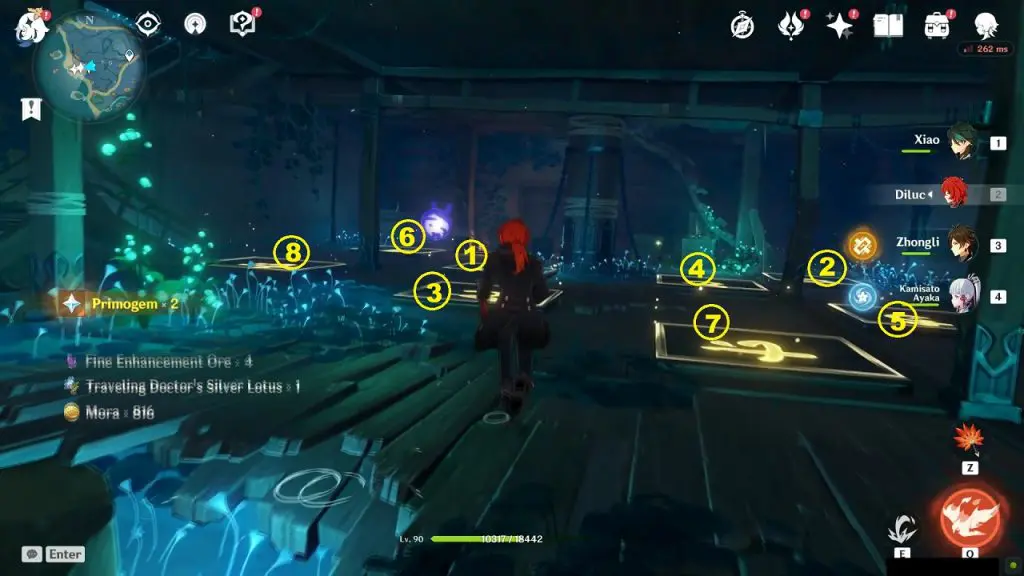
#5 Seiraimaru Ship Plate Puzzle 1
On the first basement floor of the ship, you will find a set of tiles that glows when you step on them. Step on the six tiles in the sequence as shown in the picture below to unseal the exquisite chest. Solving the puzzle not only unseals the chest but also creates a hole on the ship floor, creating a way to the bottom level.
Seiramaru Ship Complete Walkthrough
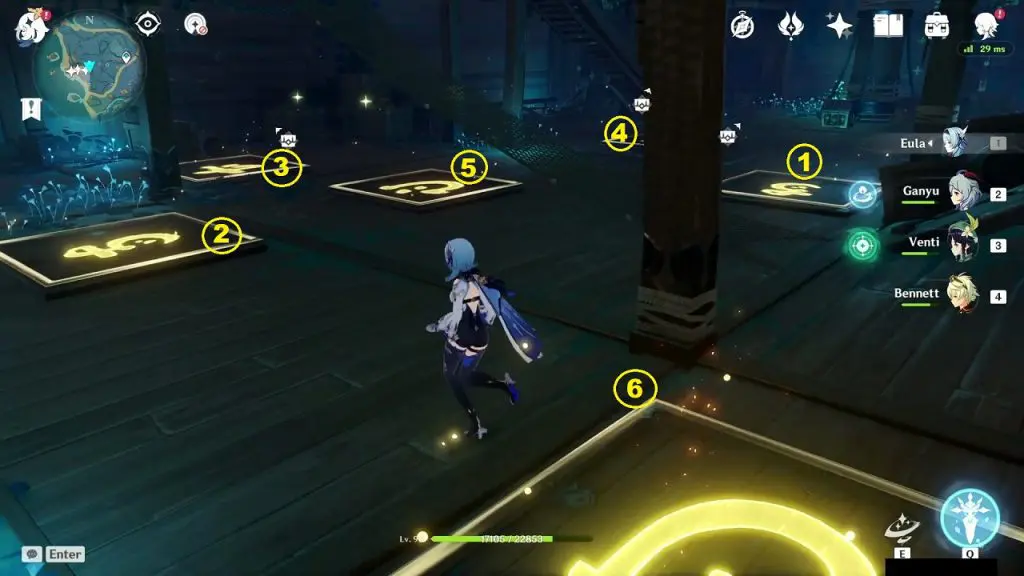
#6 Seiraimaru Ship Plate Puzzle 2
On the bottommost floor of the ship, you will find a set of tiles that glows when you step on them. Step on the eight tiles in the sequence as shown in the picture below to unseal the exquisite chest. Solving the puzzle not only unseals the chest but also breaks the eastern wall of the ship leading to a Relay Stone Puzzle.
Seiramaru Ship Complete Walkthrough