Orobashi’s Legacy is a World Quest in Inazuma. It is split into five parts. This is a tutorial to complete Orobashi’s Legacy part II. The Orobashi’s Legacy questline is launched by speaking to a worker named Kaji at a camp between Fort Fujitou and Musoujin Gorge on Yashiori Island. Orobashi’s Legacy II world quest is available once you have completed Orobashi’s Legacy I. Kaji will tell you where to find the second ward at the Serpent’s Head on Yashiori Island.
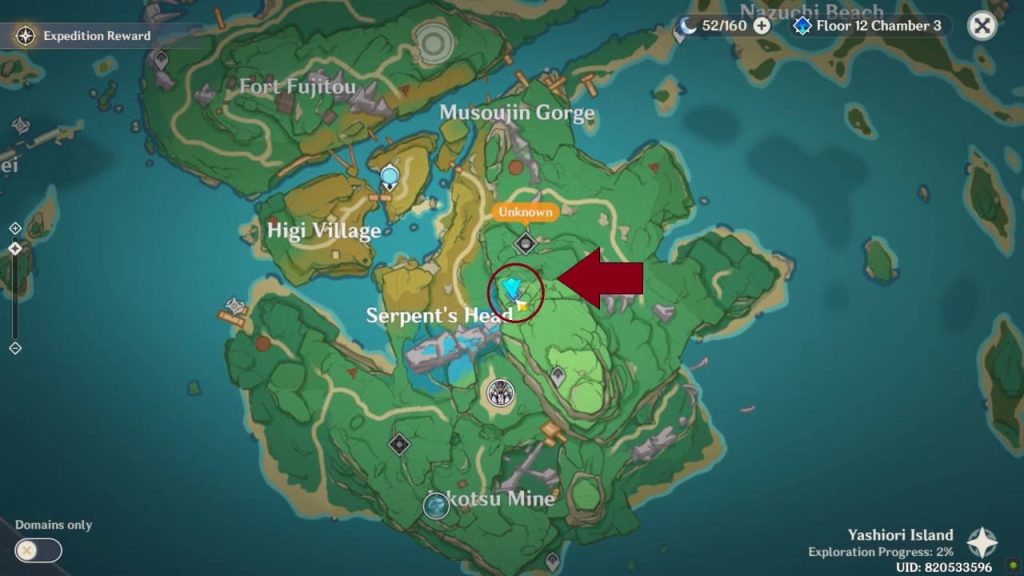
Search for the Ward at Serpent’s Head
Ward’s location on Yashiori Island is shown on the map as the Serpent’s Head. Location is marked with the quest indicator. The ward is guarded by another Kairagi: Dancing Thunder enemy at this location. Eliminate the enemy and interact with the ward.
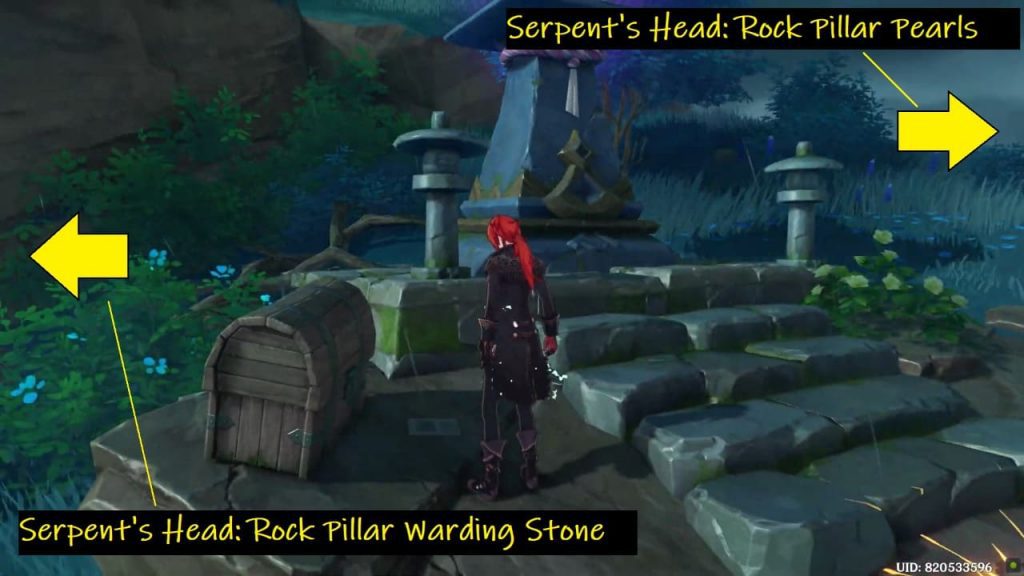
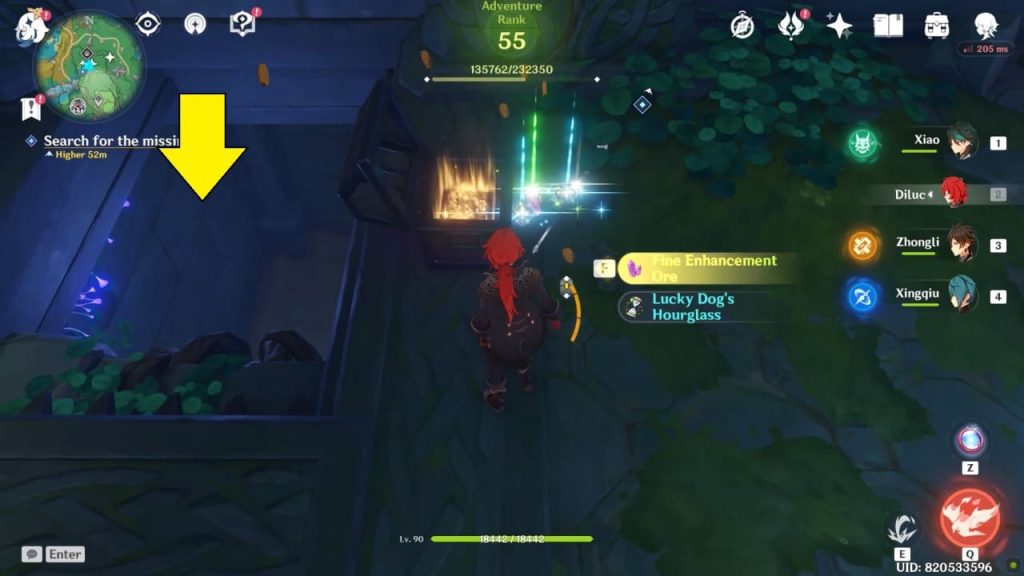
Search for the missing part
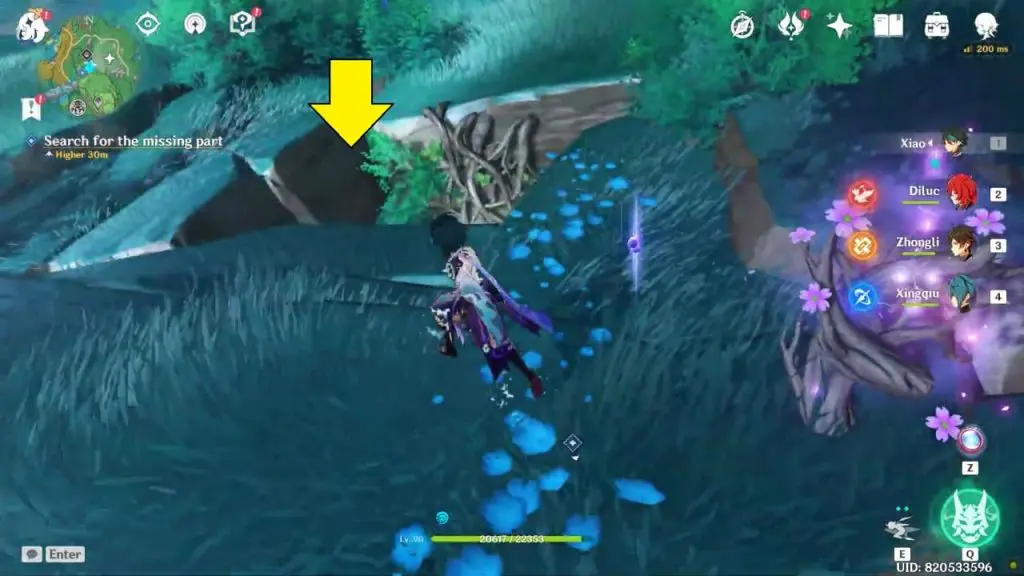
You will once again be instructed to use your elemental sight to locate two missing components for this ward and both these components are located at different locations.
- Serpent’s Head: Rock Pillar Pearls
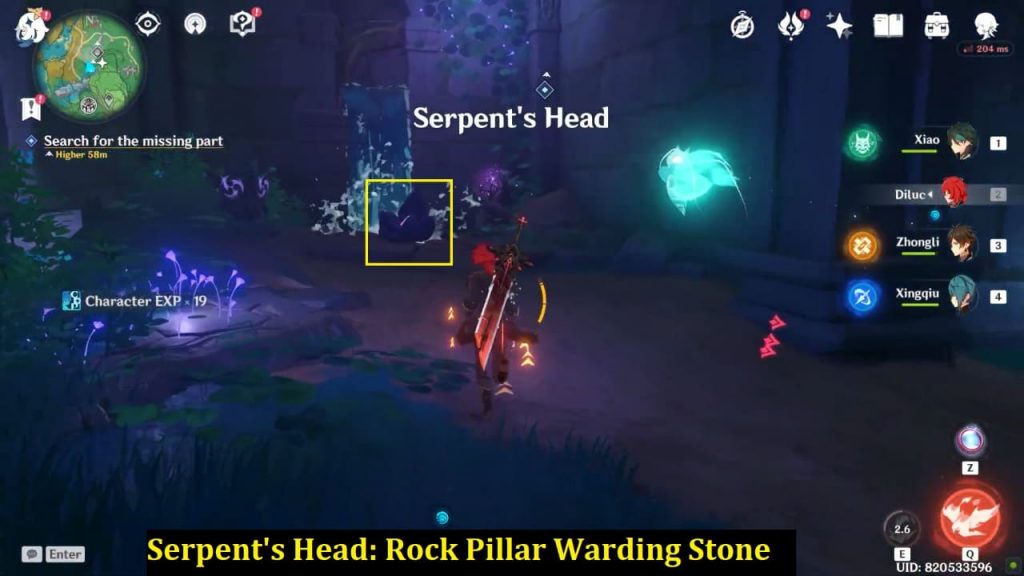
- Serpent’s Head: Rock Pillar Warding Stone
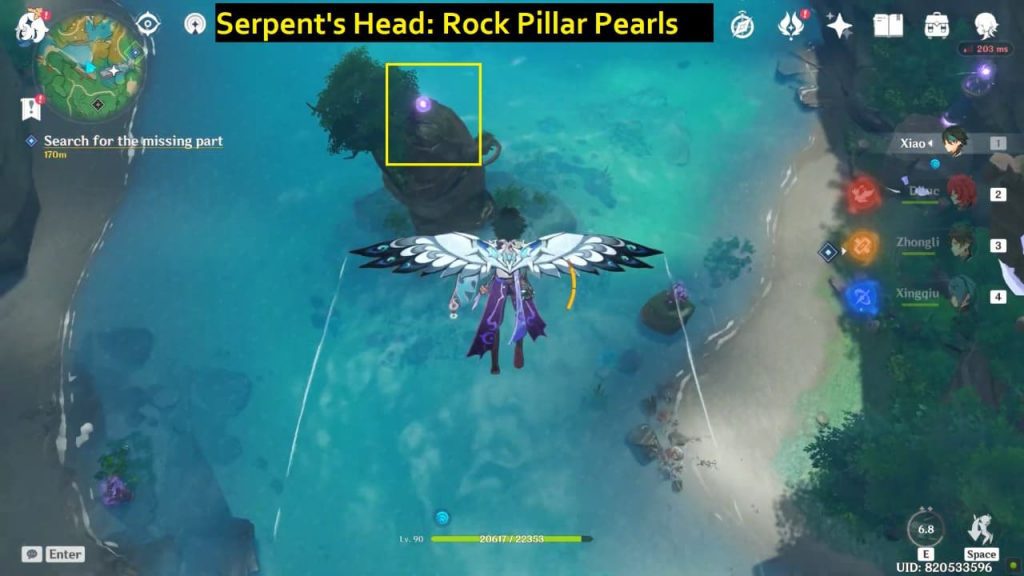
Serpent’s Head: Rock Pillar Pearls Location
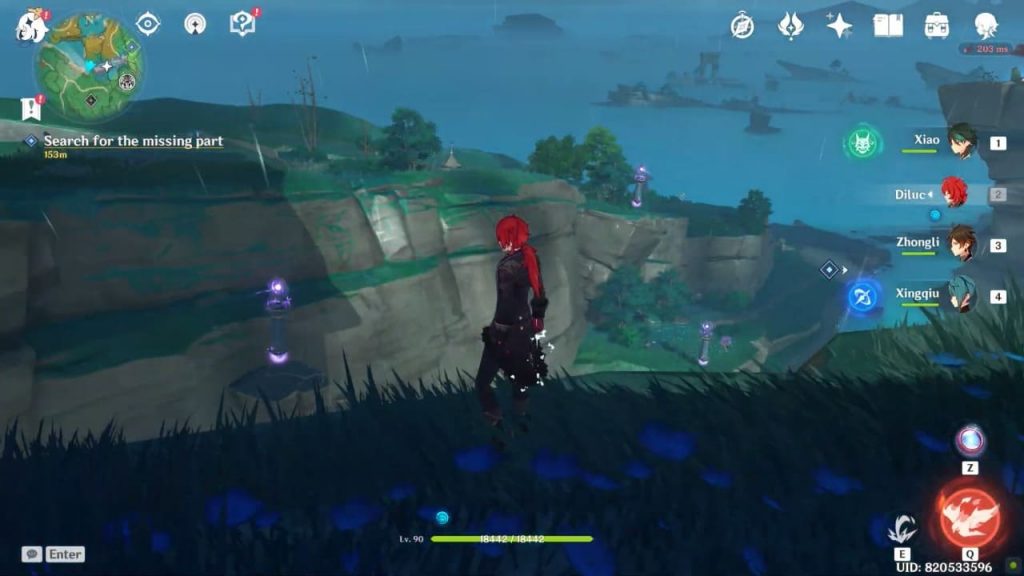
Using elemental sight will lead you westward to a place with a purple ball encircled by a dome in the canyon. Here you will get another puzzle quite similar to the previous one as in Orobashi’s Legacy I. There are no enemies available around the dome so you can directly start solving the puzzle.
Also Read: Genshin Impact 2.0: Inazuma Quest List & Walkthrough
How to solve Orobashi’s Legacy II Puzzle
Just like the previous Orobashi’s Legacy I puzzle, This puzzle also involves making use of mechanisms called Sacred Stone Mounds and Thunderbearer Mirrors. To solve the puzzle, use the Thunderbearer Mirrors to reflect the electric beam coming from the Sacred Stone Mound to the dome in the center. When you approach close to each of the pillars, you can change their orientation (which direction they face) and elevation (up or down).
In this puzzle, you need to redirect and orient 7 different Mounds and mirrors to guide the electric beam from top to bottom of the canyon. I below image Sacred Stone Mound is marked 1, it needs to orient toward the marked 2 location which is Thunderbearer Mirrors. Thunderbearer Mirrors-2 face toward Mirrors-3. Similarly, Mirrors-3 needs to rotate toward Mirror-4 and this goes on till the Mirror-7. Finally, Mirror-7 needs to be set toward the circular dome at the bottom of the canyon.
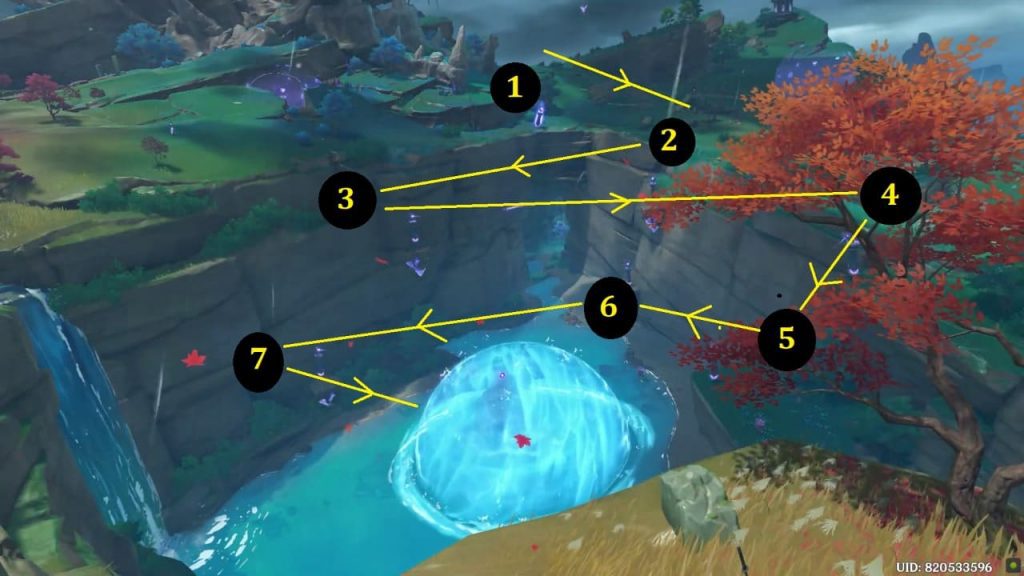
Once you successfully change the pillar’s orientation and elevation, you are ready to destroy the center dome. Since you will be at the bottom of the canyon by the time you will orient mirror 7, you can use a character that has a bow and deals Electro damage.
From the bottom use the arrow to attack the Sacred Stone Mound to fire an electric current that can receive by multiple Thunderbearer Mirrors and direct to the central dome and destroy it. I have marked all the locations of the mirror and mound for reference.
Once the circular dome is destroyed, summon the electrogranum from nearby and fly to reach the top of the rock and collect “Serpent’s Head: Rock Pillar Pearls”. Glide down into the circle area where the dome was present earlier. Be sure to pick up the purple orb floating in the air (Musoujin Gorge: Rock Pillar Pearl) as you descend!
I below image Sacred Stone Mound is marked 1, it needs to orient toward the marked 2 location which is Thunderbearer Mirrors. Thunderbearer Mirrors-2 needs to be oriented toward Thunderbearer Mirrors-3. Similarly, Thunderbearer Mirrors-3 needs to rotate toward Thunderbearer Mirrors-4 and finally, Thunderbearer Mirrors-2 needs to be set toward the circular dome.
Serpent’s Head: Rock Pillar Warding Stone Location
Return to the ward and use elemental sight. This time, the trail will take you east to a hole. Before entering the underground cave, you can summon an electrogranum. You’ll notice an electro barrier as you glide down, and you’ll be able to pass past it because you’ve previously summoned Electrogranum.
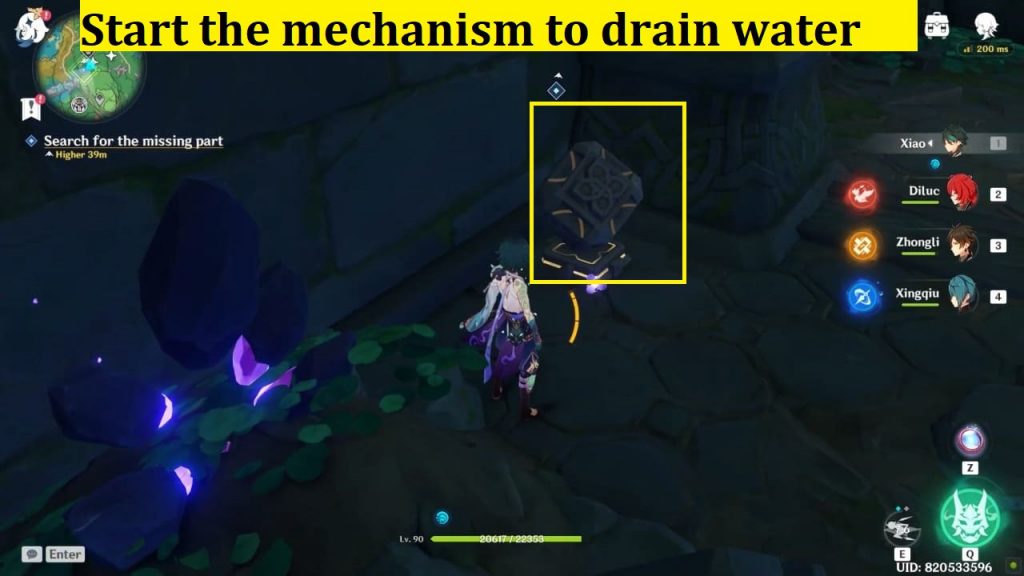
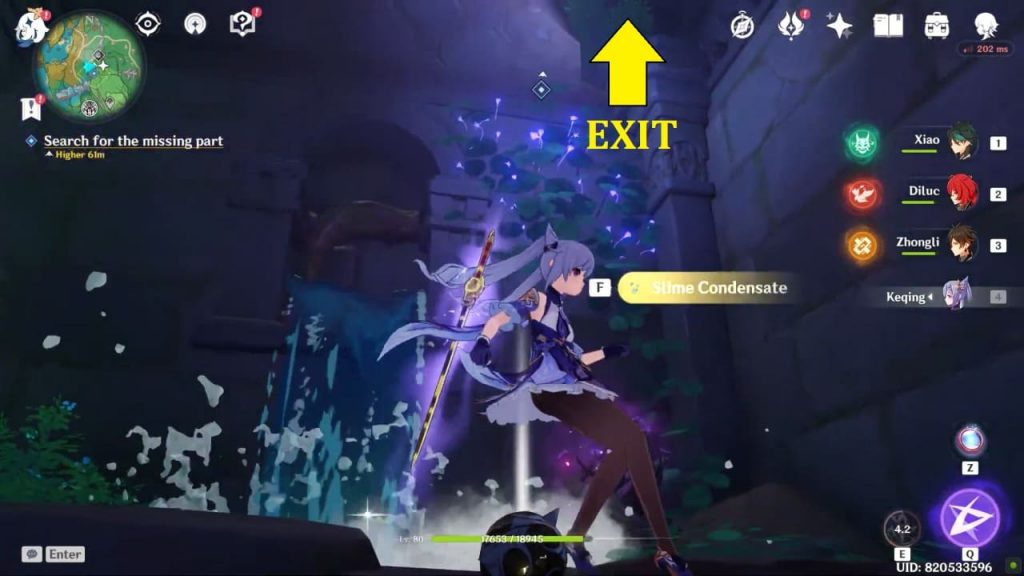
Once inside, start the mechanism which will make the water level drop. You can now proceed further down. You’ll come up against three Ruin Destroyers, so bash them up. After the fight, the chest appeared close to yet another hole. When you drop down, you’ll be ambushed by some hydro slimes and a seelie. Follow the seelie along the tunnel, fighting off another gang of hydro slimes until you find “Serpent’s Head: Rock Pillar Warding Stone.” near a waterfall.
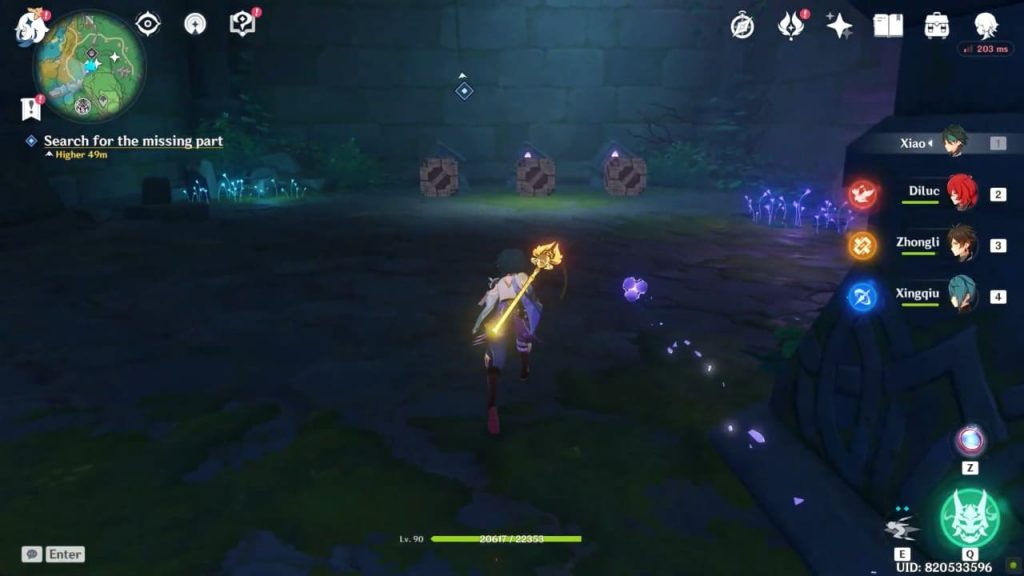
Activate the electro monument and utilize the electrograna’s teleportation skills to track down and lead the seelie back to its court, spawning a common chest. You can now return to the ward with both the stone and the pearl in your possession. Another cinematic will play, showing the dark skies over Yashiori Island and informing you that your next stop is Jakotsu Mine.
ALSO READ:
Genshin Impact 2.0 Walkthrough
Araumi Cleansing Defilement Barrier Guide & Sacred Sakuna Cleansing Ritual
Hayashi of Tanuki in the Forest World Quest – Chinju Forest Destroy the Barrier Puzzle
Cleansing Defilement: Complete the Sacred Sakura Cleansing Ritual Puzzles
Sacrificial Offering: Destroy the Barrier Shrine Puzzle
Orobashi’s Legacy Part 3
Orobashi’s Legacy Part 4 & 5