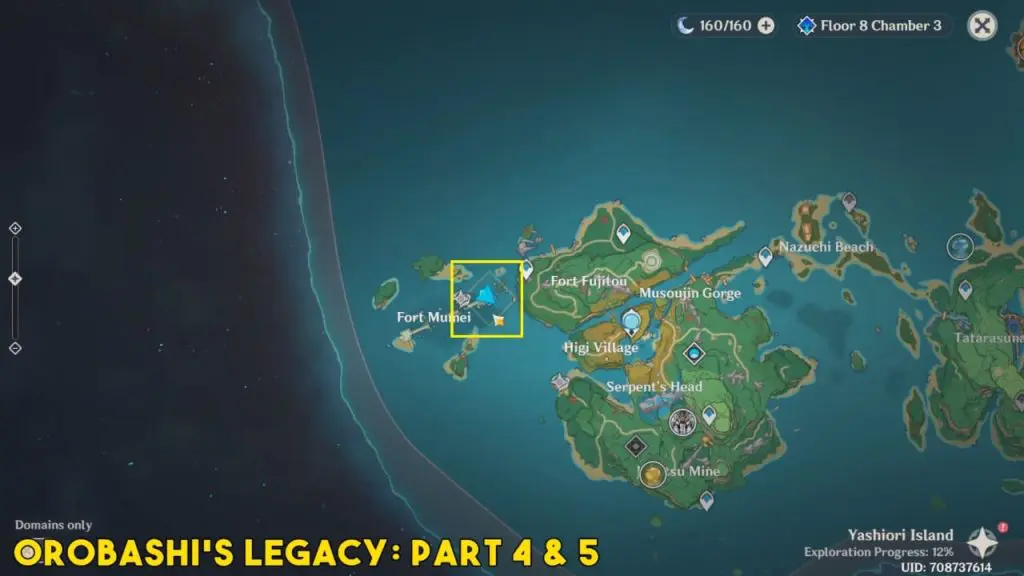
Orobashi’s Legacy is a World Quest in Inazuma. It is split into five parts. This is a tutorial to complete Orobashi’s Legacy Part 4 & 5. Orobashi’s Legacy Part 4 world quest automatically starts after you have completed Orobashi’s Legacy Part 3. Your first objective is to ‘Go Back and Report to Kaji’.
Go Back and Report to Kaji
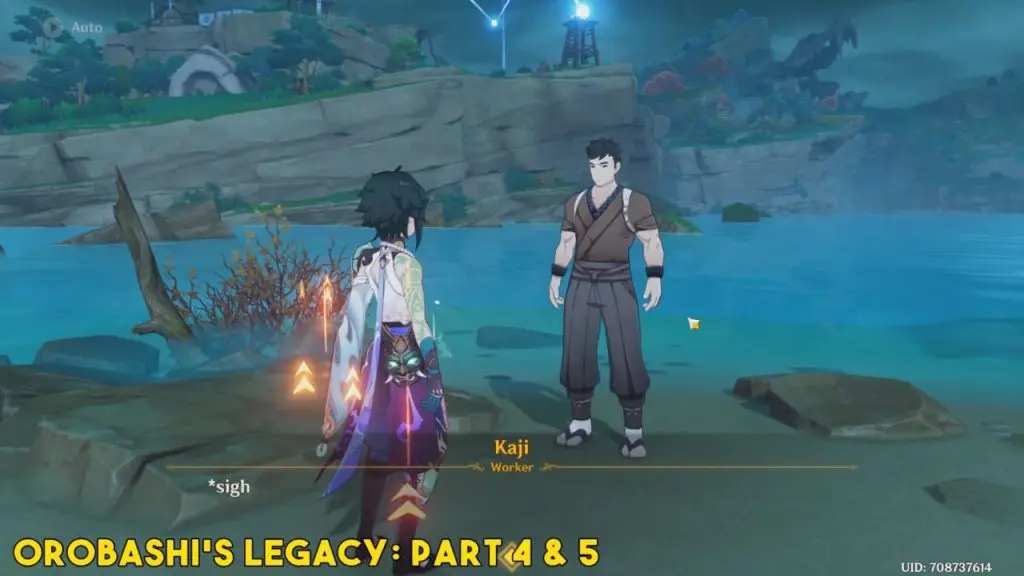
Return to Kaji and report on the result of the repairs you made to the ward. Kaji will be hanging out near Fort Mumei. Kaji will inform you that rains have stopped, clouds are cleared and the air is refreshing up. But his investigation is still not finished yet as Fort Mumei has risen up from the sea.
Note: Part IV of the quest basically tasks you with talking to Kaji again. Kaji is near Fort Mumei.
Orobashi’s Legacy Part 5
Here’s our Genshin Impact guide to help you finish Orobashi’s Legacy Part 5, complete the puzzle in Fort Mumei, and obtain the Kitain Cross Spear.
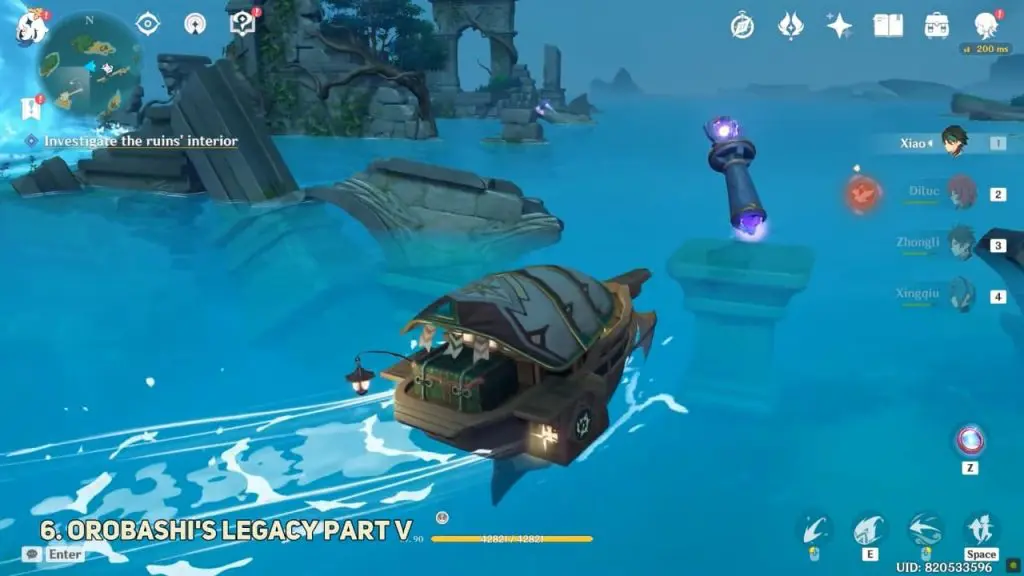
Investigate the ruin’s interior
Pillars puzzle for this one is pretty simple and similar to the previous Orobashi’s Legacy World Quest. You just have to make the bolt go around the fort in a circle before the final pillar reflects it into the center.
Here to search for missing parts you must use Elementary Sight to look around. While you approach Fort Mumei, it will eventually show you a place with a purple/whitish ball encircled by a dome.
How to solve Orobashi’s Legacy I Puzzle
The puzzle involves making use of mechanisms called Sacred Stone Mounds and Thunderbearer Mirrors. When a Sacred Stone Mound is attacked, it can fire an electric current in a specific direction. Thunderbearer Mirrors can receive the current fire by a Sacred Stone Mound and fire it back in a different direction.

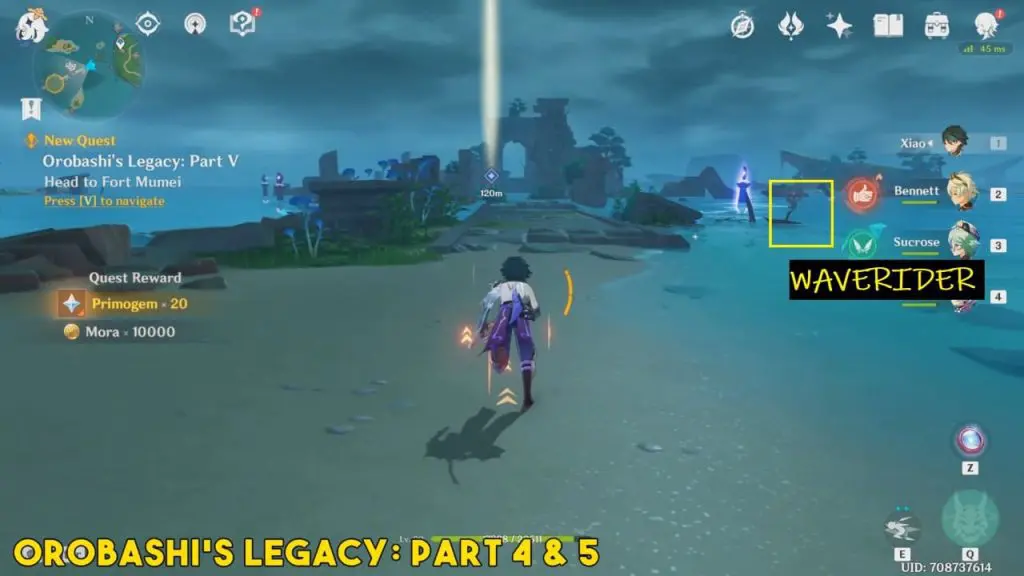
All the Mound and Mirrors are somewhat submerged in water. You can summon a Waverider from the Waverider waypoint which is nearby only. It’s better to sail your Waverider from time to time than swimming and losing stamina.
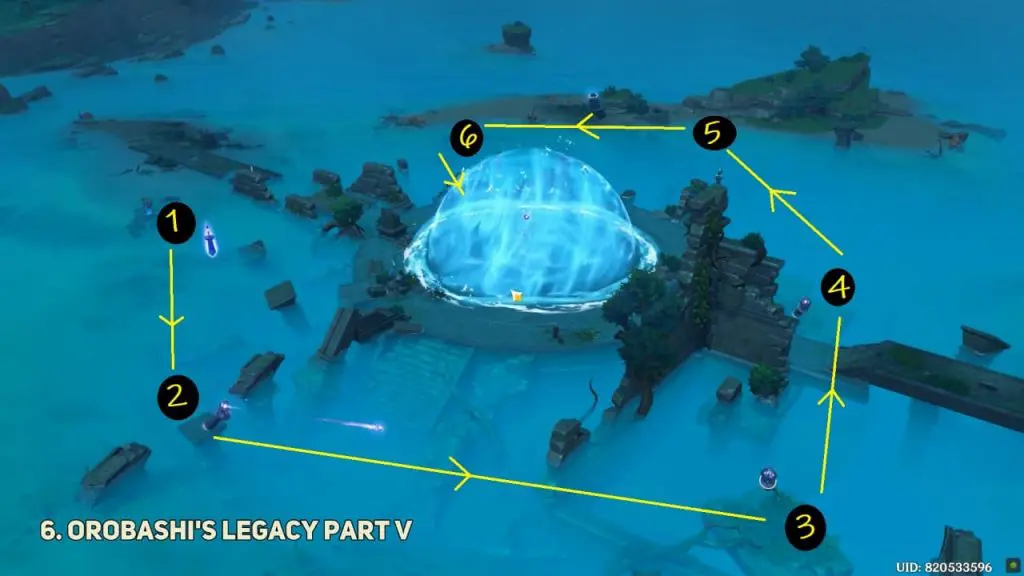
To avoid moving randomly you can start counter-clockwise. Starting with the Mound nearby fallen pillar. When you approach close to each of the pillars, you can change their orientation (which direction they face) and elevation (up or down). Keep going around Fort Mumei until you reach the last pillar and direction it toward the dome.
In the below image Sacred Stone Mound is marked 1, it needs to orient toward the marked 2 location which is Thunderbearer Mirrors. Thunderbearer Mirrors-2 needs to be oriented toward Thunderbearer Mirrors-3. Similarly, Thunderbearer Mirrors-3 needs to rotate toward Thunderbearer Mirrors-4 and finally, Thunderbearer Mirrors-5 needs to be set toward the circular dome.
Once you successfully change the pillar’s orientation and elevation as shown in the below image you are ready to destroy the center dome. Now head back to “Sacred Stone Mound” which is marked as 1 and launch an attack on the Sacred Stone Mound to fire an electric current that can receive by Thunderbearer Mirrors and direct to the central dome.
Repair the Ward
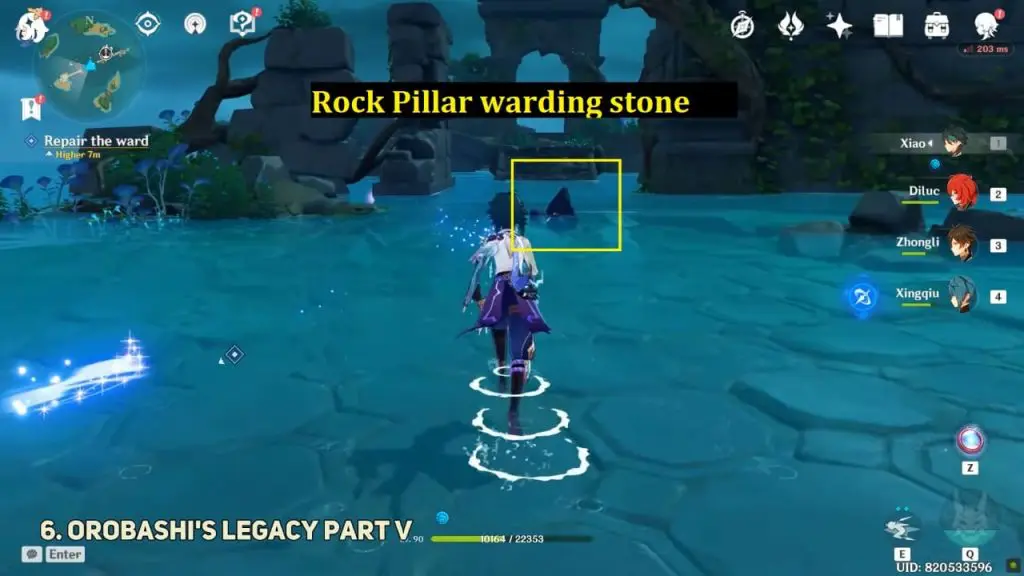
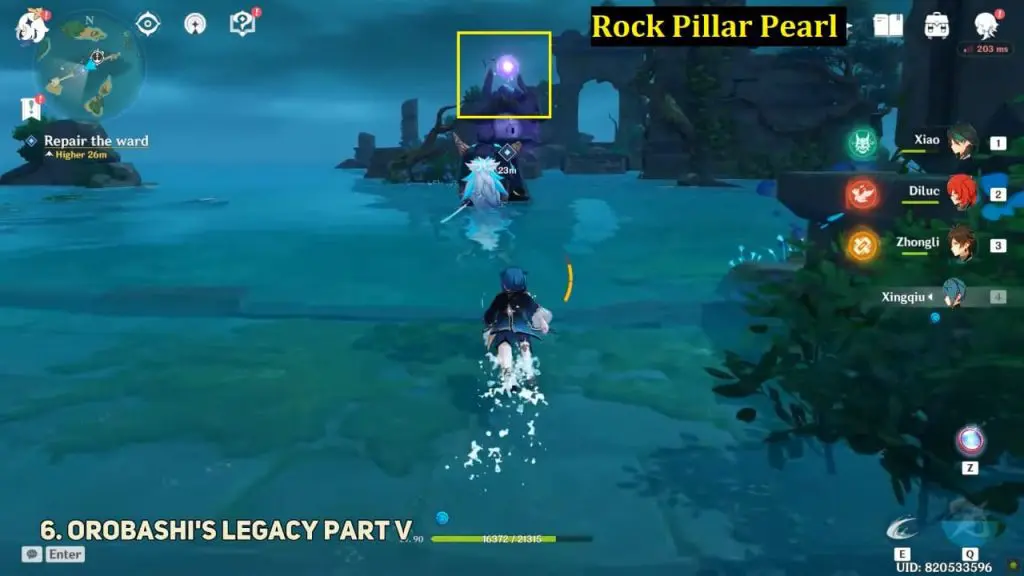
The Fort Mumei: Rock Pillar Pearl is right above the ward but you’ll have to fight the Maguu Kenki to get it. Use an elemental sight to locate the Fort Mumei: Rock Pillar Warding Stone, which should be just on the edge of the arena floating on the water.
Return to the ward and deliver the two newly acquired components. As you submit it to repair the ward. Go back and speak to Kaji to receive your quest reward, which includes the blueprint for the new craftable polearm: Kitain Cross Spear!
ALSO READ
Araumi Cleansing Defilement Barrier Guide & Sacred Sakuna Cleansing Ritual
Hayashi of Tanuki in the Forest World Quest – Chinju Forest Destroy the Barrier Puzzle
Cleansing Defilement: Complete the Sacred Sakura Cleansing Ritual Puzzles
Sacrificial Offering: Destroy the Barrier Shrine Puzzle
Orobashi’s Legacy Part 1
Orobashi’s Legacy Part 2
Orobashi’s Legacy Part 3