This guide shows how to complete the ‘Thrill Seeker’ Mission in Five Nights at Freddy’s Security Breach, which released on 16th December 2021. To be able to do this quest, you will need to complete the ‘Monty Golf‘ mission first.
Also Read: FNAF Security Breach Complete Walkthrough
Find out how to decommission Monty
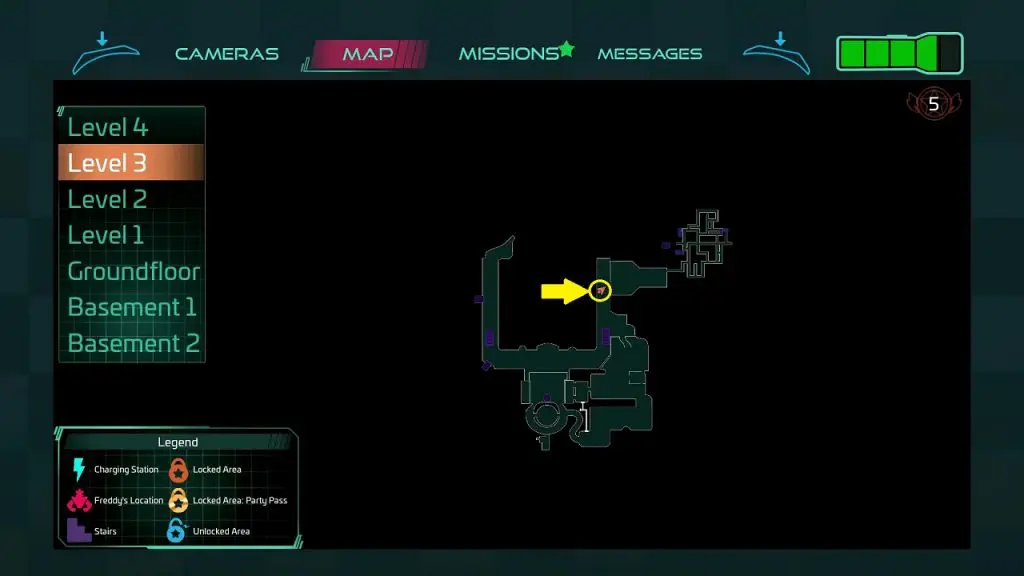
Before starting this objective, you need to get Faz Camera and Mazercise Ticket from Monty’s Gator Golf. Then go to the Main Stage and take the escalators to reach Mazercise on the third floor as shown in the pictures below.

Enter Mazercise. Then go through the door on the left side to reach the backside of the Mazercise. Then turn right and enter the room as shown in the picture below.

Inside this room, you will see some buttons on the wall as shown in the picture below. Interact with the buttons for the objective to update.

Find Mazercise control key in the Daycare Theater
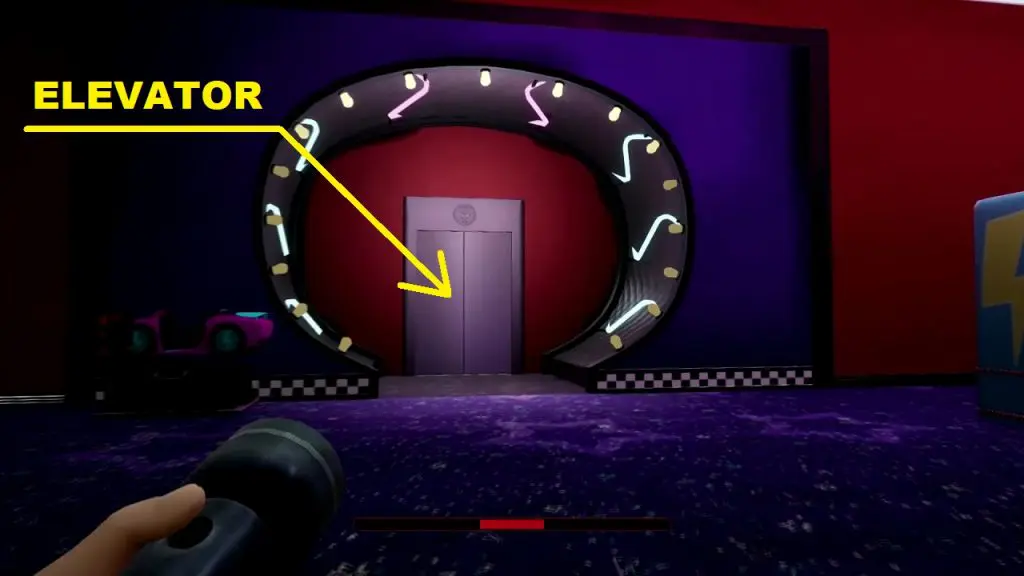
Get out of the Mazercise to reach the Main Stage Area. Take escalators to go down to the first floor. Then enter the elevator as shown in the picture below.
Take the elevator to reach the Daycare Level. Exit the elevator, then turn left and enter the Daycare (Marked as 1 in the map below). The map below also marks other spots through which you will pass to reach the Daycare theater.
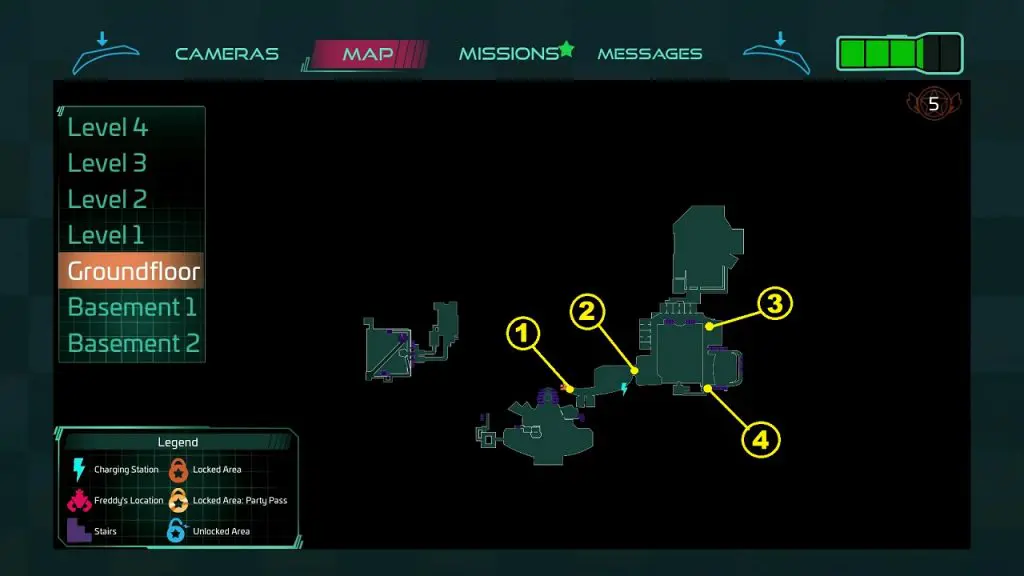
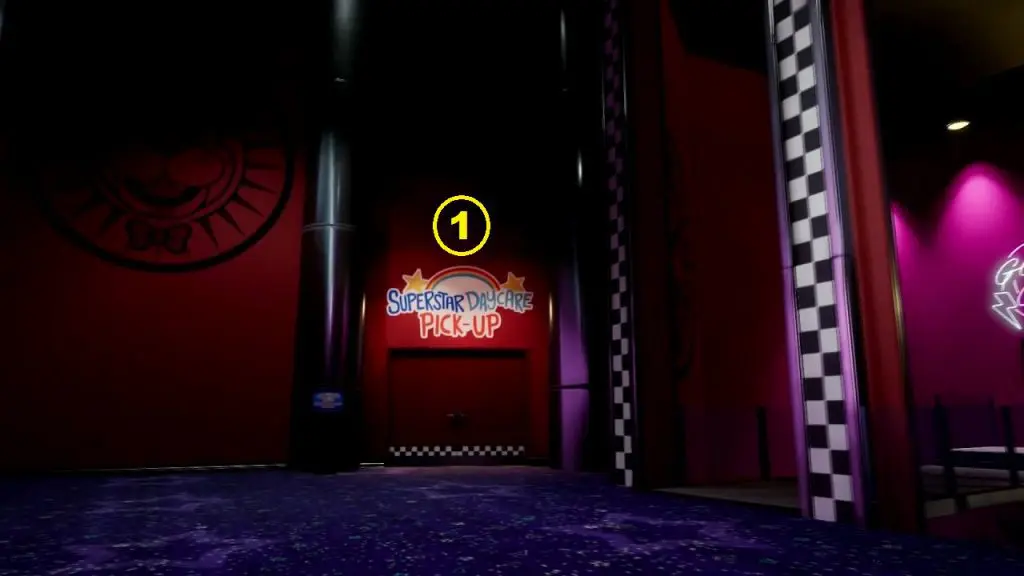
After entering the daycare, go straight and enter Superstar Daycare Pick-up (Marked as 2 on the map posted before).
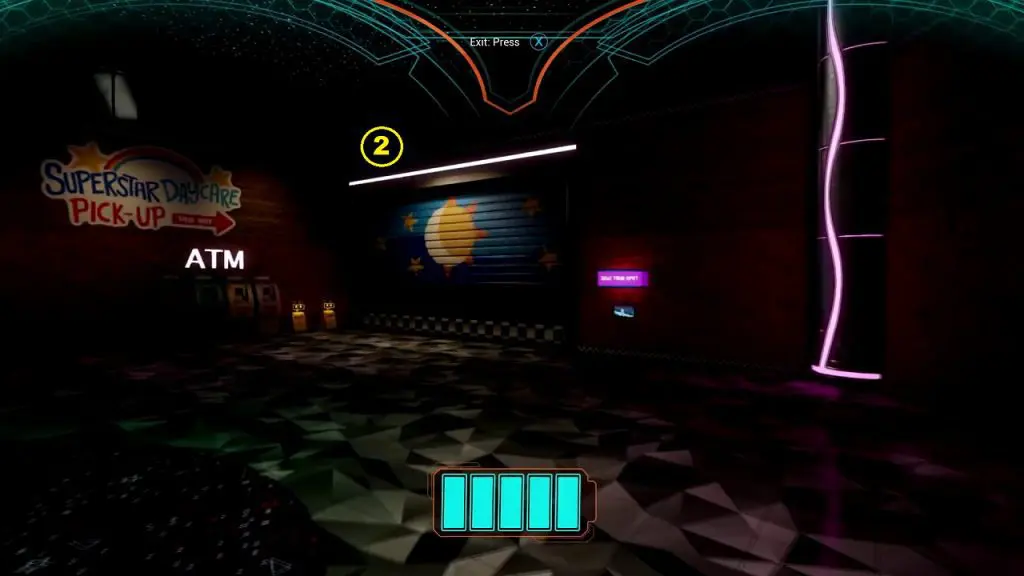
Then turn left and go to the spot marked as 3 on the map posted before. Spot 3 is the entrance to the Daycare Theater as shown in the picture below.
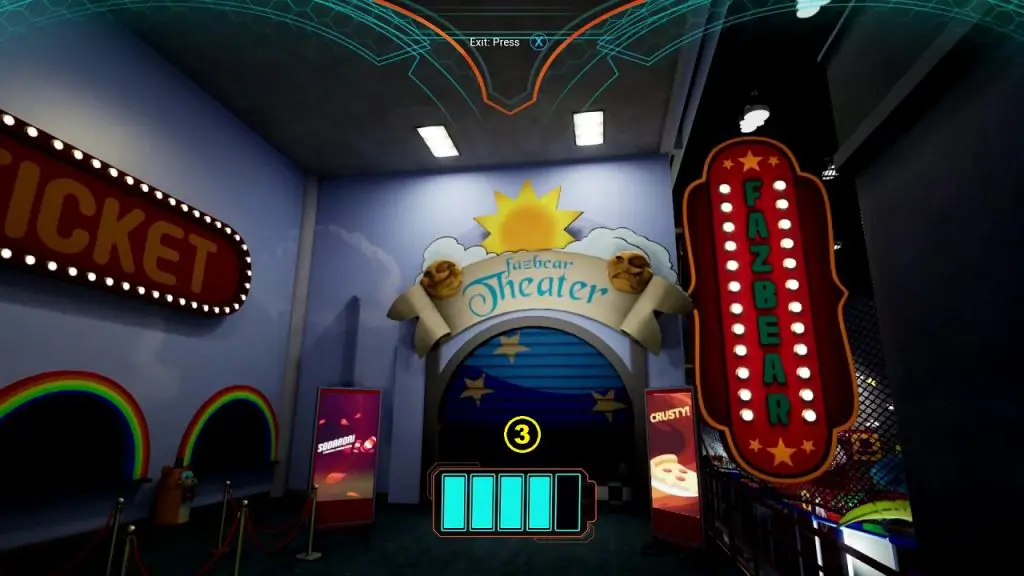
After entering the theater, go straight till the end (marked as 4 on the map posted before). Go down the stairs at Spot 4. Then turn right and go down the stairs at the location shown in the picture below.
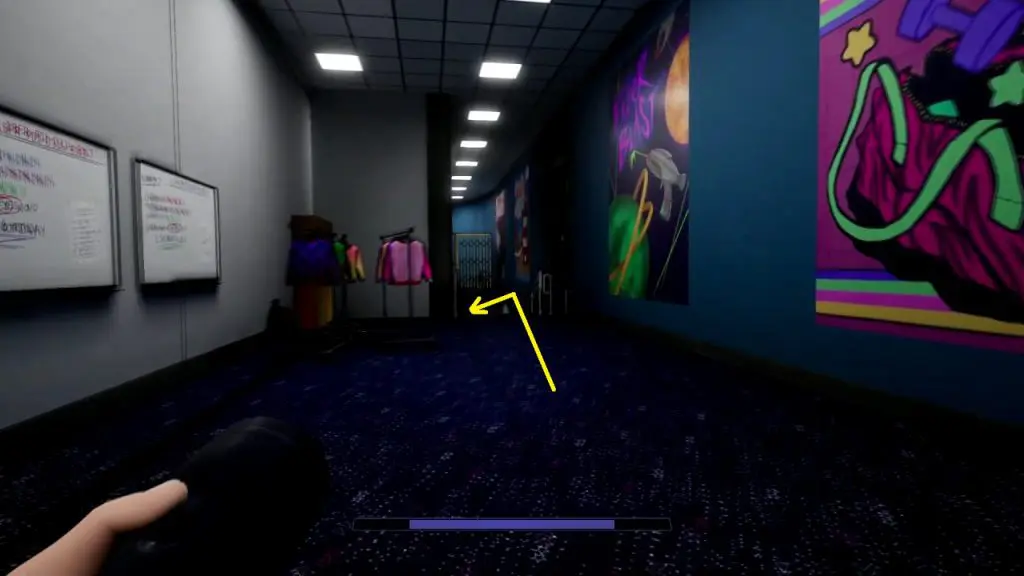
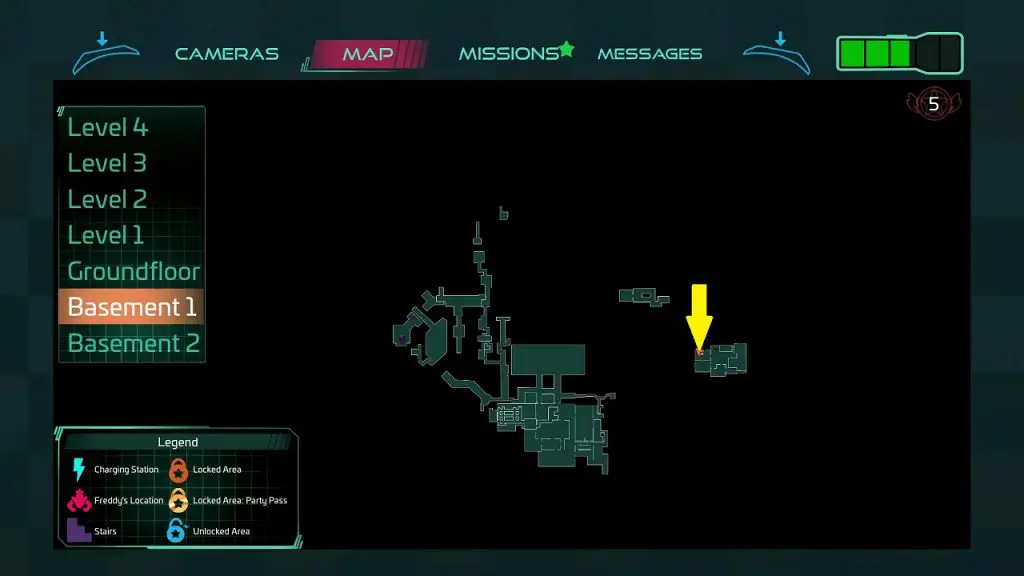
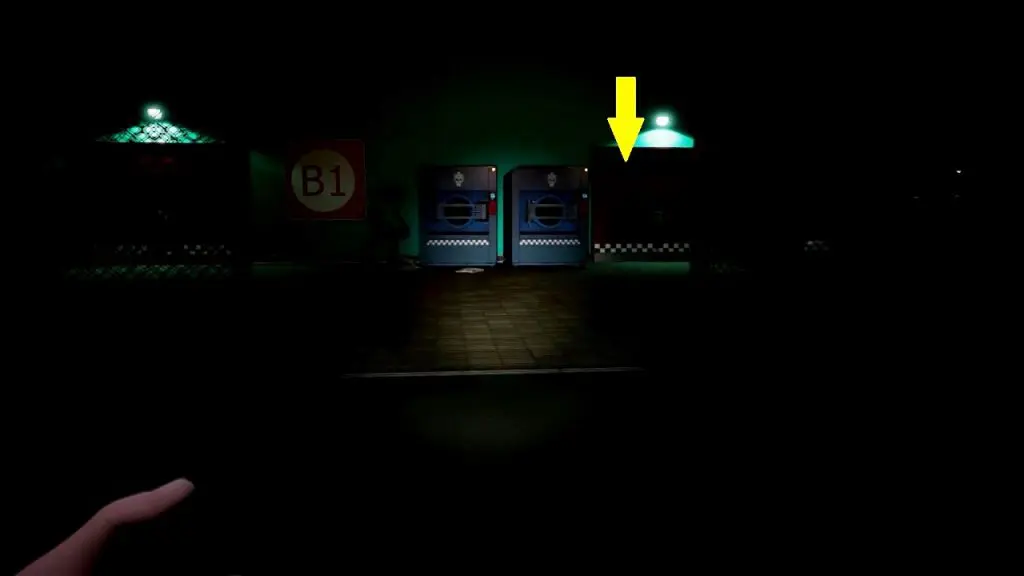
Keep doing down the stairs until you reach basement 1. In Basement 1, enter the room on the northwest side as shown in the picture below.
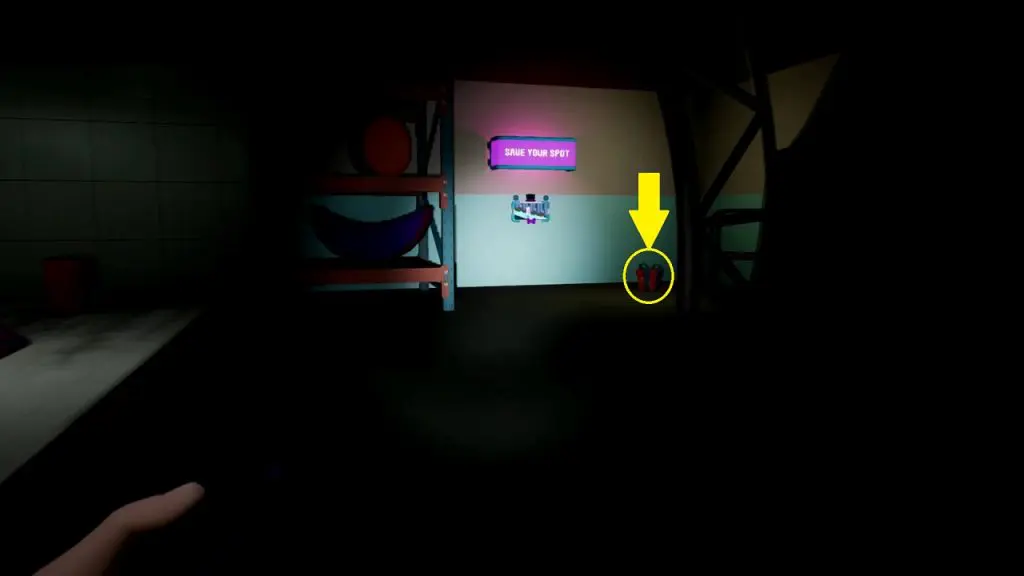
Inside the room shown above, you will find the Mazercise Control Key inside a gift package near the save point as shown in the picture below.
Picking up the key will activate the Animatronics in the area. Now trace your steps back to the Mazercise. In the path, you will be attacked by Animatronics. Use the Faz Camera to pause the Animatronics for a while.
Use Mazercise controls to move the walls and access the vent
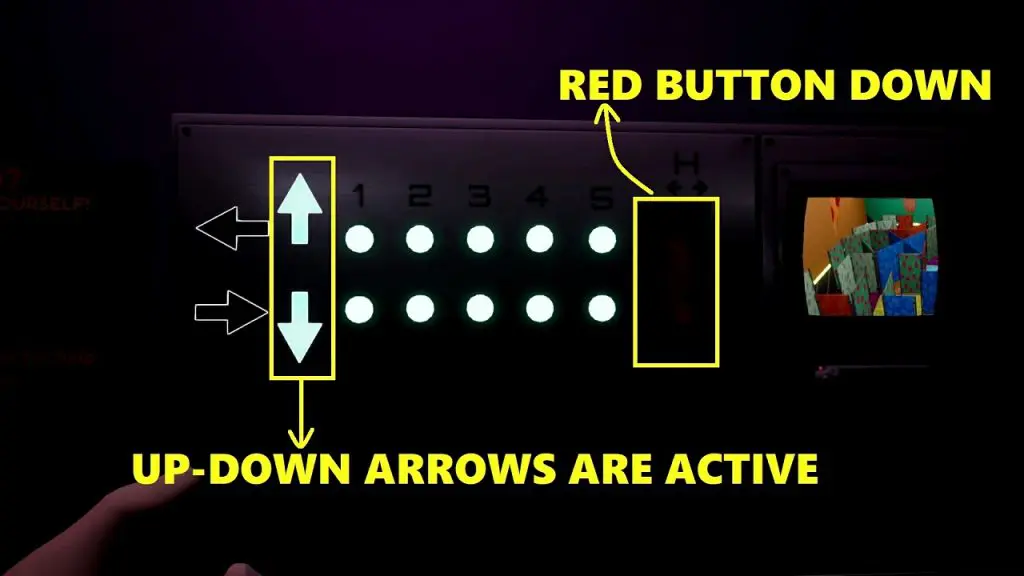
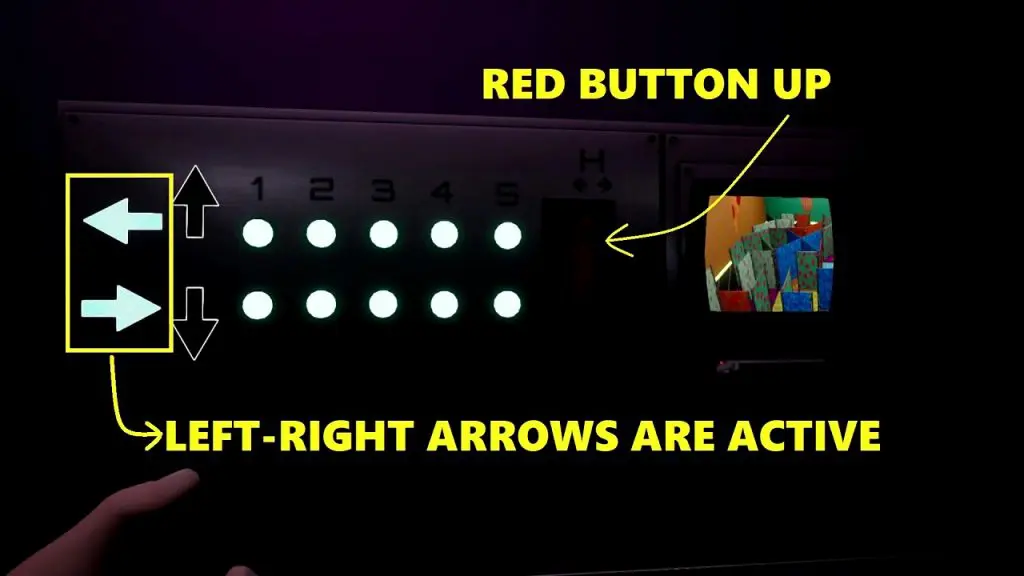
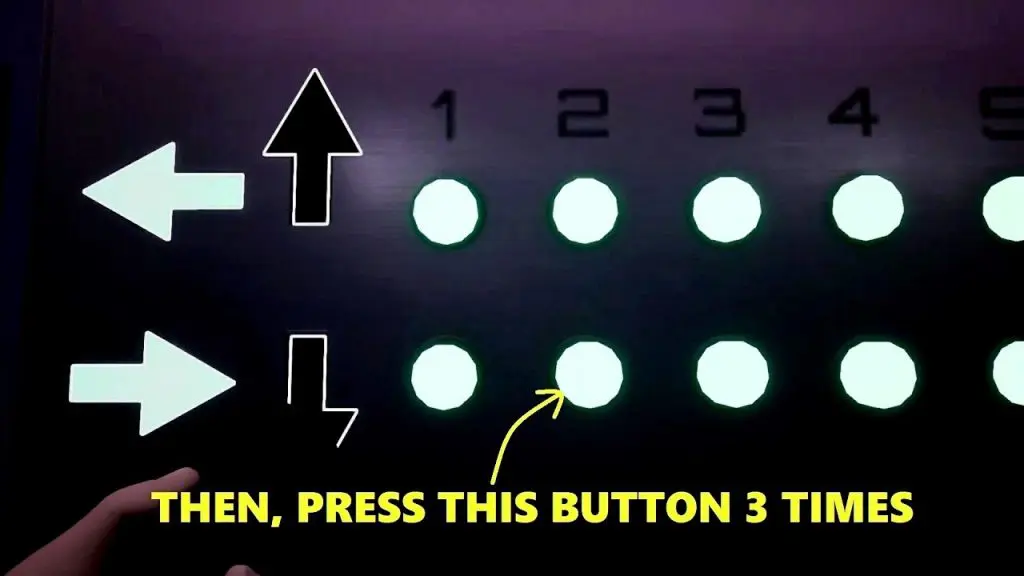
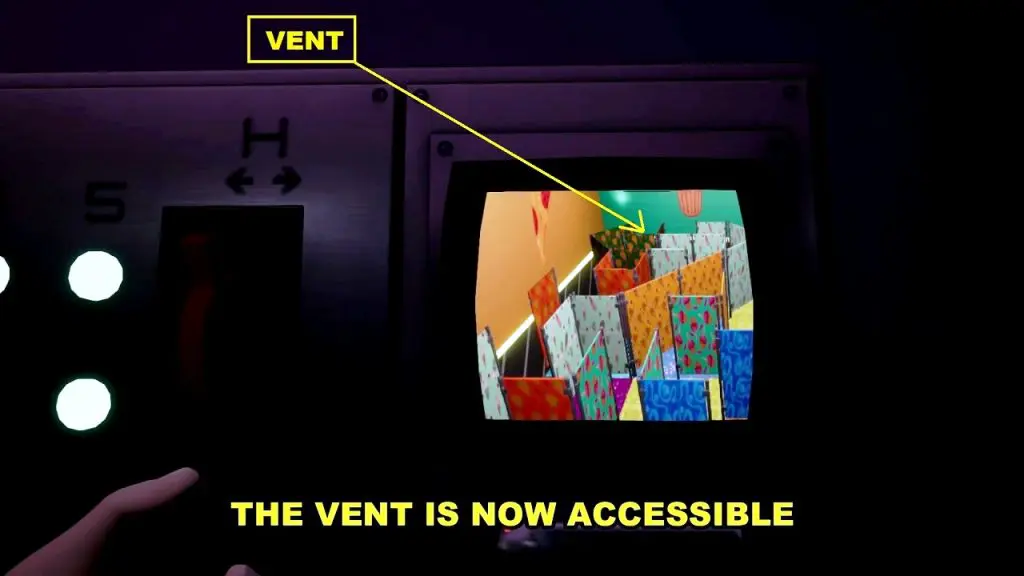
When you have reached Mazercise, go to the room with the controls on the wall. In this panel, when the red lever is down, then Up-Down arrows will be active as shown below. When the red lever is up, then Left-Right arrows will be active as shown below. With this in mind, you need to press the buttons such that the path to the vent becomes clear by moving the wooden walls. The screen on the right side of the panel shows the position of the movable walls blocking the path to the vent. Below I will stepwise explain how to clear the path to reach the vent.
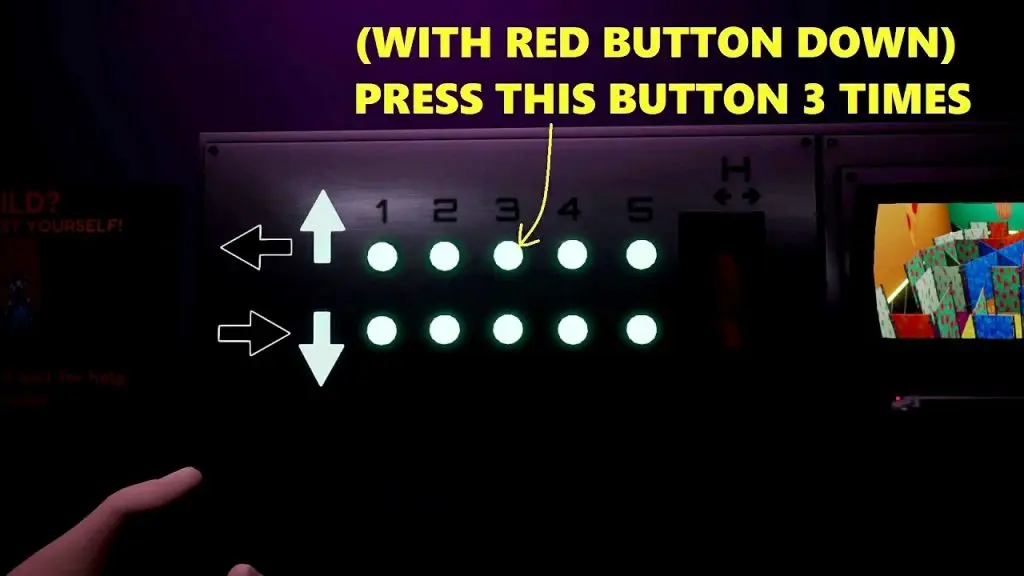
Step 1: Turn the red lever down and press the button shown below 3 times.
Step 2: Turn the red lever up and press the button shown below 1 time.

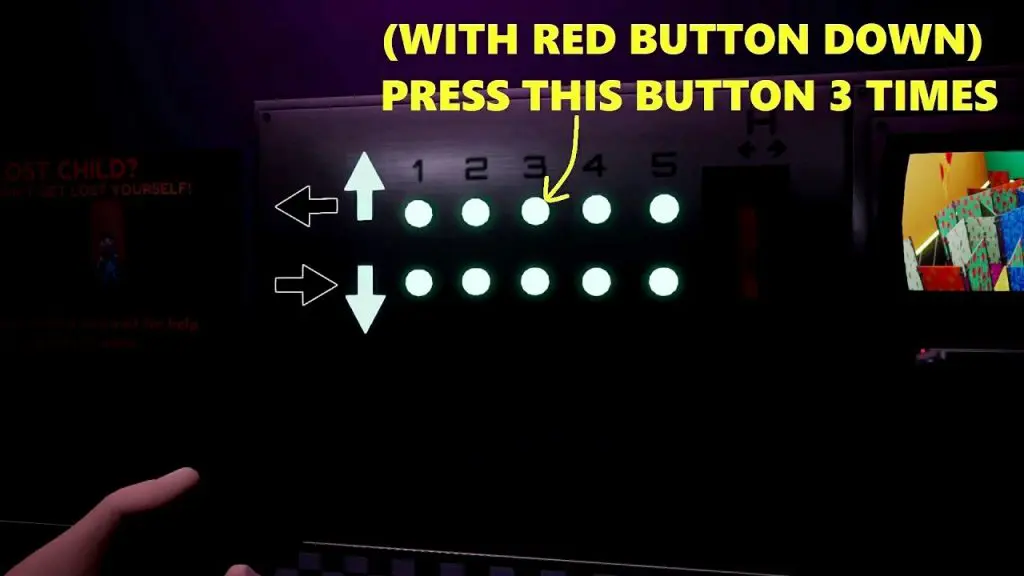
Step 3: Turn the red lever down and press the button shown below 3 times.
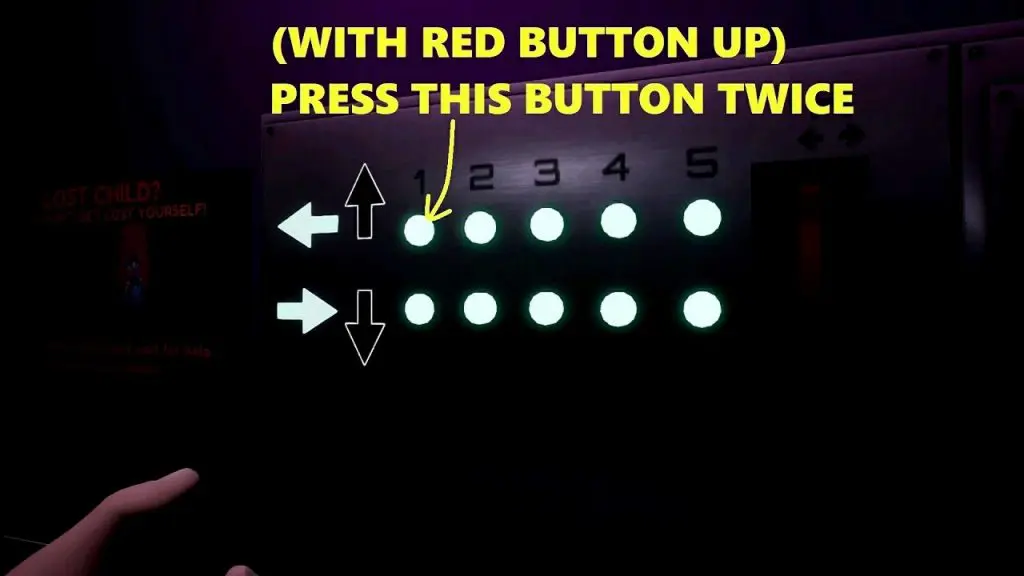
Step 4: Turn the red lever up and press the button shown below 2 times.
Step 5: With the red lever up, press the button shown below 3 times.
Now you can see on the screen that the path to the vent is clear.
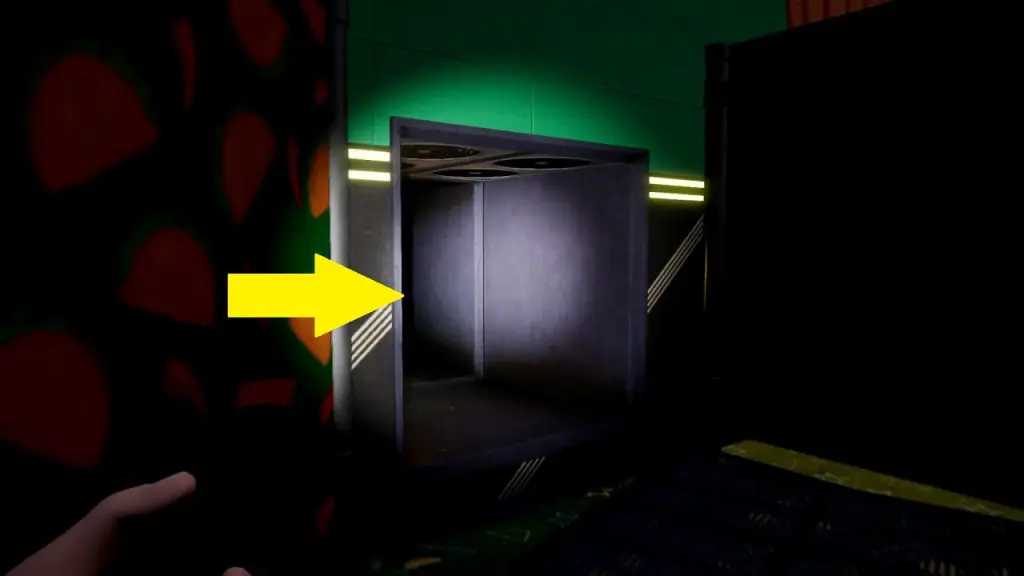
With the path to the vent clear, come out from the room and enter the room on the right side as shown below. Go through the maze to reach the vent as shown in the second picture below. Enter the vent and come out from the other side.

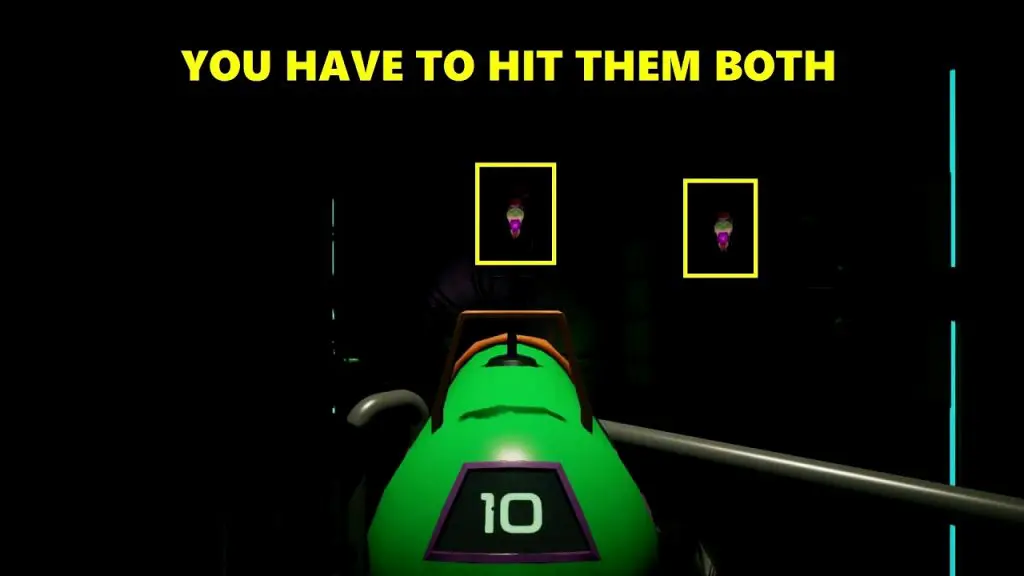
After coming out from the vent, take control of the cannon there. Then hit the two targets on the right side as shown in the picture below. This will start the “Monty’s Claw” mission.
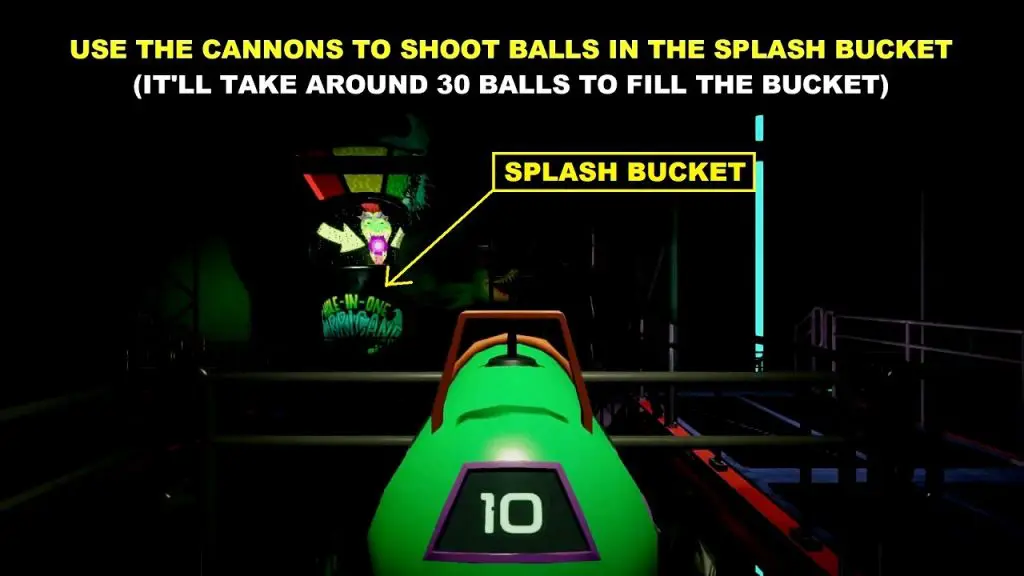
Monty’s Claw: Fill Splash Bucket
As the mission starts, jump down to the platform below. Here you will be attacked by Monty. Now take control of cannons in the area and will the Splash Bucket as shown in the picture below. It will take around 30 balls to fill the bucket.
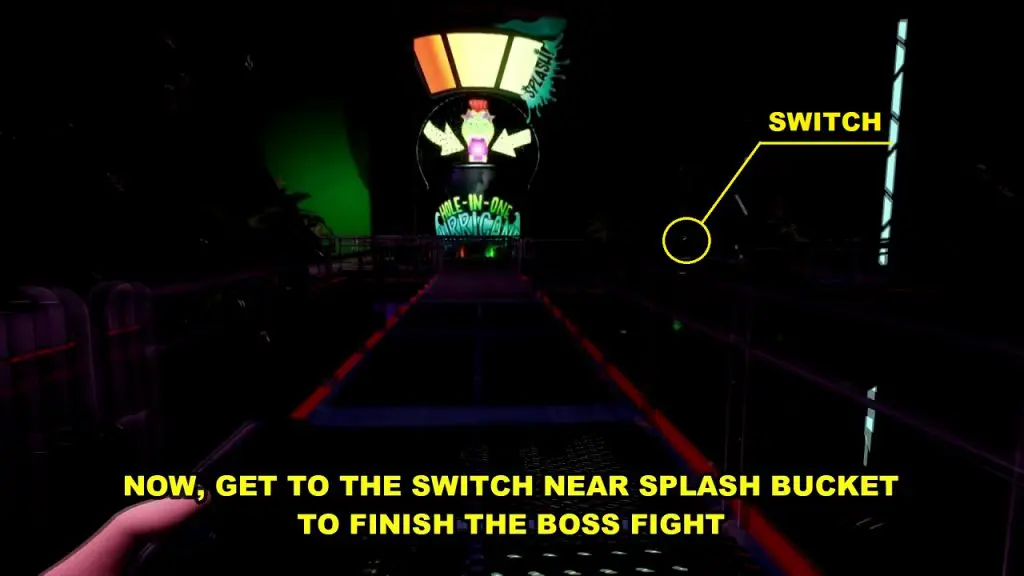
Monty’s Claw: Dump Splash Bucket & Collect Monty’s Claws
Once the bucket is full, get to the switch on the right side of the bucket as shown in the picture below. Press the switch to dump the bucket on Monty. Now collect Monty’s Claws from his body.
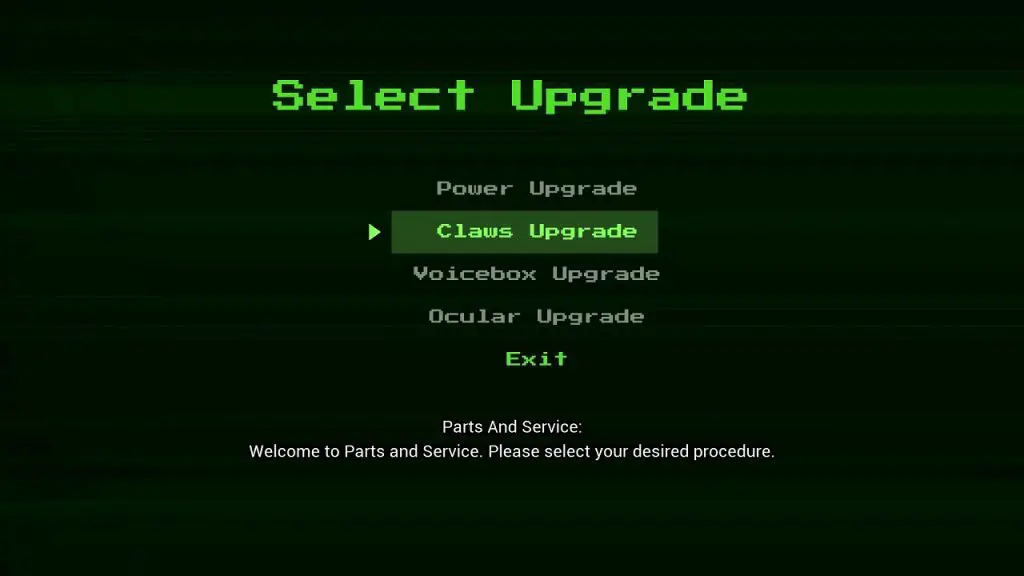
Upgrade Freddy in Parts and Service
After collecting Monty’s Claw, enter the vent in front of the body. Crawl through the vent to reach the kitchen on the ground floor. From there make your way to the main stage on Level 1. Push the button on the main stage and it will take you down to Basement-2. Enter the door with the B2 sign and sprint towards the two red doors. This will lead you to Parts and Services.


Use the computer in the middle of the room and select “Claw upgrade”. Head inside the protective cylinder room and match the color pattern correctly. Now come out of the protective room and select the “Finish Upgrade” option on the computer. This will complete the mission.