miHoyo has finally released Genshin Impact 2.0 update on 21st July 2021. Update 2.0 Introduces a new Japanese-themed region, Inazuma, which the developers have been teasing for a long time now. Inazuma is the third of the seven regions of Genshin Impact relevant for main storyline progression. The update brings new Archon quests (Main Story Questline) and several world quests. In version 2.0, three areas, Narukami Island, Kannazuka, and Yashiori Island.
Genshin Impact: A Strange Story in Konda
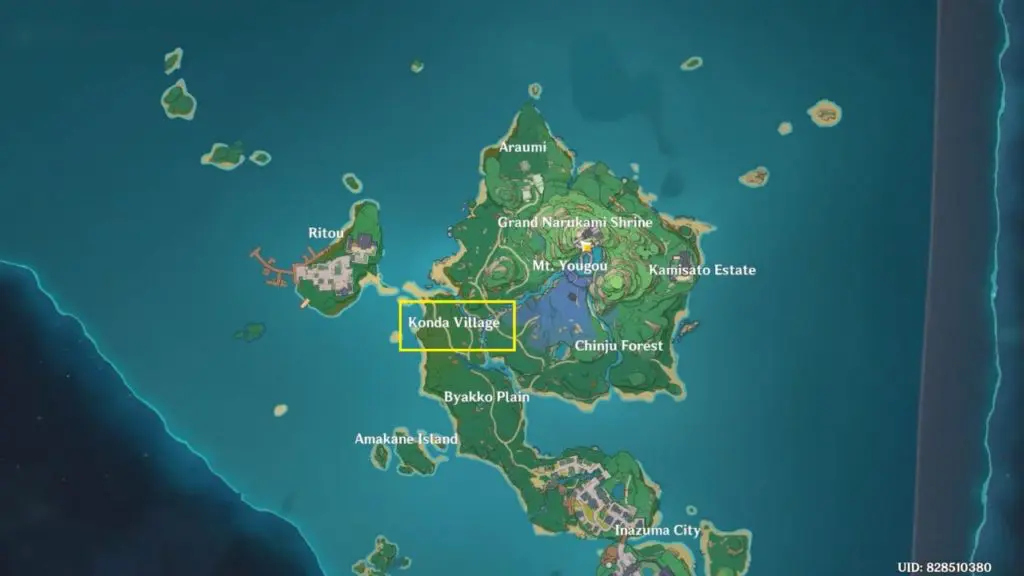
A Strange Story in Konda is an upcoming World Quest on the island of Inazuma. The tutorial explains how to obtain the quest and where to begin A Strange Story in Konda. To receive the ‘A Strange Story in Konda‘ World Quest, you must first speak with the initial NPC. Go to the Sky Kitsune Statue and speak with the Shrine Maiden (Kazari). The Sky Kitsune Statue (Fox Statue) is located between Ritou and Konda Village on the island of Inazuma.
Use the Power of Electro on the Sky Kitsune Statue
Shrine Maiden (Kazari) will instruct you to use the power of Electro to strike the Fox statue. You can strike the statue with Keqing, Razor, or any other electro character.

Go to Konda Village
After striking the statue with electro power, you can take the item from the Statue and head to Konda village to finish the World Quest – A Strange Story in Konda. Konda village is located south of the fox statue on the island of Inazuma.
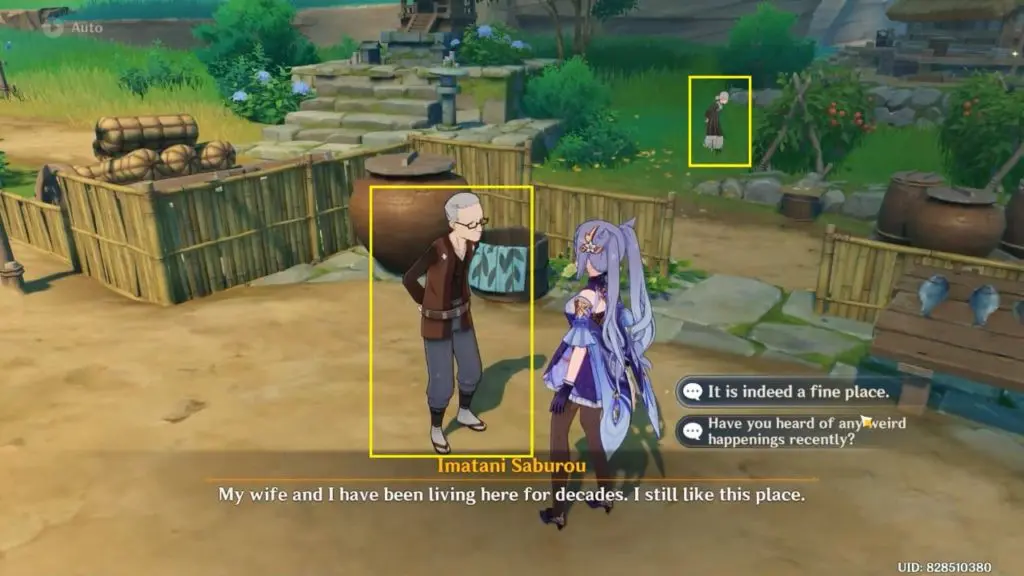
Ask the local for information
Within the Quest Area, speak with the local people in Konda. Speak with Saimon Eri (Ols lady) near the Tomato Plants to obtain some insights into what’s going on in the village.
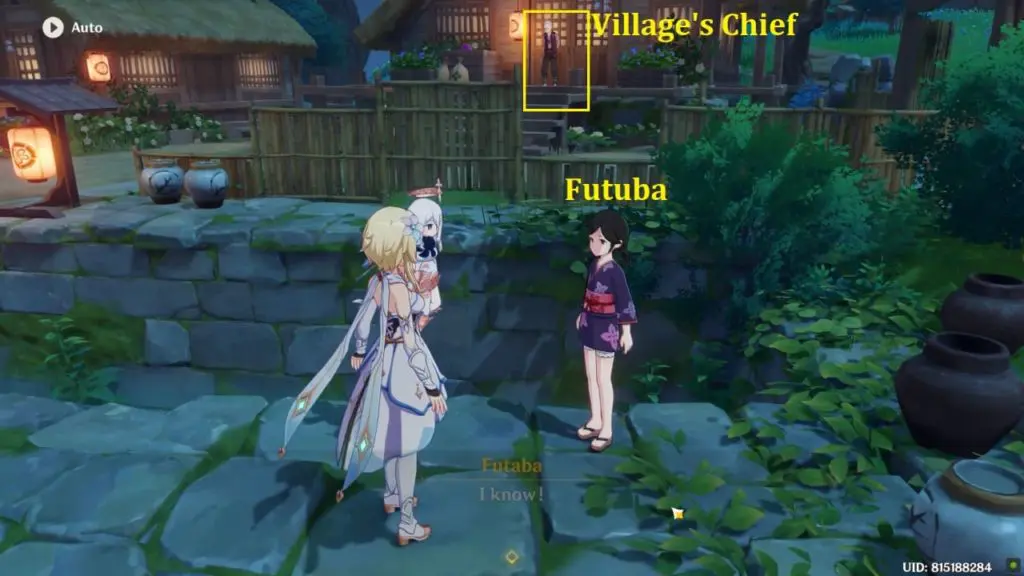
Ask the Konda Village Chief for information
The Village Chief’s house is the second house on the right side of the village entrance. He will not be willing to divulge any information about weird occurrences within the village.
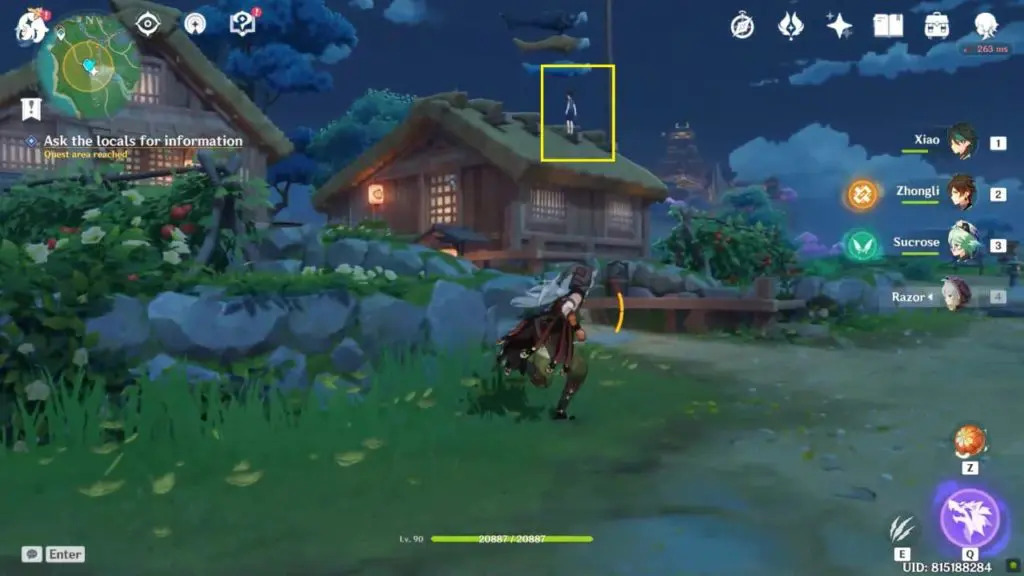
Futuba: Talk to the village chief’s daughter, who is standing in front of the chief’s house. She will request that you speak with Takeru “Village Chief’s” grandson.
Takeru can be seen on the roof of a cottage with three fish flags. The little boy will tell about the strange spooky ghost. When you speak with each person, three markers will appear on the map.
Look for clues (0/3)
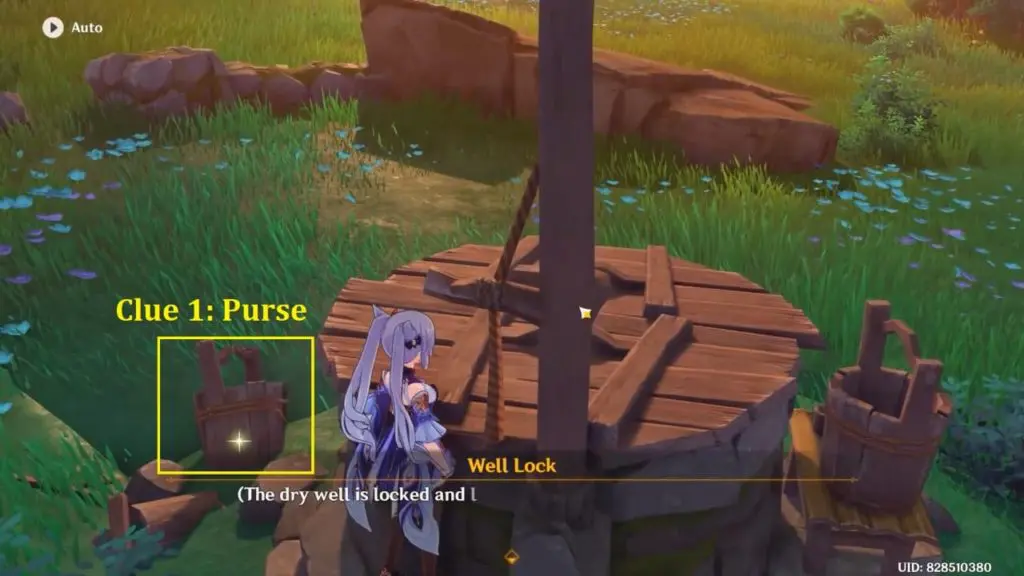
Clues 1/3: Purse by the Dried-Up Well
Proceed to the westernmost marker, which is located beside the village chief’s house. You will come upon a dry well that has been locked and requires a key to unlock. Investigate the area around the well to locate Clue 1 – Purse by the Dried-Up Well.
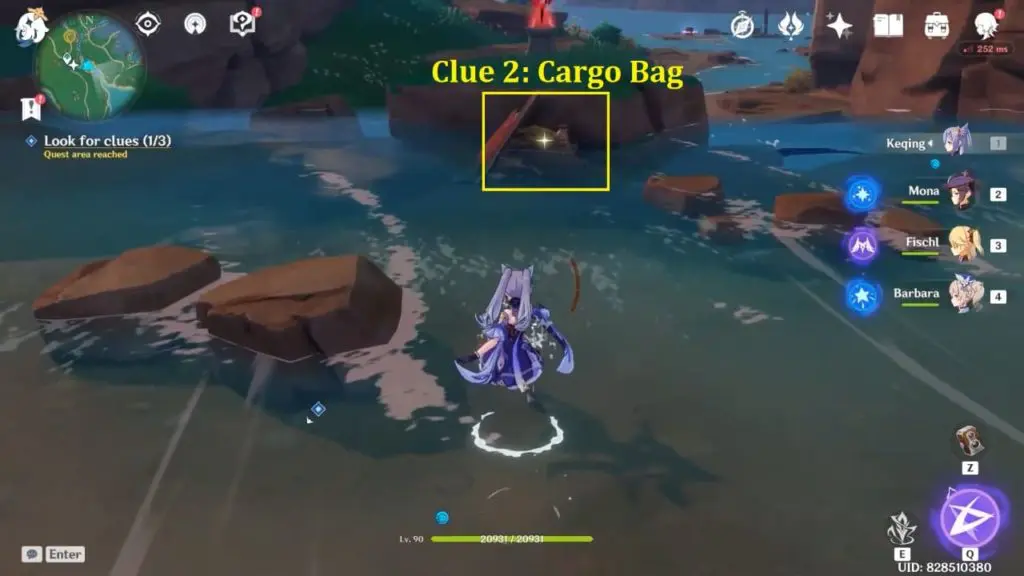
Clues 2/3: Cargo Bag Fished Out From Water
It is a bag of cargo that you will find in the water while following the gully.
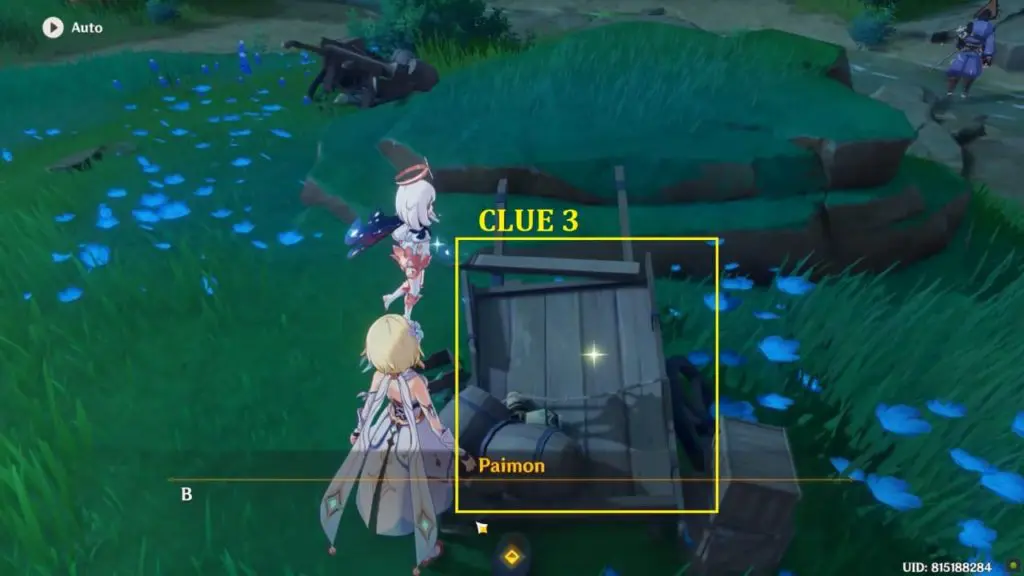
Clues 3/3: Ragged List of Goods
Clear all the enemies around carts. Check all carts to find Ragged List of Goods
Cut a deal with the Village Chief
Once you have found all the three items head back to the village and speak with the Village’s chief again to strike a deal. You need to give all three pieces of evidence to Village Cheif. There’s a certain order in which you’ll need to hand over these three items.
The sequence is as follows:
1) Purse by the Dried-Up Well
2) Cargo Bag Fished Out From Water
3) Ragged List of Goods
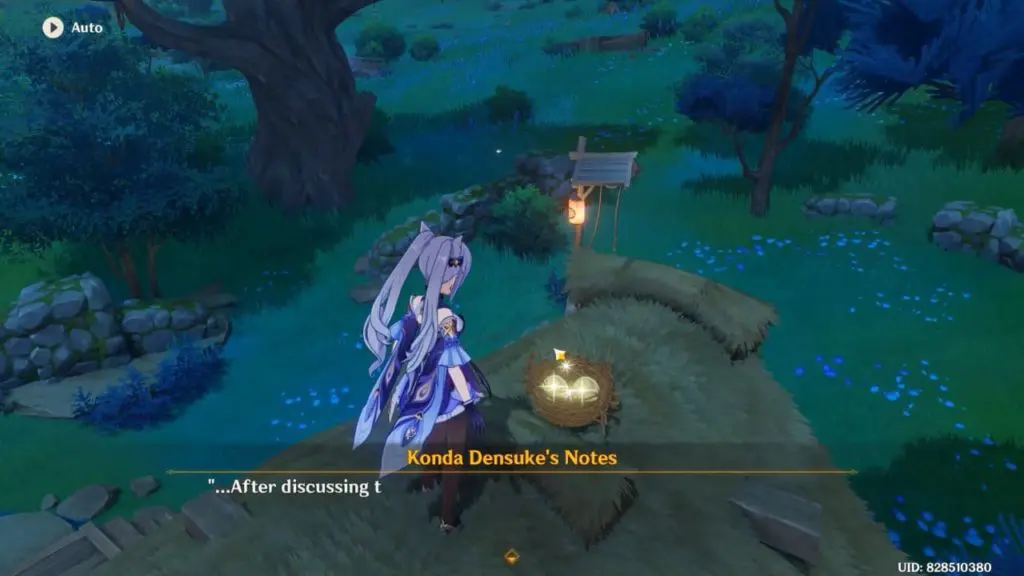
Look for Cheif’s Diary on the Rooftop
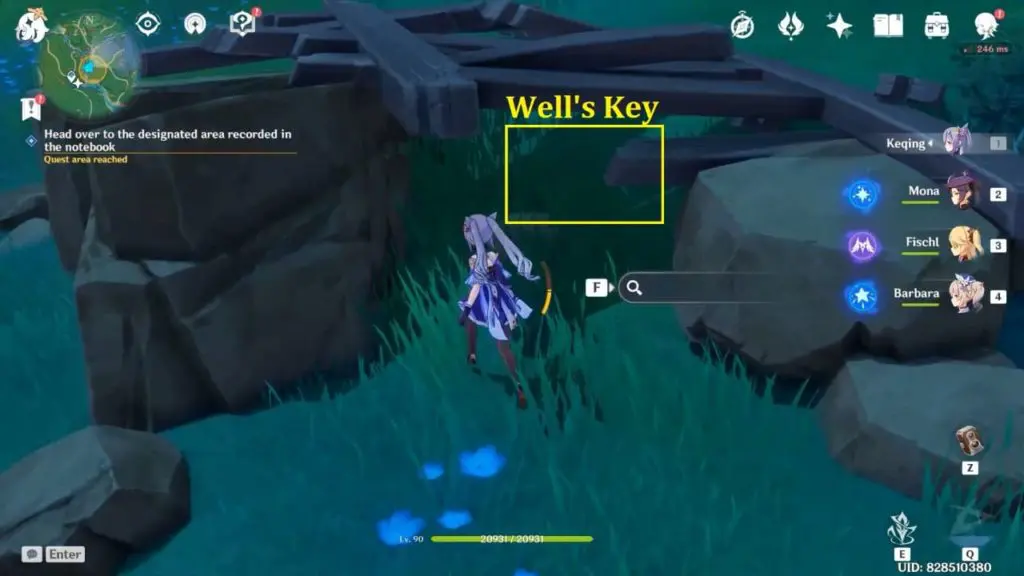
Climb to the roof of the Chief’s hut and read the diary to find out where the key is. Well’s Key is hidden in a dilapidated house on the east side of the river, across the gully.
Head over to the designated area recorded in the notebook
Go to the marked location and fight with all the enemies. Dig under the broken wood part to find the well key.
Descend into the well in Konda Village
Now head back to the village and venture down into the well behind his house to uncover lots of rewards
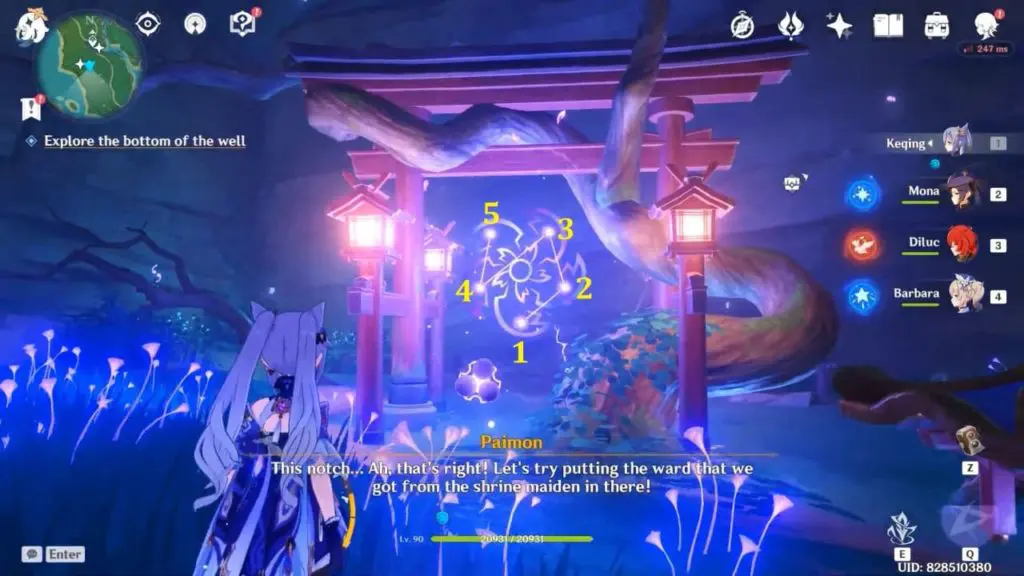
Explore the bottom of the Well
At the bottom of the well explore the area and collect different items. Use a Claymore or strong Pyro character to break through the wall.
Also Read: Genshin Impact 2.0: Inazuma Quest List & Walkthrough
Well Puzzle Sequence
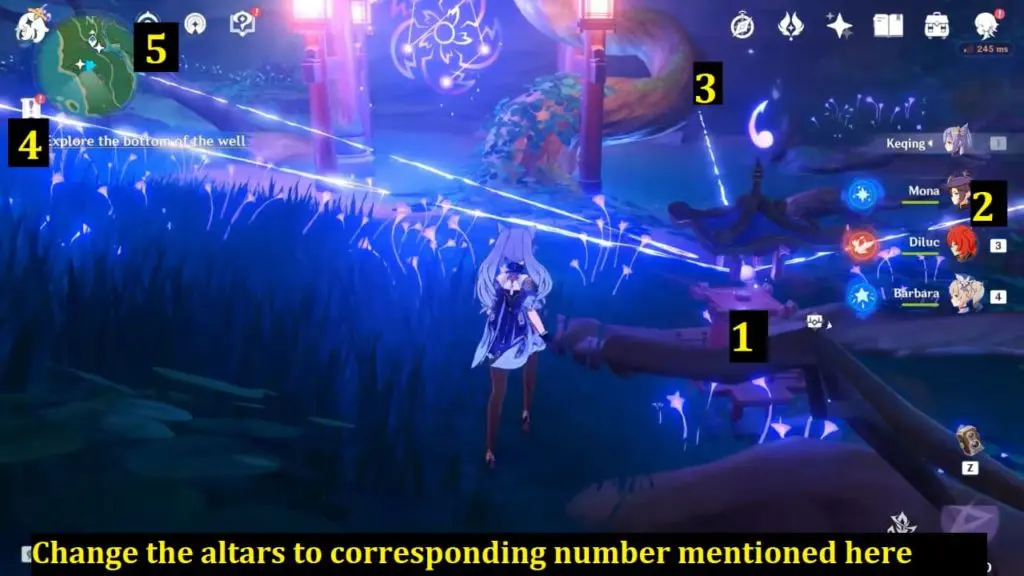
You can interact with five altars, each of which requires a number from 1 to 5. Because 1 cannot be modified, we shall begin there. Go to the altars-2 on the right from altar-1 while looking at the purple gateway pattern. The one closest to the altar-1 should already be a 2, so leave it alone. The one in the back corner should be a 3, so fix it. Return to the one and turn left. The first one on the left is supposed to be a 4, and the last one on the left is supposed to be a 5. Interact with the 1 once more to breach the seal and initiate a fight.
After defeating the opponent, summon the electromagnum near altar 2 to remove the barrier and enter the other side of the barrier to collect items from the chest.
ALSO READ
Araumi Cleansing Defilement Barrier Guide & Sacred Sakuna Cleansing Ritual
Hayashi of Tanuki in the Forest World Quest – Chinju Forest Destroy the Barrier Puzzle
Cleansing Defilement: Complete the Sacred Sakura Cleansing Ritual Puzzles
Sacrificial Offering: Destroy the Barrier Shrine Puzzle
Orobashi’s Legacy Part 1
Orobashi’s Legacy Part 2
Orobashi’s Legacy Part 3