There are a total of 8 Luxurious Chests in the Golden Apple Archipelago area of the Genshin Impact 2.8 update. This article shows the locations of all 8 luxurious chests and how to get them.
Shortcuts:
Broken Isle (1 Luxurious Chest)
Minacious Isle (4 Luxurious Chest)
Mona Domain (2 Luxurious Chest)
The Treasure of the Four Skerries Quest (1 Luxurious Chest)
#1 Broken Isle Luxurious Chest
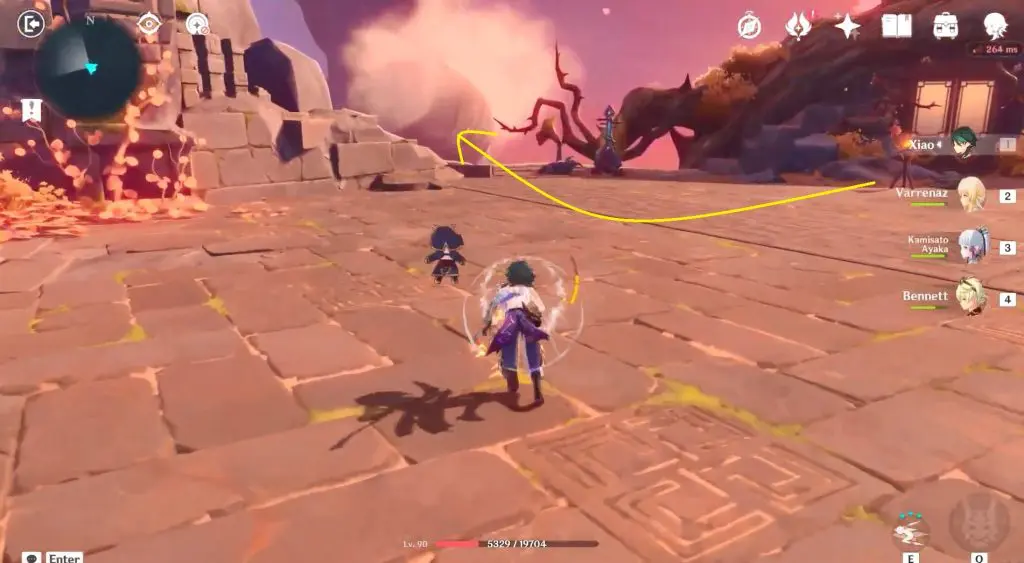
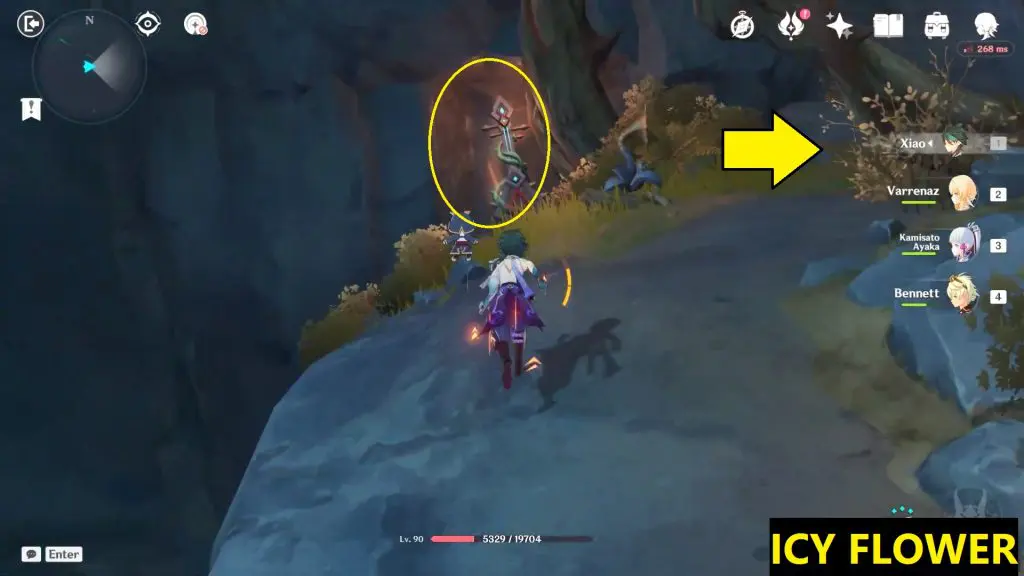
Once you finish Xinyan’s Domain, go back inside to the Frozen Soul, an Icy flower. Take this location as a reference point to start the search for Luxurious Chest.

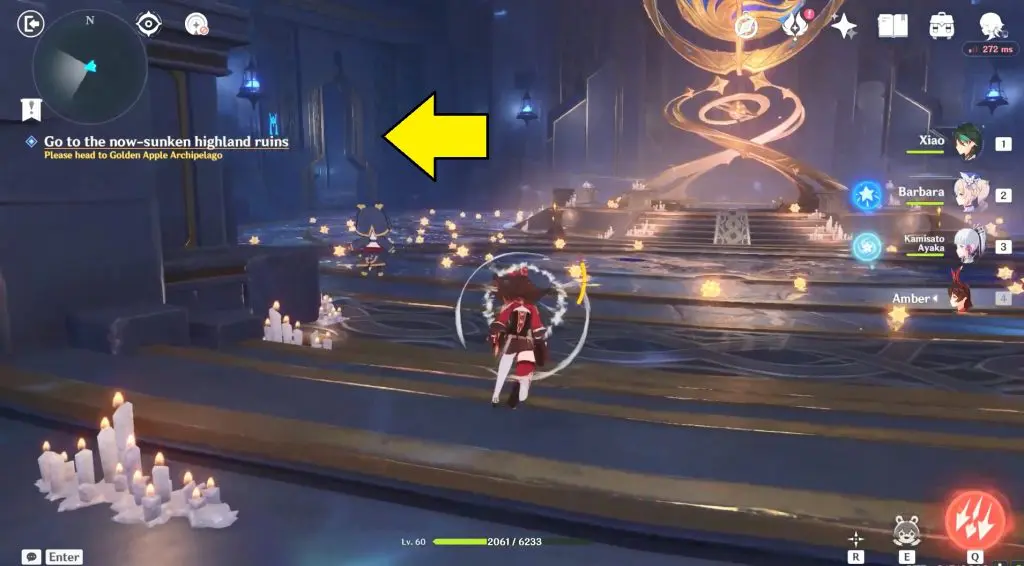
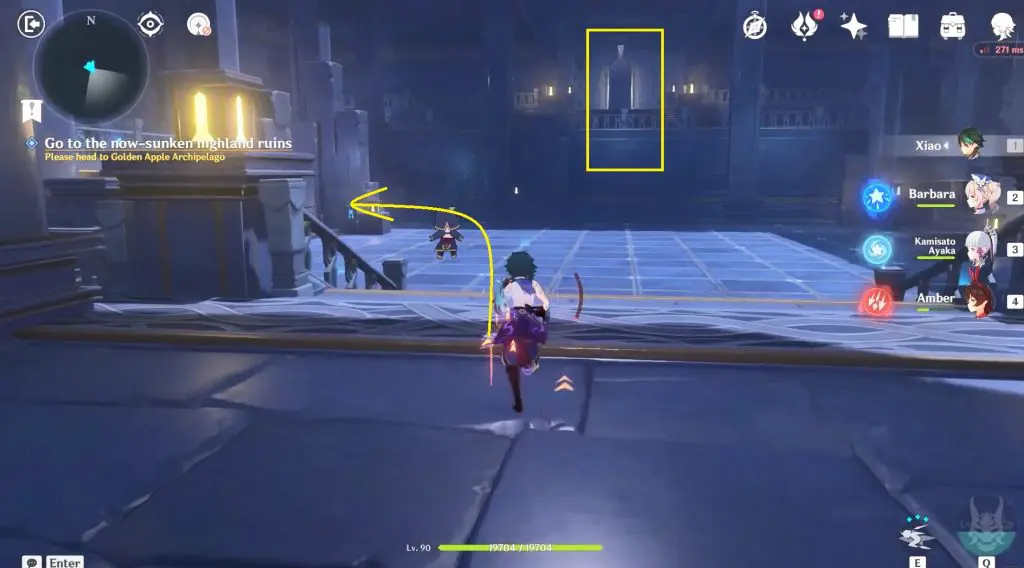
Exit the area where you find Frozen Soul and turn left. Enter the door at the end of the passage, and it will take you to a new Domain area.
This new area includes a series of Melodic Harp & Bloom puzzles, but they’re pretty straightforward. At first, the location just hit the Melodic Harp to create a small wind current that will take you to other islands.
At the second location also, just hit Melodic Harp again to create wind rings and use it to move to the third location.
Third location: Walk on melodic pedals to activate the Melodic Harp. Then Hit the Melodic Harp for the first time to clear the roots and collect a key. Hit the Melodic Harp for the second time to create wind rings.
At the next location, you will find a Heron (Bird) in the middle of the large area. Defeat all the enemies and then interact with the Heron (Bird). Follow Heron to enter a door.
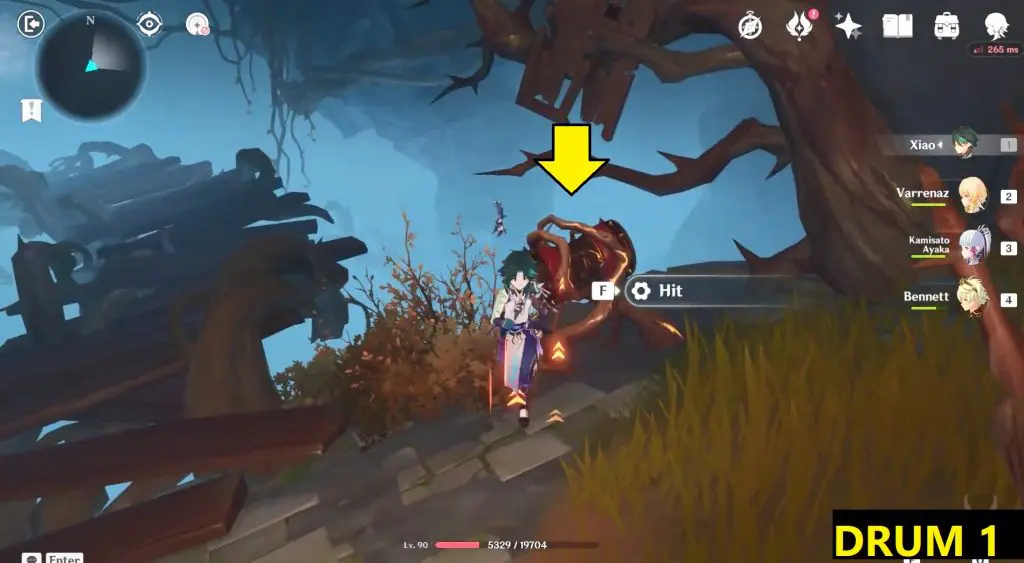
Follow the heron, and hit the drum to create a new path.
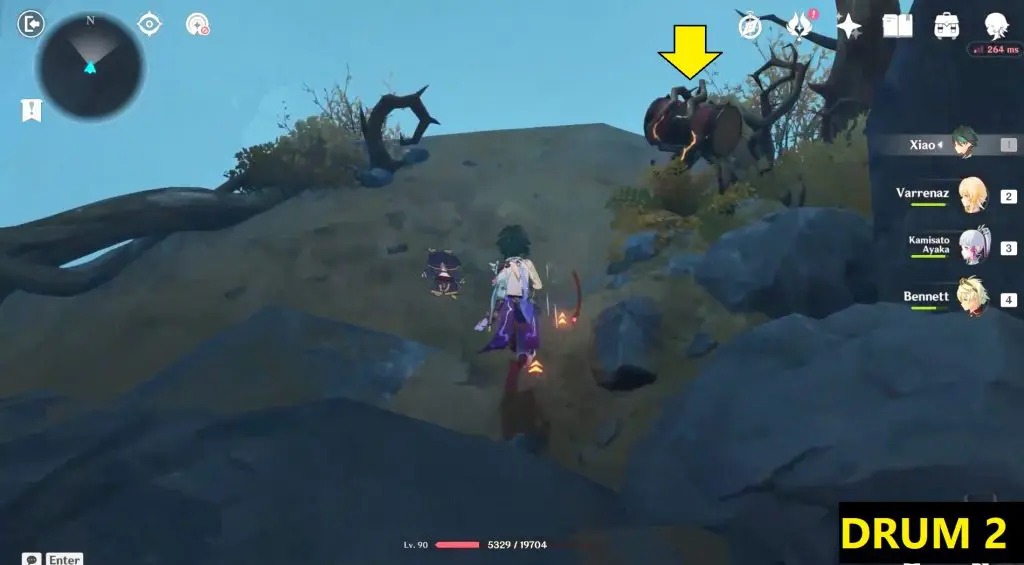
Continue in the newly created path and then hit the second drum also. This will unlock the seal around the Melodic harp placed at the exit/entry of the Icy Flower room.
Now retract the path to where Heron was standing earlier. Head to the right and hit Melodic Harp to create wind rings and use it to move to the next location
Enter the door at the new location to reach back to the starting point and head toward the icy room.
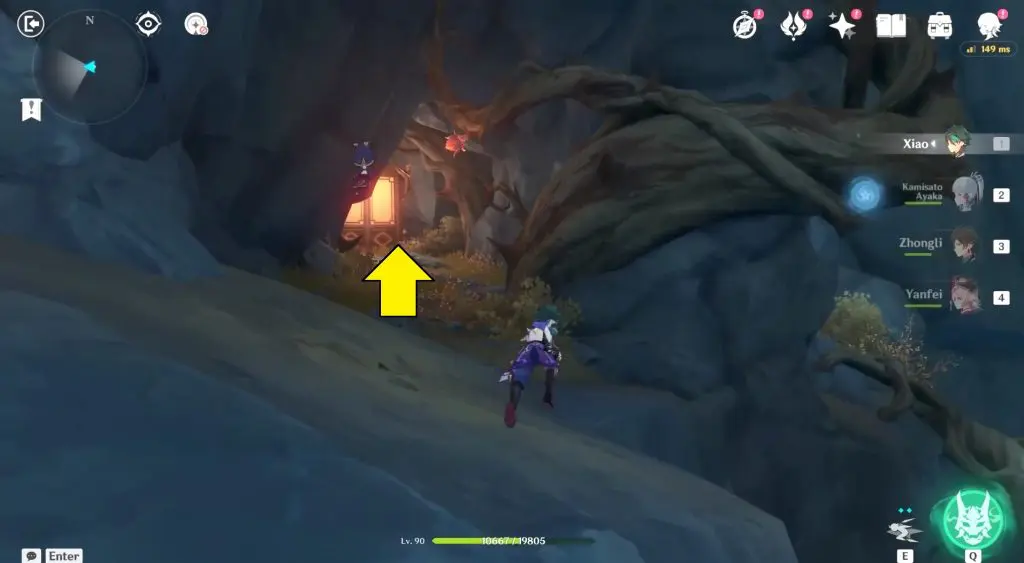
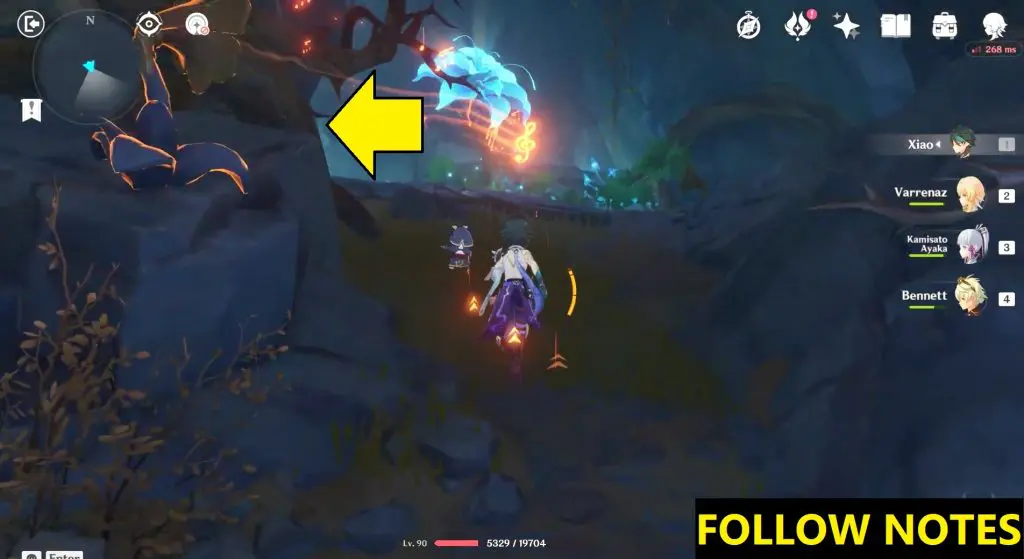
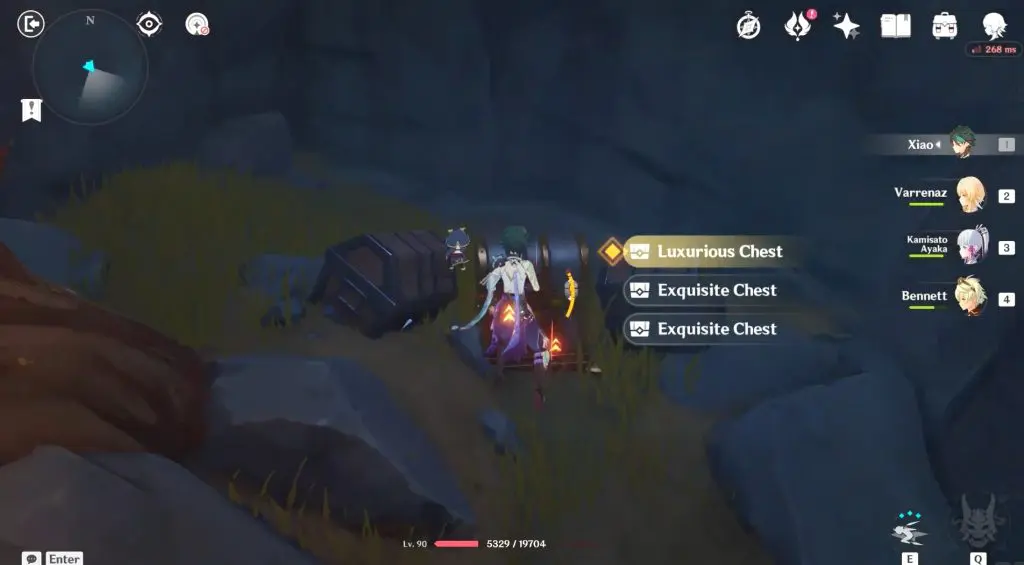
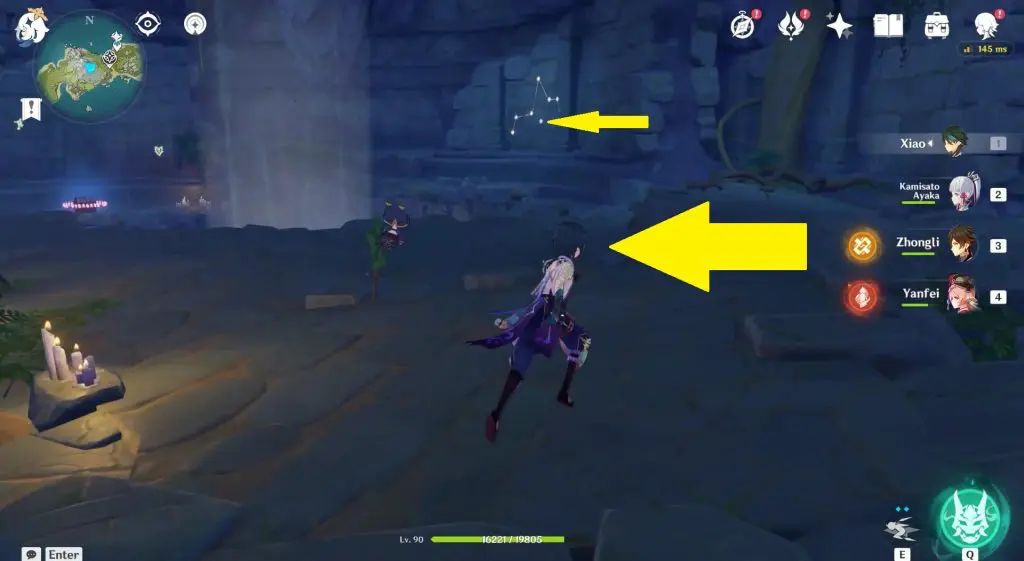
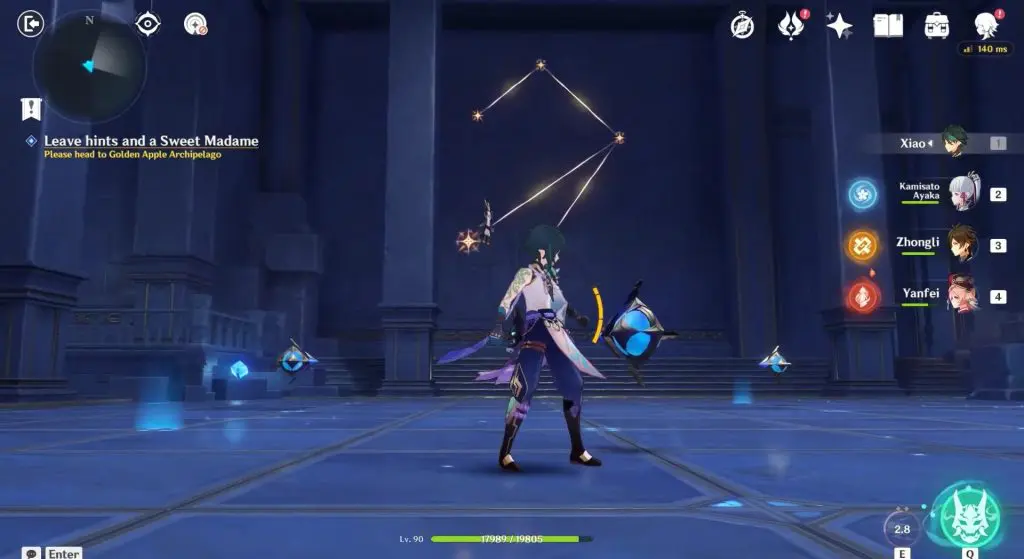
At the entrance, you will find the unsealed Melodic Harp. Hit the Melodic Harp and follow the notes to the back of the icy room. Notes from the Melodic Harp will unlock another sealed there that contains a Luxurious chest.
#2 Luxurious Chest 1: Elemental Monument Puzzle
At the center portion of Minacious Isle, as shown in the picture below, you will find four elemental Monument Totems. By hitting them in the correct order you will be able to get a Luxurious Chest and 3 Starlight Coalescence.

Read the stone tablet near the cryo totem and it will tell you to look out for elemental symbols on the island. Sort the symbols from top to bottom based on their elevation and then hit the elemental totems in the same order.
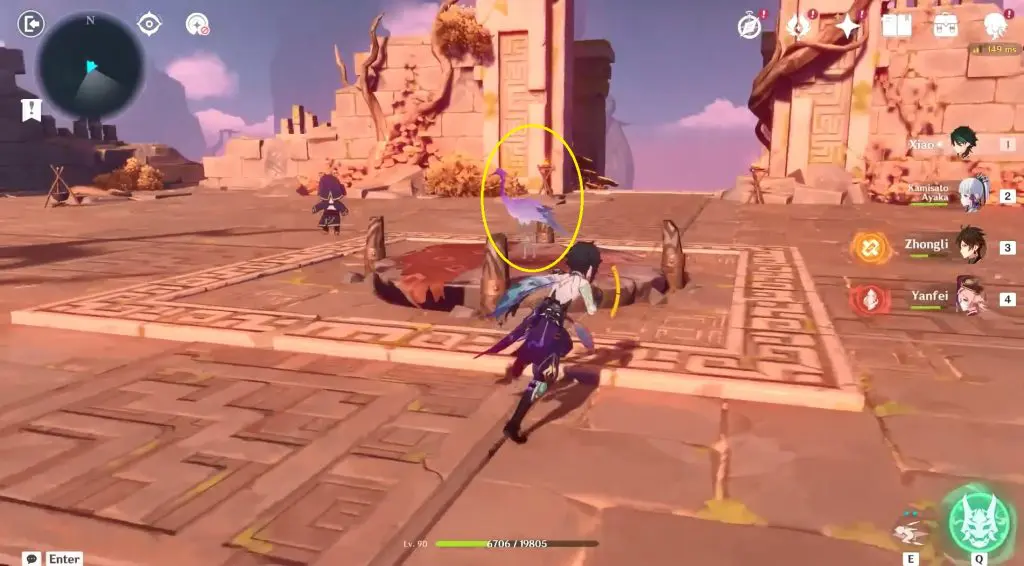
Go to the southwest portion of Minacious Isle and follow the bird as shown in the picture below. This bird will lead you to four big pictures of the elemental symbols.

The bird will first lead you to Hydro Symbol. It is in the water at the beach on the far left of the island. The Cryo symbol is on the cliff wall east of the hydro one. From Cryo, climb up the cliff on the north side to find the Anemo symbol on the grass. The Pyro is a leaf formation above the puzzle. The four pictures sorted from top to bottom based on their elevations are shown below (Pyro-Anemo-Cryo-Hydro).


Now go to the puzzle area and activate the four elemental totems in this sequence: Pyro-Anemo-Cryo-Hydro. Pyro is on top of a broken arch. Anemo and Cryo are on the lower levels. The Hydro is on top of a big arch.
Once you have activated the totems in the correct order, a portal will appear as shown in the picture below. Cast Anemo to the windmill nearby to activate the wind current. Then take the wind current to enter the portal. You will find a Luxurious Chest and 3 Starlight Coalescence inside.

# 3-5 Luxurious Chest: Constellation Puzzle
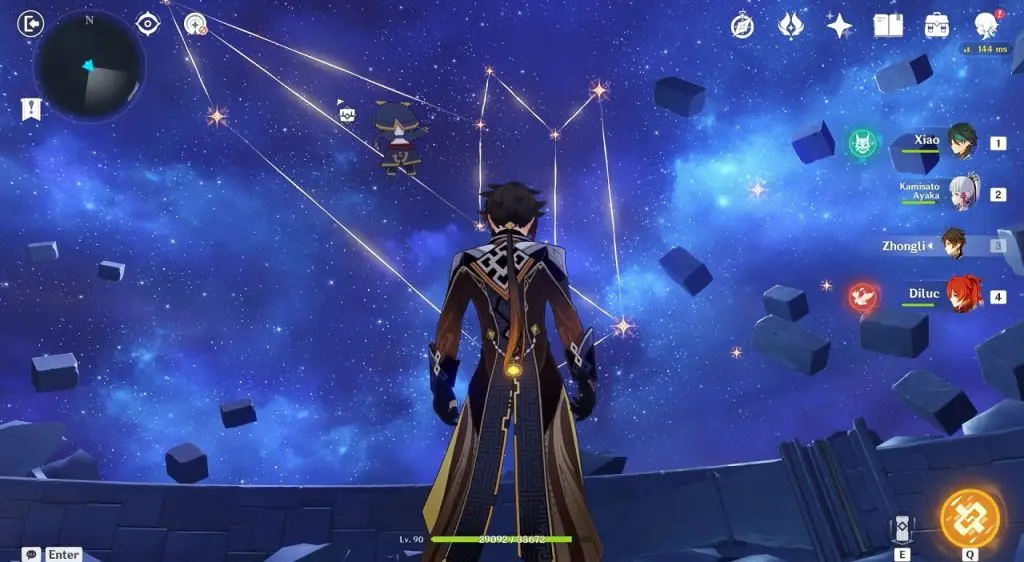
On top of the central ruin on Minacious Isle, you will see a constellation as shown in the picture below. To complete the puzzle, you will need 8 Starlight Coalescence. On completing the puzzle, you will get 3 Luxurious Chests.

Starlight Coalescence 1,2,3
You will get 3 Starlights during Thus Was the Work Done in Vain world quest. Place three Starlights in the Starlight Lamp. This will make a translucent stair appear that leads to the top of the ruins as shown in the picture below.

Luxurious Chest #3
Take the translucent stairs to the top of the ruin. There you will find a luxurious chest as shown below.

Starlight Coalescence 4
At the top of the ruin, where you got the luxurious chest, you will find a Starlight on top of a pillar as shown in the picture below.

Starlight Coalescence 5
After collecting the previous Starlight, jump down to get another Starlight, which is on top of an arch as shown in the pictures below.


Starlight Coalescence 6
Jump down from the broken bridge n the west portion of the ruin. Glide down to get the Starlight underneath the bridge as shown in the picture below.


Starlight Coalescence 7
Go to the location marked in the picture below and ride the wind current there to the top. Then glide to get the Starlight as shown in the second and third pictures below.


Starlight Coalescence 8
Go to the lower portion of the ruin and you will find the Starlight on the wall as shown in the pictures below. Chase it to its destination and then collect it.

Luxurious Chest #4
Place the remaining five Starlights in the Starlight Lamp to unlock the Luxurious chest there.
Luxurious Chest #5
From the previous Luxurious Chest, a Starlight will come out. Chase it and it will lead you to the final Luxurious Chest as shown in the pictures below.


#6 Mona Domain Luxurious Chest
Luxurious Chest 1/2
This chest is located behind the first door you enter during The Ancient Azure Stars story quest as shown in the picture below.
In case visiting the first time: Enter the first door and solve the Astral puzzle to summon the chest in order to open the door up the stairs to the back of the room to gain access to the next area.
Go up the stairs and enter the room on the rear to reach a new area if you have already solved the Astral puzzle and obtained the chest.
Proceed ahead until you reach an area with translucent bridges. Cross the translucent bridges to reach the next area. In the new area, you will have to solve another Astral puzzle. Input the three correct patterns that appear on the wall in order for the wall constellation to change to an arrow pattern.
Puzzle 1
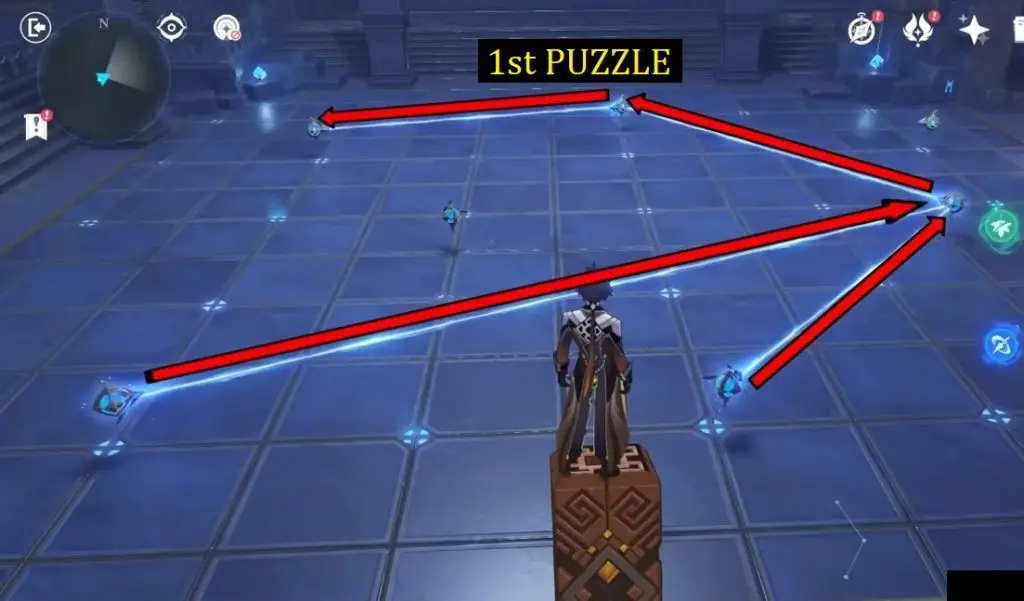
Puzzle 2
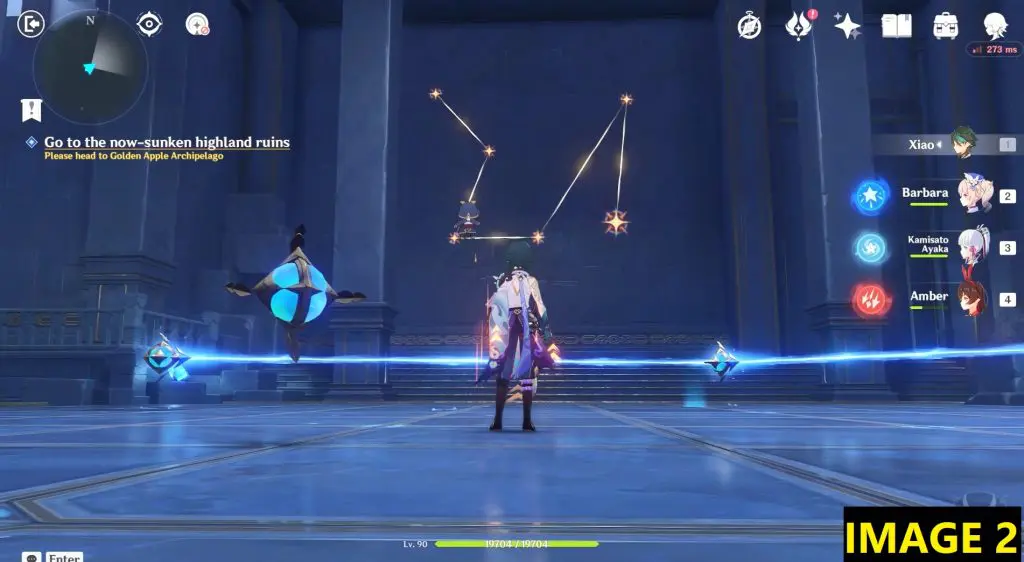
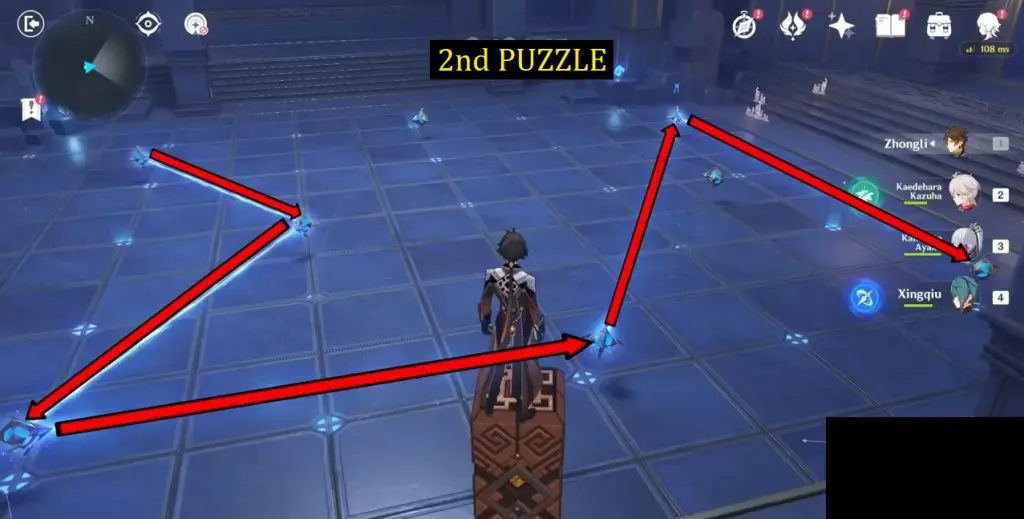
Puzzle 3
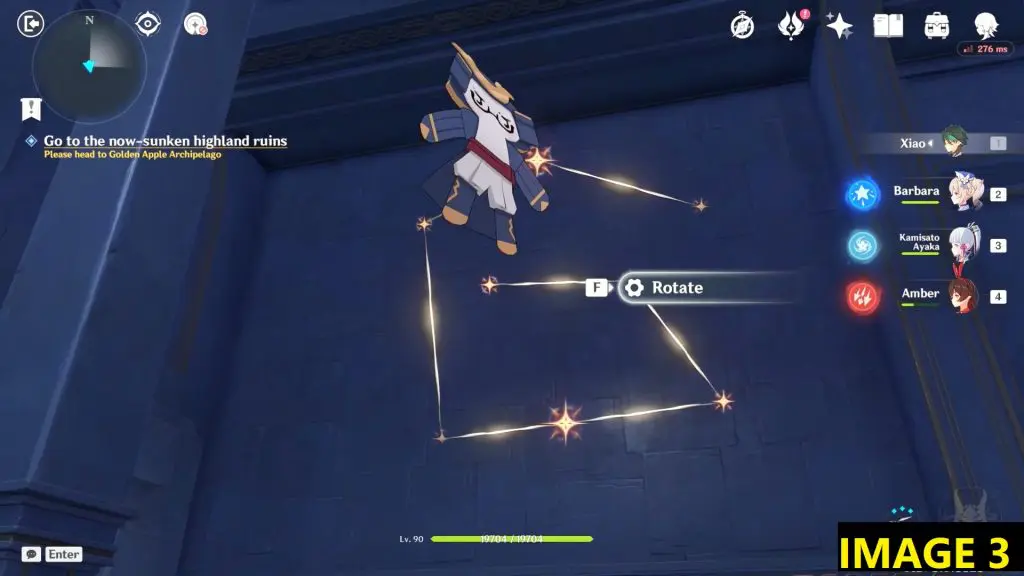
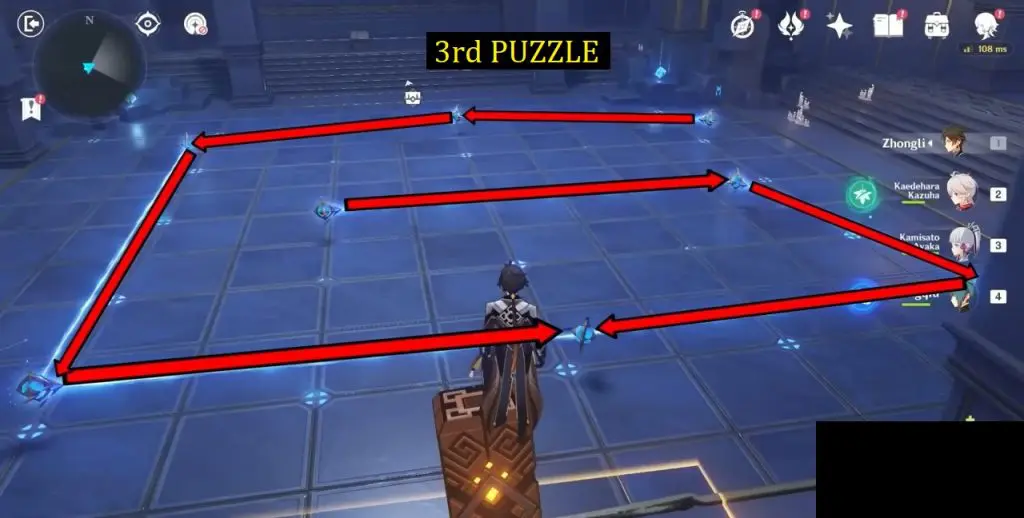
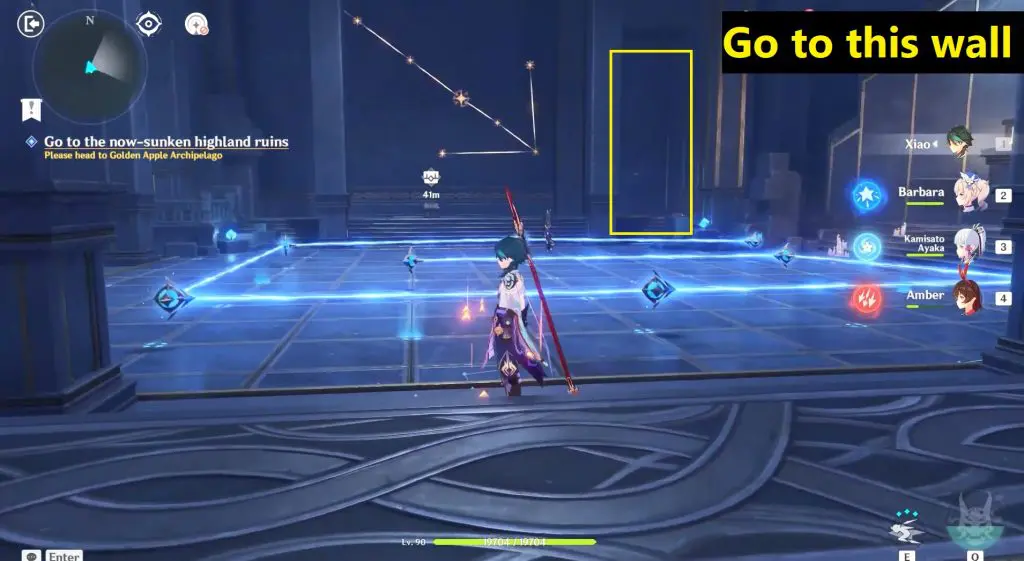
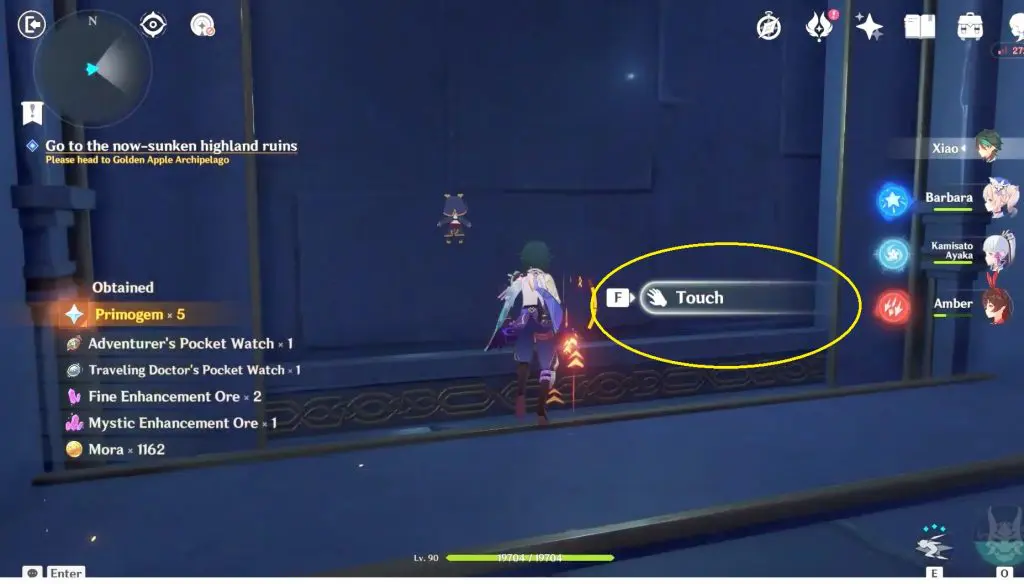
On solving the three puzzles, stars will form an arrow. Go to the wall the arrow is pointing at and touch it to reveal the next area.
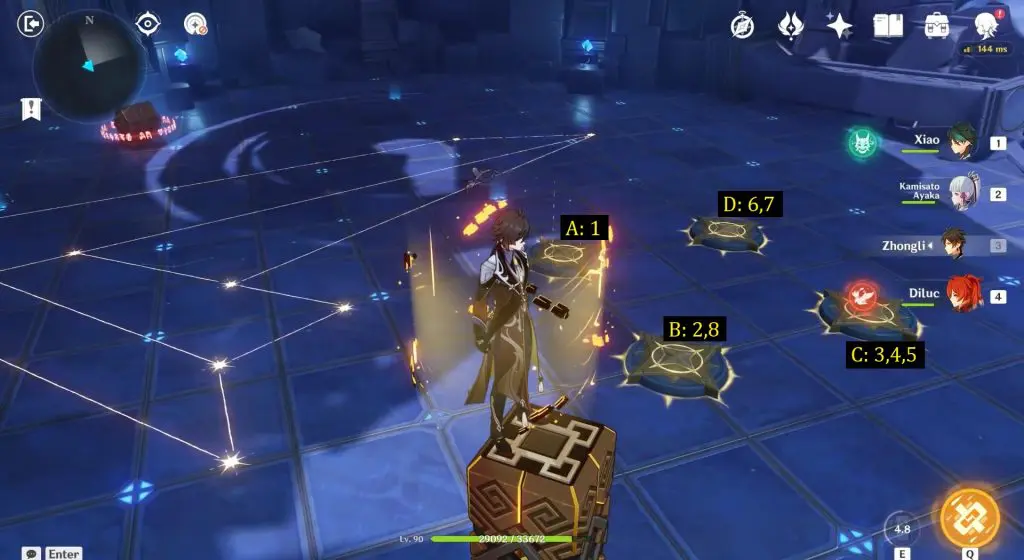
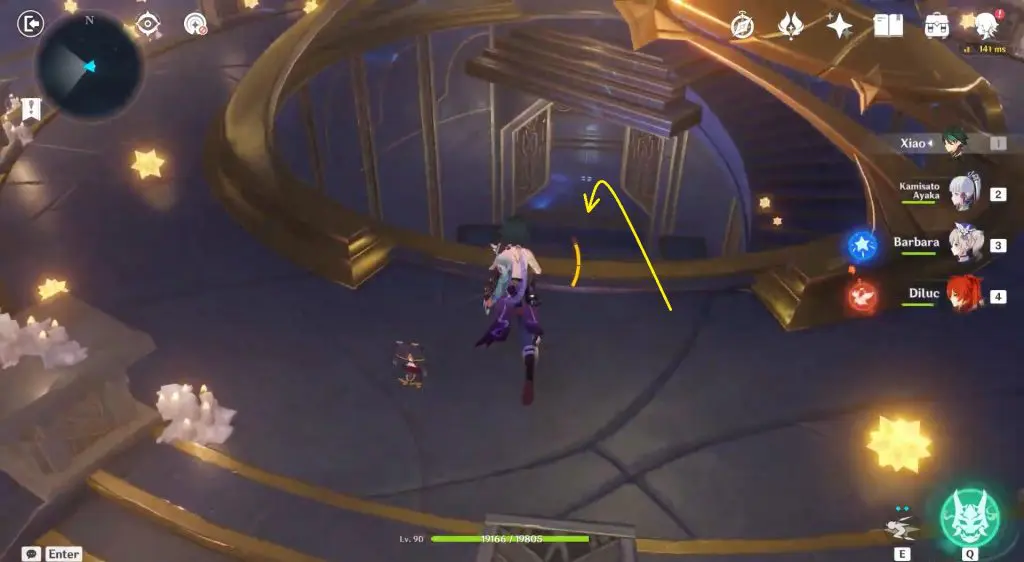
Enter inside, then take the astral path up to a room with four circular switches on the floor. You will see a pattern drawn on the floor near the switches. To solve the puzzle, you need to step on the switches to form the same pattern in the sky. This can be done in 8 steps as shown in the picture below. I have named the switches as A, B, C, and D for ease of explanation.
Step 1: Step on Switch A
Step 2: Step on Switch B
Step 3: Step on Switch C
Step 4: Step on Switch C
Step 5: Step on Switch C
Step 6: Step on Switch D
Step 7: Step on Switch D
Step 8: Step on Switch B
On solving the puzzle, the precious chest in this room will unlock. Open the chest and a Star will come out from it. Follow the star until you fall into Starry Realm. Complete the Challenge of the Starry Sky there. Then take the portal back and you will find the Luxurious chest in front of the pool in the Mona Domain.
#7 Mona Domain Luxurious Chest
This chest will be available only after you have completed The Ancient Azure Stars story quest. After completing the quest, jump inside the pool and enter the portal. Touch the strange ornament to reach a mirage.
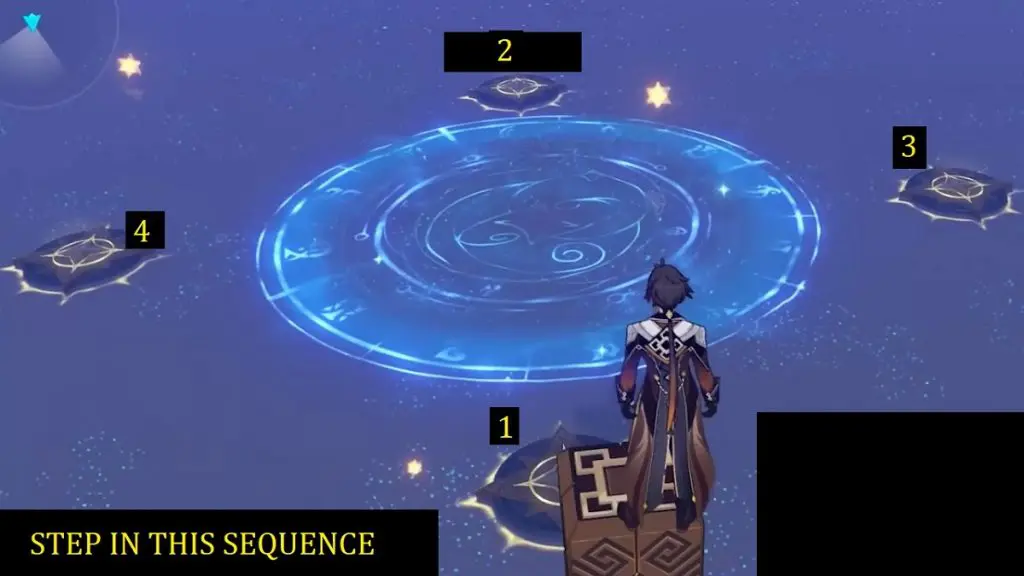
You will see four switches here and some patterns in the sky. Your objective here is to make the patterns in the sky disappear. To do so, step on the switches in the sequence shown below. After that enter the portal and you will find the Luxurious chest in front of the pool in the Mona Domain.
#8 The Treasure of the Four Skerries Quest – Luxurious Chest
Complete the hidden world quest “The Treasure of the Four Skerries” to get the last Luxurious Chest. This is a series of 5 other quests.