Sacrificial Offering is a world quest in Inazuma region of Genshin Impact 2.0. This walkthrough of Sacrificial Offering will guide you through all the objectives / puzzles and will show you how to complete this world quest.
How to Unlock Sacrificial Offering?
You need to complete the world quest “A Strange Story In Konda” to start Sacrificial Offering.
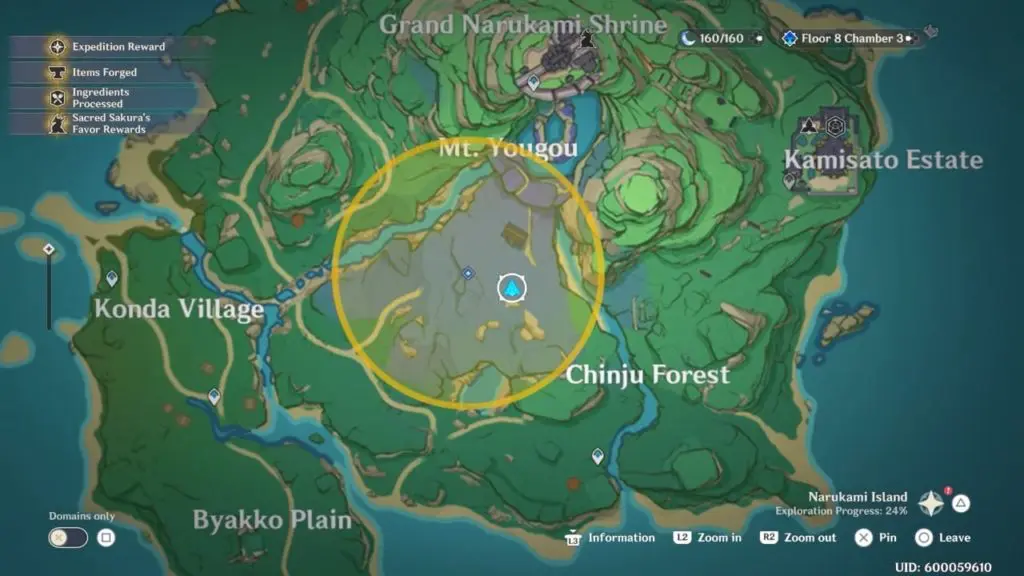
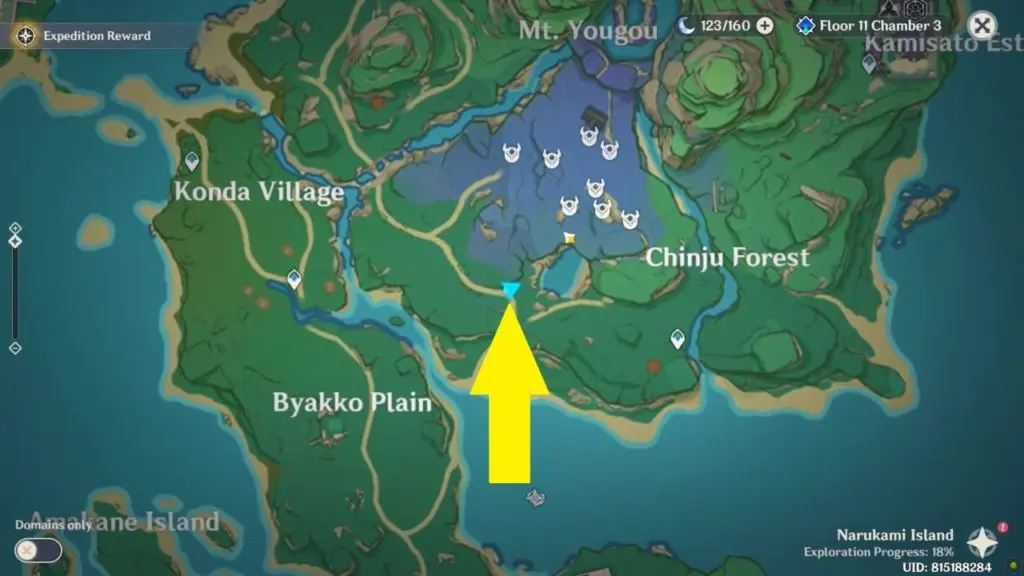
Go to the abandoned shrine northeast of Konda Village
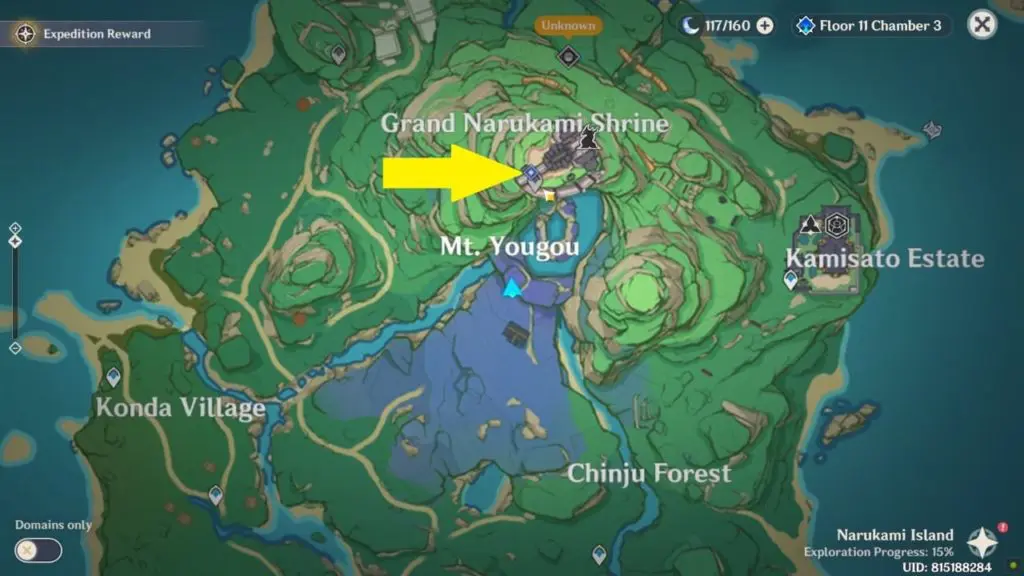
The game doesn’t mark the location of the abandoned shrine on the map. Check out the image below to see the location of the abandoned shrine. It’s actually east of Konda village and south of Mt. Yougou.
[Ghost Puzzle] Carry out the investigation at the abandoned shrine
There are 3 fox statues in the center of this area. You need to bring the 3 spirits (ghosts) to these 3 fox statues. We’ll show you the location of the 3 ghosts and how to send them to the fox statues. Interact with the ghosts in the order shown below.
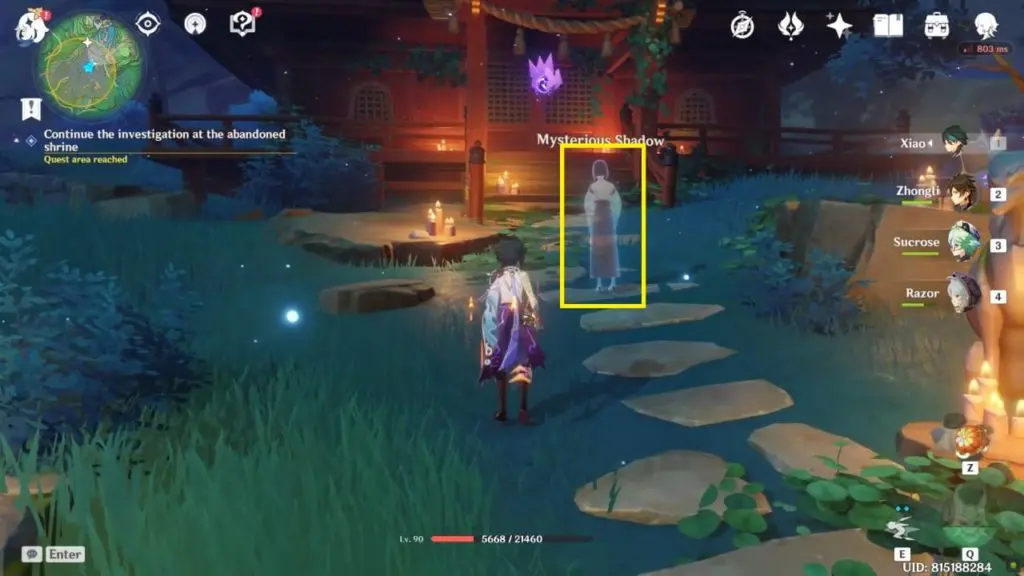
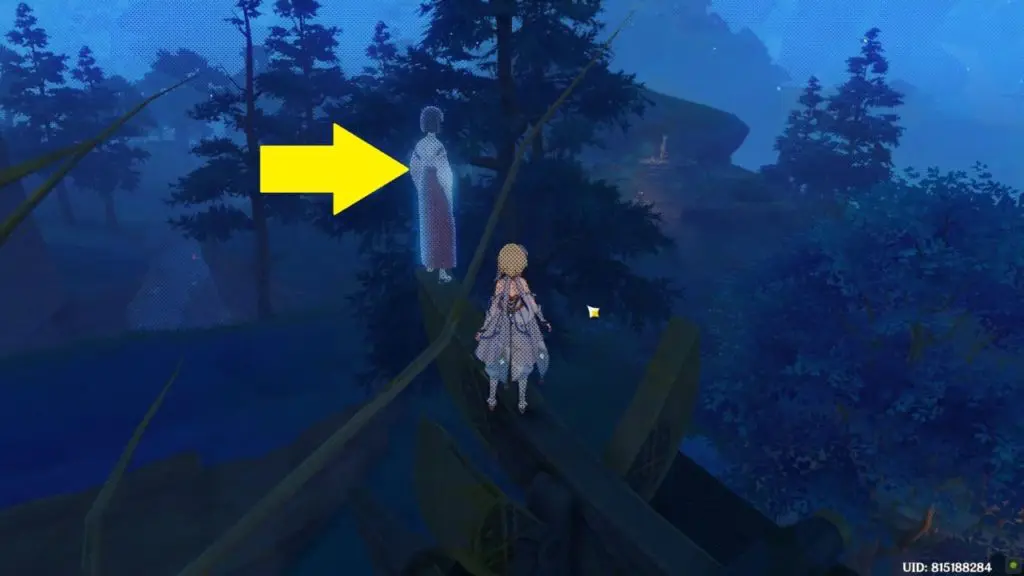
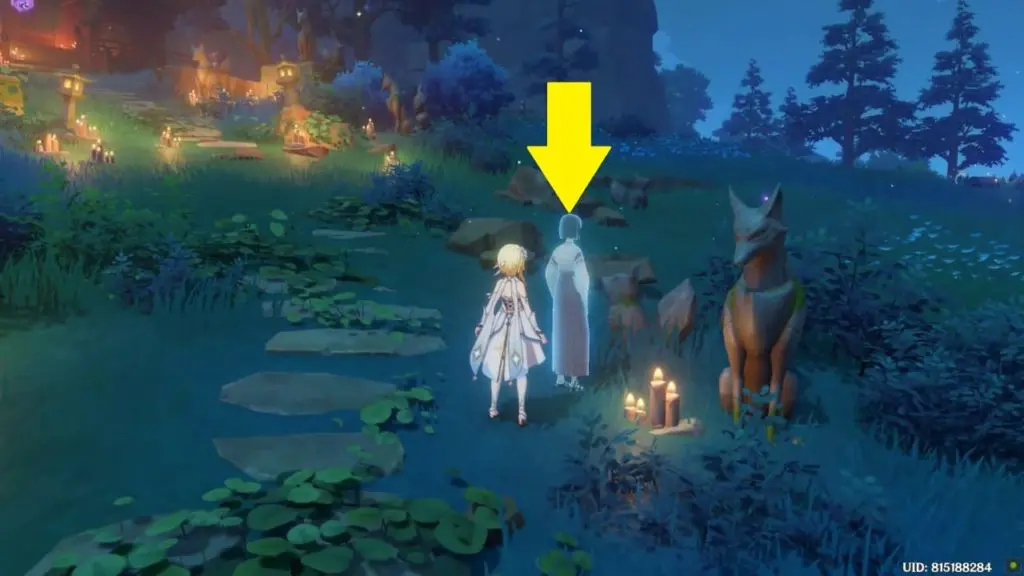
Ghost #1
Interact with the ghost in front of the big house. This ghost will then respawn in front of the big fox statue. Interact with it again to send it to the 3 fox statues in the center.
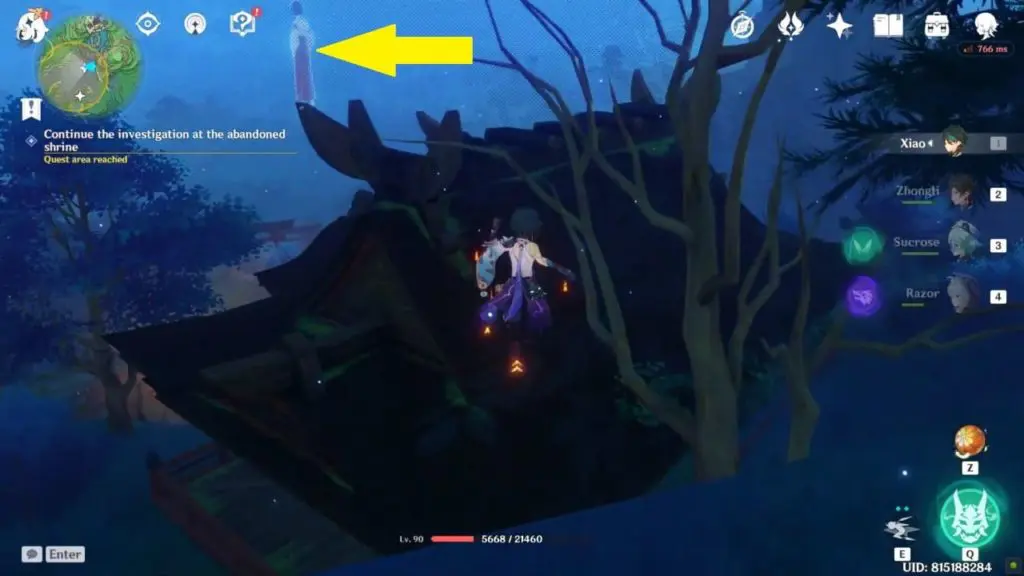
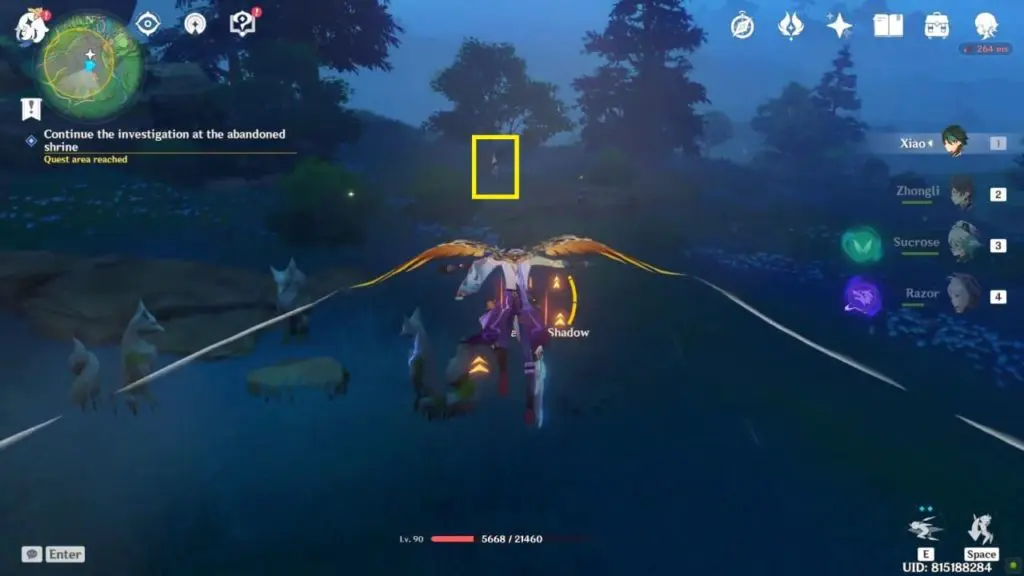
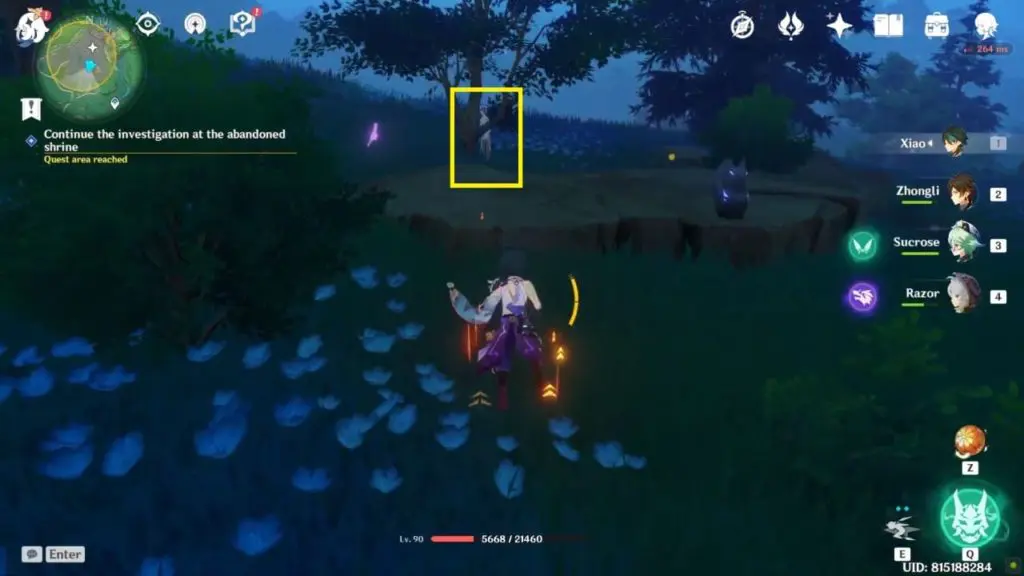
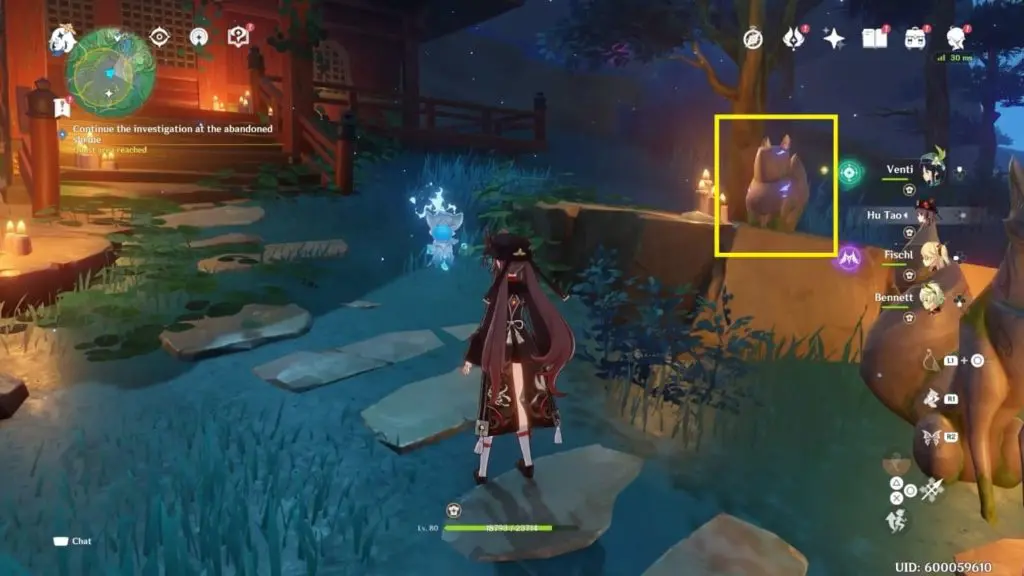
Ghost #2
The 2nd ghost is above the big house. Get on top of the house and interact with it. This ghost will then appear behind a tree (which is on the right side of the big fox statue). Interact with it to send it to the 3 fox statues in the center.
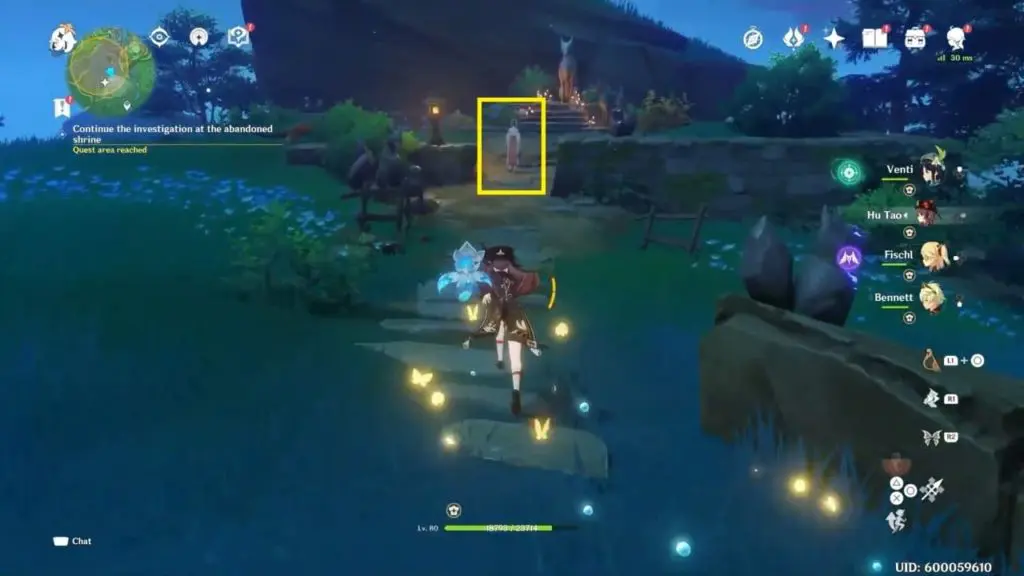
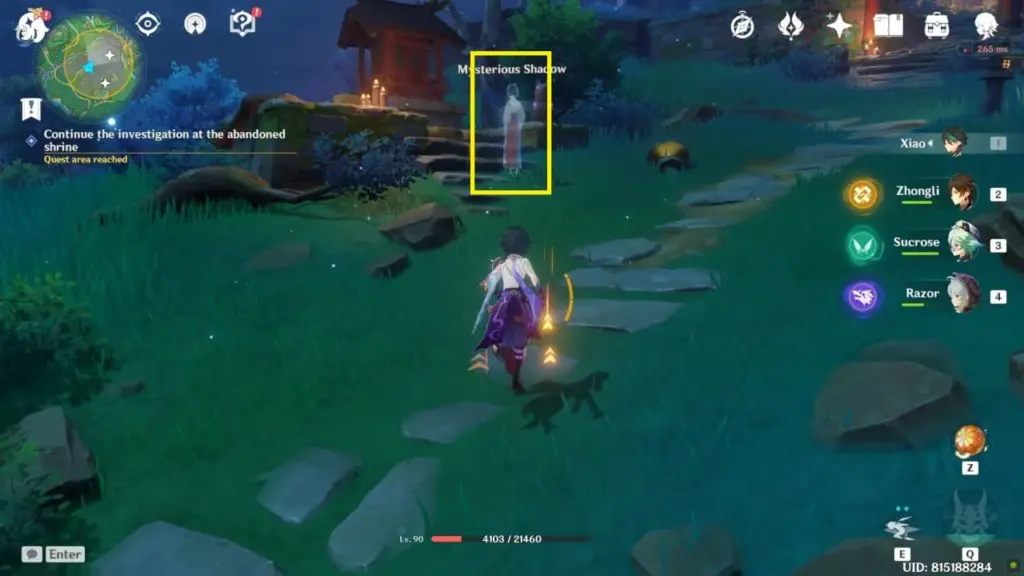
Ghost #3
Go down the stairs. You’ll see a ghost standing in front of a small shrine on the right. Interact with the ghost. Now, go up the stairs (from which you just now came down) to find the ghost standing next to a ghost statue. Interact with it to send it to the 3 fox statues in the center.
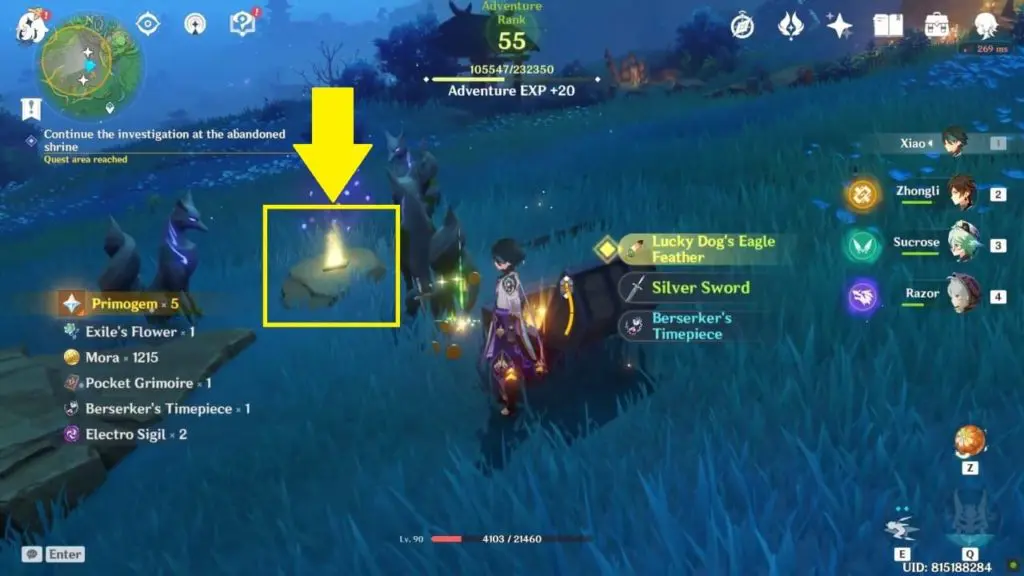
An item will then appear in-between the 3 foxes. Examine the item to complete the objective.
Head to the Grand Narukami Shrine to investigate
Go to the Grand Narukami Shrine north of Mt. Yougou. Climb the mountain to reach Grand Narukami Shrine and talk to the shrine maiden Inagi Hotomi who is standing in front of the shrine. She’ll give you a Memento Lens and the objective will be completed.

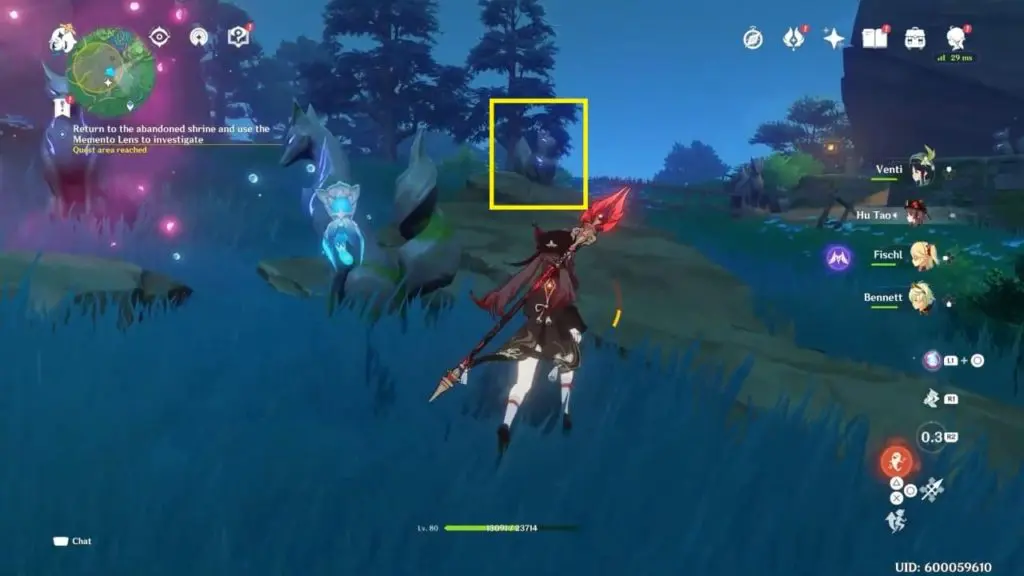
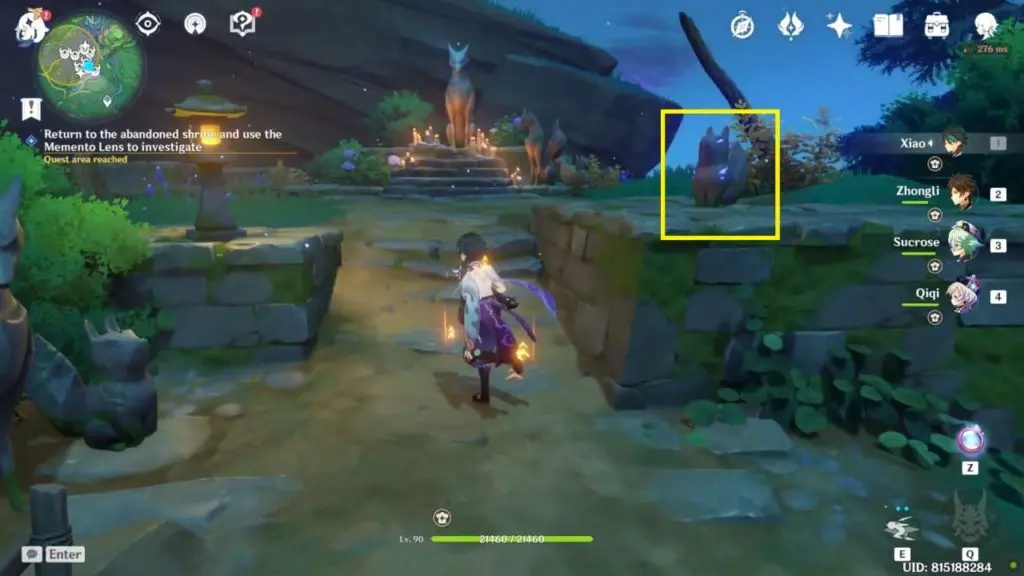
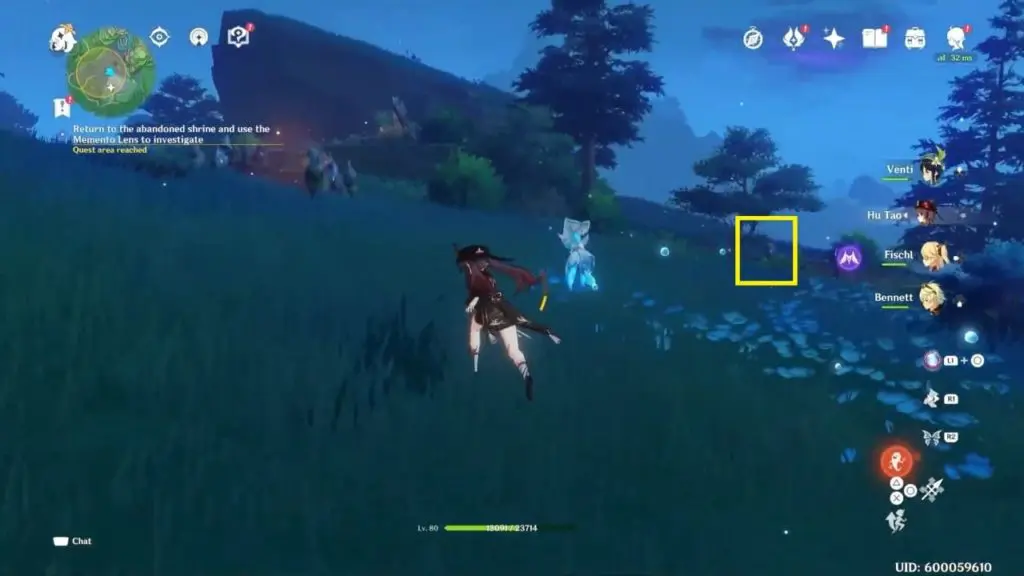
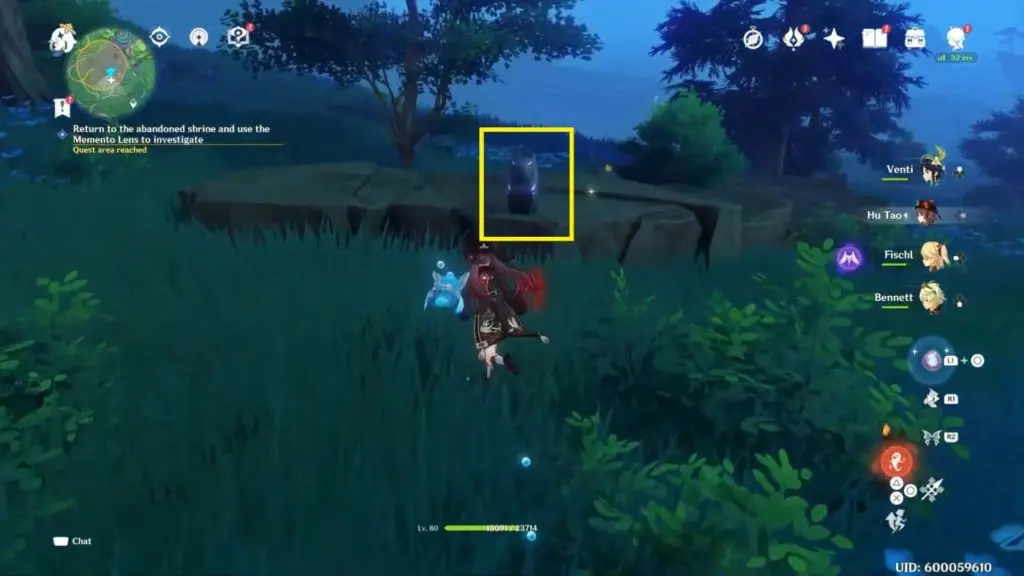
Return to the abandoned shrine and use the Memento Lens to investigate
Return back to the abandoned shrine with the Memento Lens. Equip the Memento Lens from the gadgets menu and examine the following 5 small fox-statues to complete the objective.
Fox statue #1
In front of the big house.
Fox statue #2
Near the 3 fox statues in the center.
Fox statue #3
In front of the huge fox statue.
Fox statue #4
In front of the small shrine down the stairs.
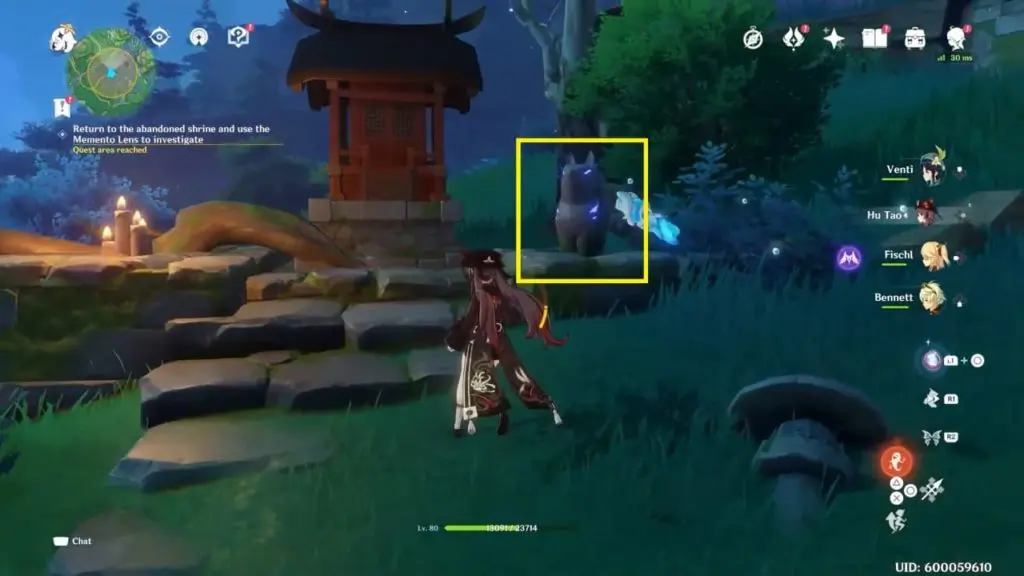
Fox statue #5
See the images below to find the location of the 5th fox statue you need to examine.
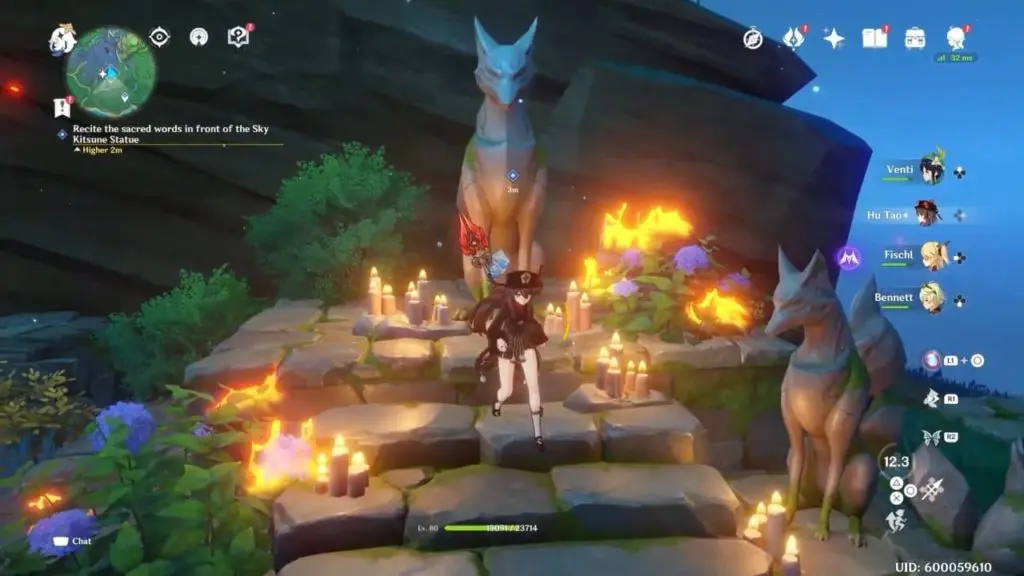
Recite the sacred words in front of the Sky Kitsune Statue
Interact with the huge fox statue and choose the following dialogue options to complete the objective.
1. In the name of Narukami’s envoy.
2. And of the Hakushin bloodline.
3. Bring forth the fried tofu.
Then pick up the WARD to complete the objective.
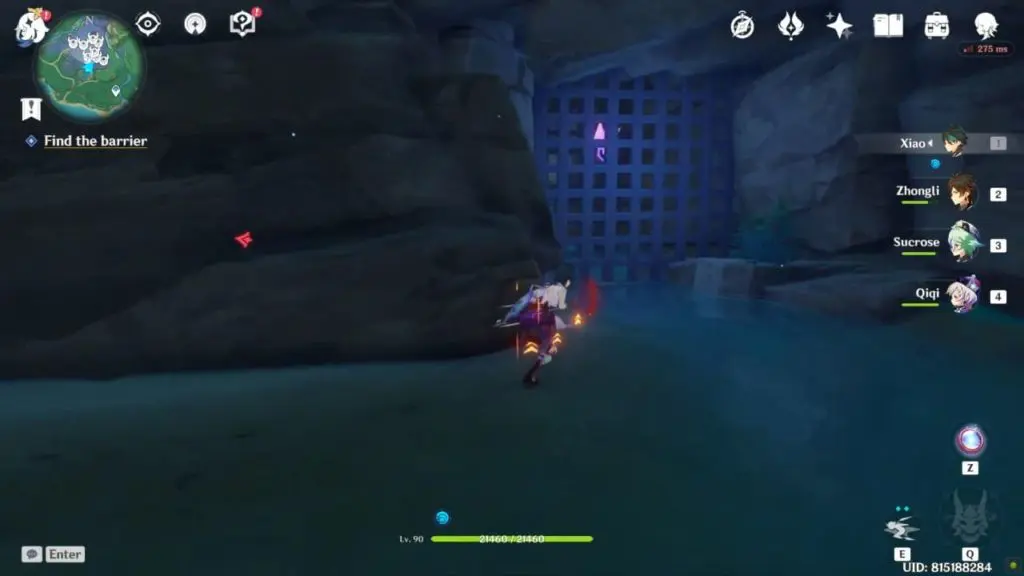
Find the Barrier
To reach the barrier you need the Rust-Worm Key.
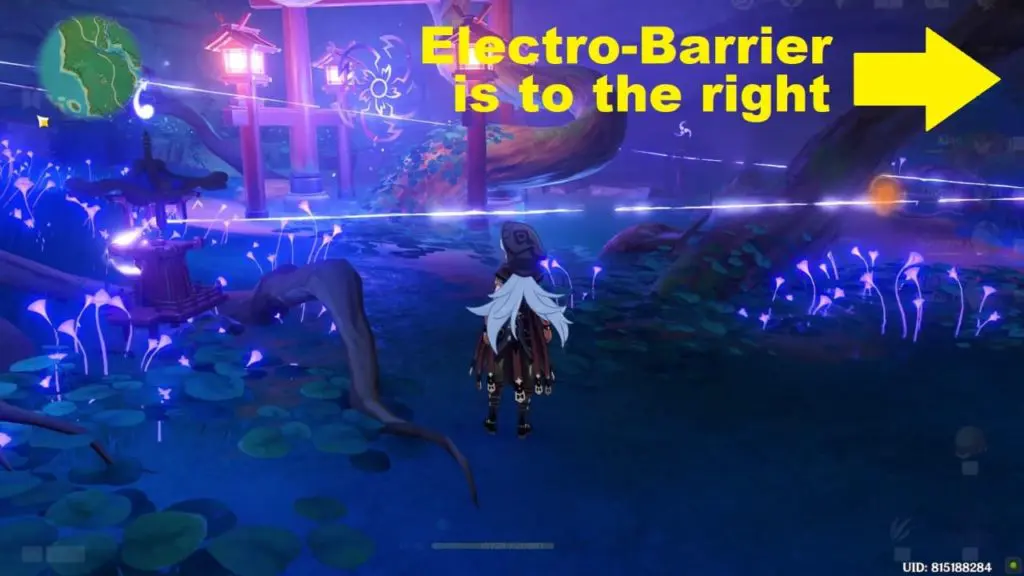
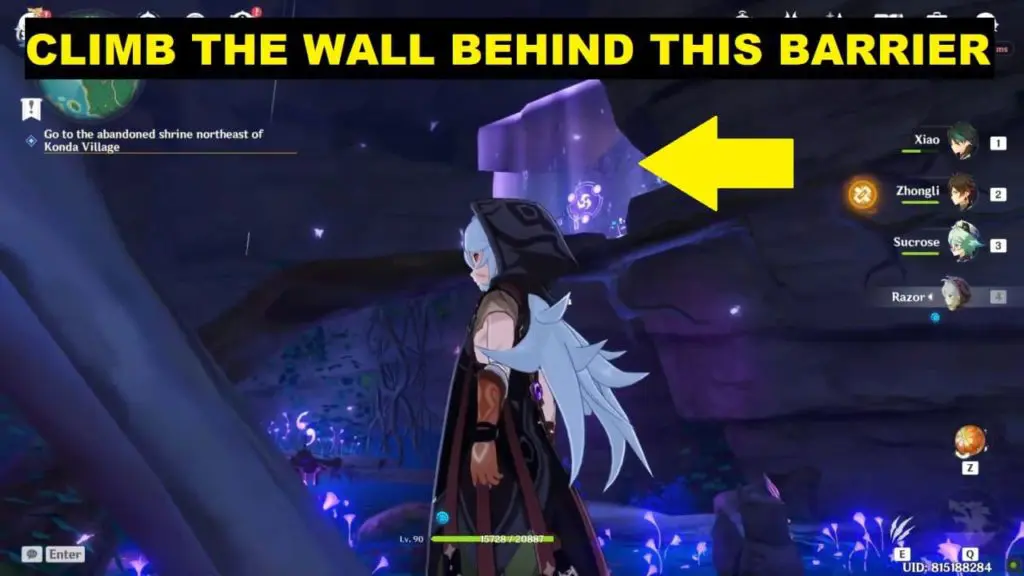
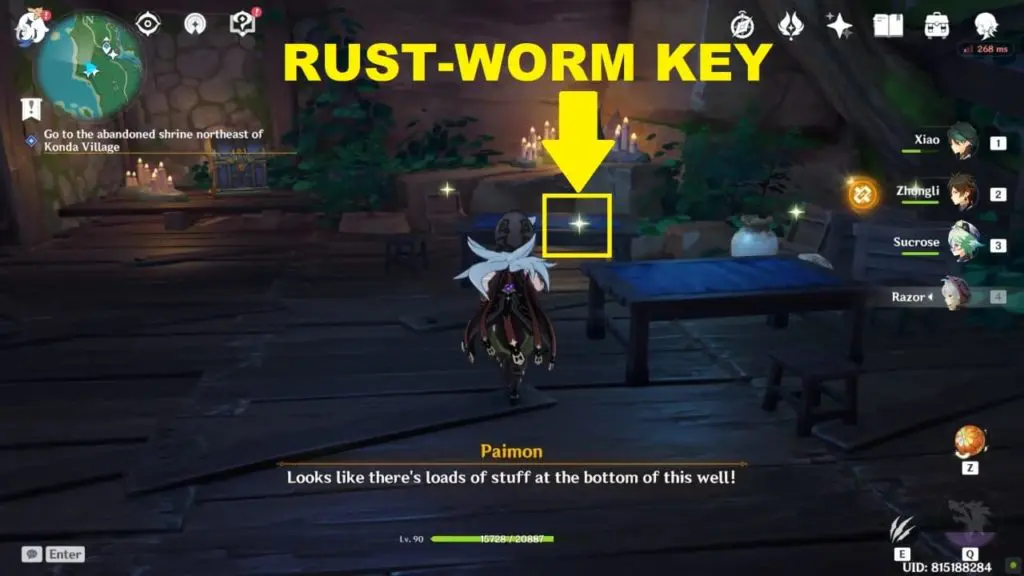
Rust-worm Key Location
Head back into the well at Konda Village in which you descended earlier during the quest “A Strange Story in Konda”. Head to the Red Tree and climb the wall on its right that is blocked by Electro Barrier. You’ll reach a room with lots of loot. The Rust-Worm Key is on one of the tables.
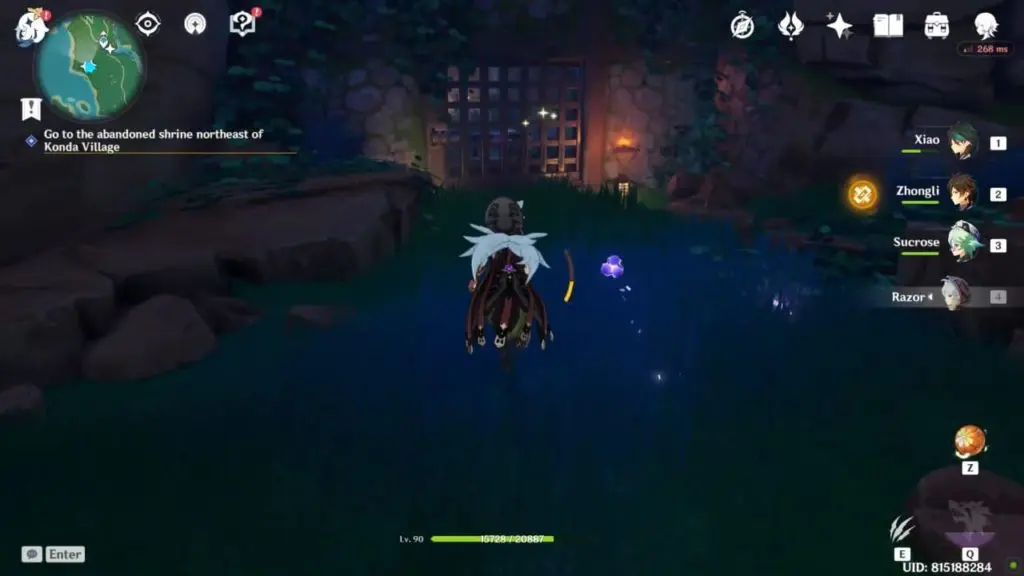
Head back to the abandoned shrine. Head to the river to the south side of abandoned shrine (check the images below). The river has a locked gate at its north end. Use the rust-worm key to open the gate and reach the Barrier.
[Shrine Puzzle] Destroy the Barrier
There are 5 shrines in the area. You’ll be able to interact with one of the shrines. Interact with the shrine (purify the shrine) using the ward that you found earlier. You’ll notice that a pattern forms in the central construct. You need to rearrange the order of all these shrines (number the shrines) so that the pattern of the shrines matches the pattern in the center.
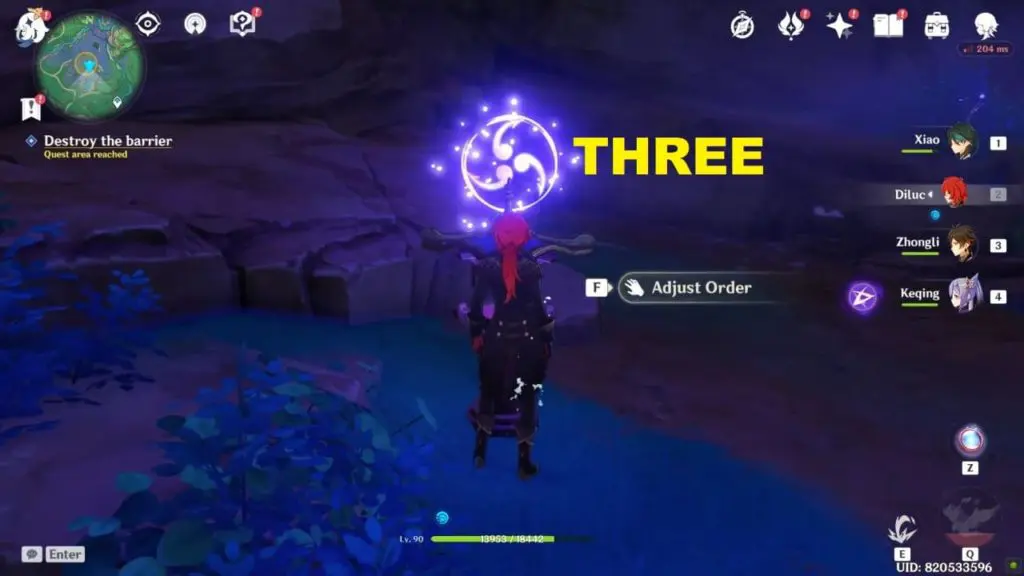
NOTE: You can interact with the shrine to adjust (change) its order. The number of symbols above the shrine denotes the position (order) of the shrine in the pattern. For example, 3 symbols above a shrine means the shrine is in the third position in the pattern.

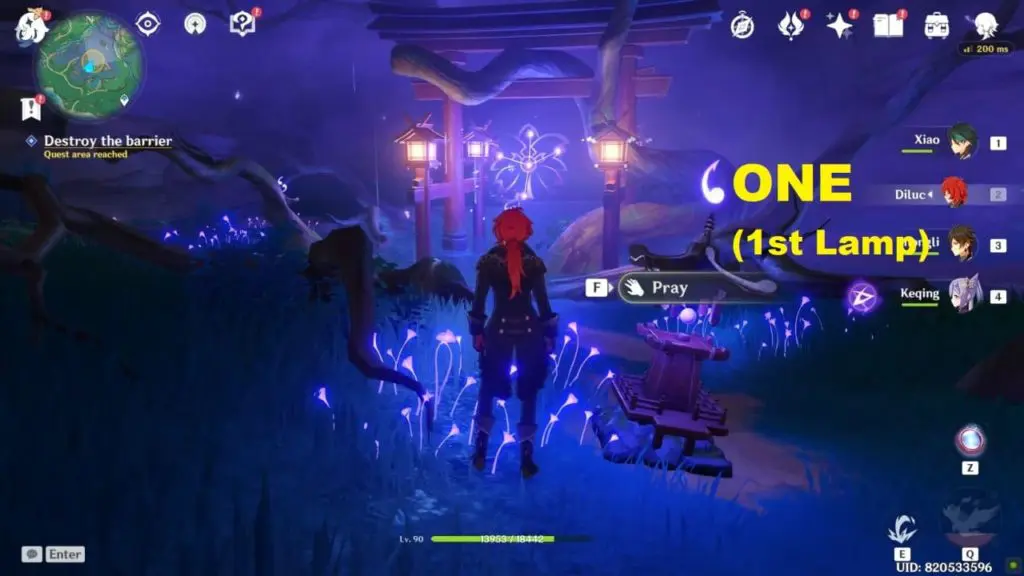
The shrine that you interacted with at first using the ward will be the first shrine of the pattern. This shrine will have only one symbol above it (which can’t be changed) meaning its order (position) in the pattern is one.
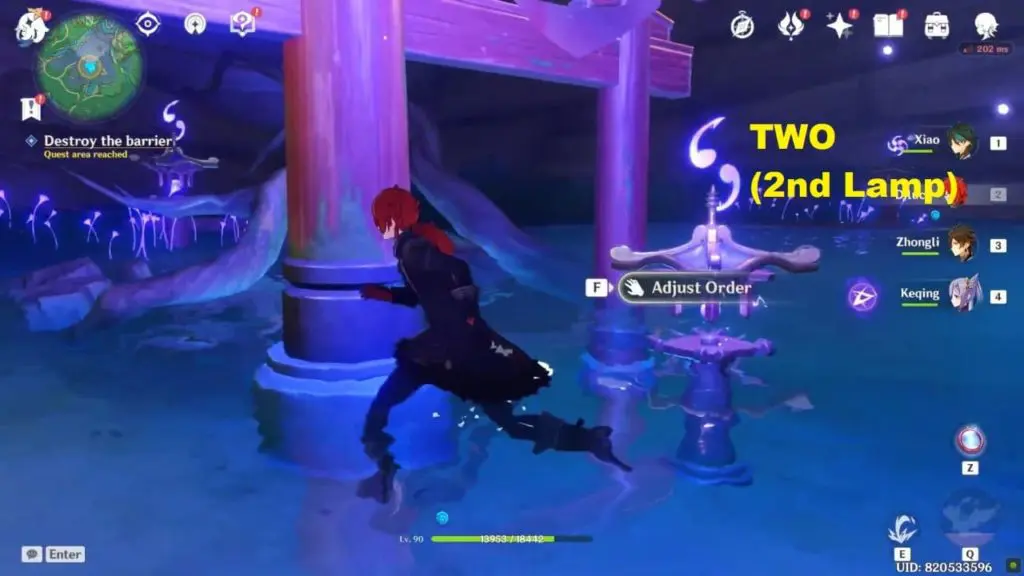
Get to the shrine under the central construct. According to the patter, this shrine must be in second order (2nd position). Interact with this shrine to change the number of symbols above it to TWO.
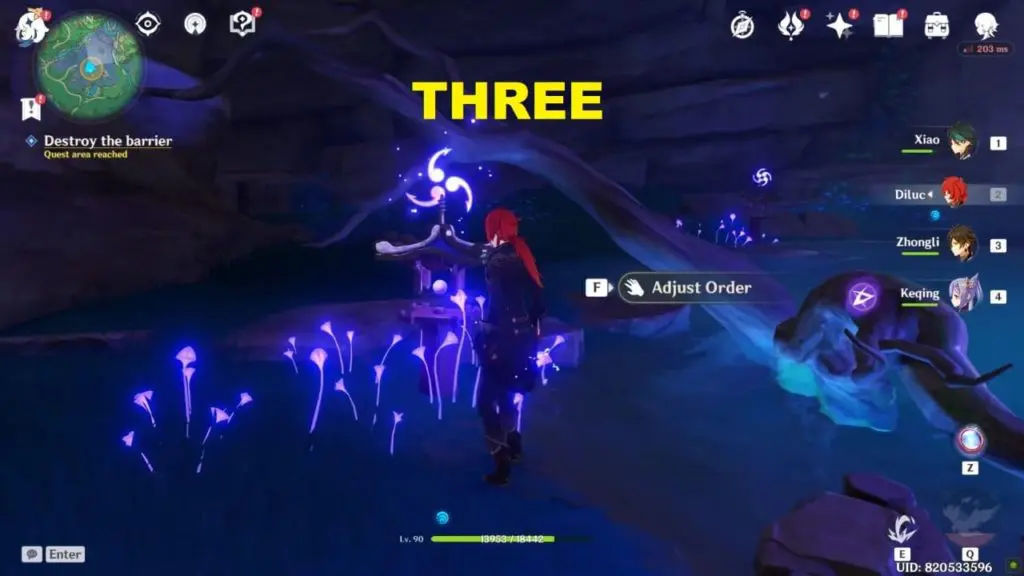
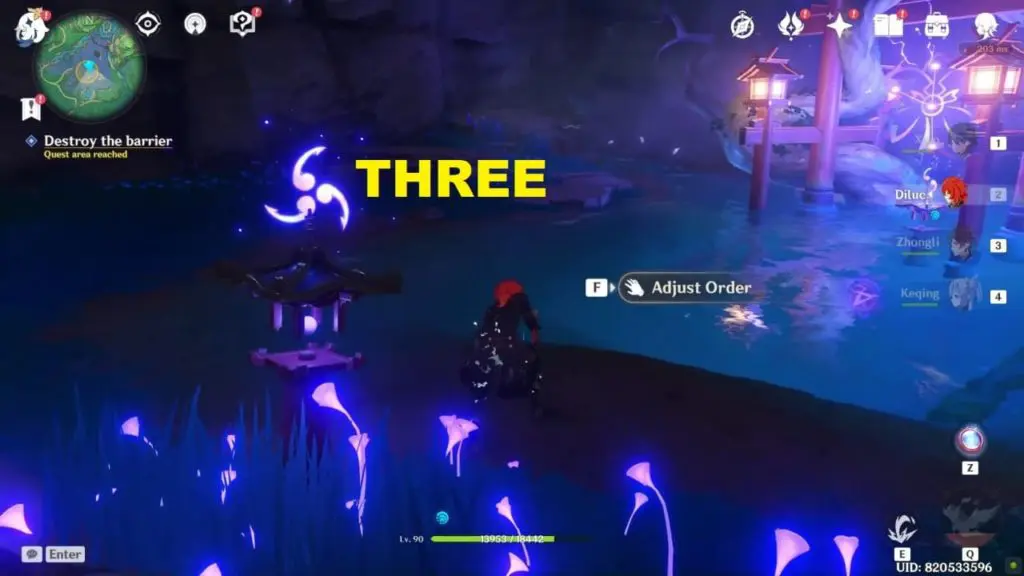
All the remaining three shrines in the area are in the third order (3rd position) in the pattern. Interact will the three remaining shrines and change the number of symbols above them to THREE.
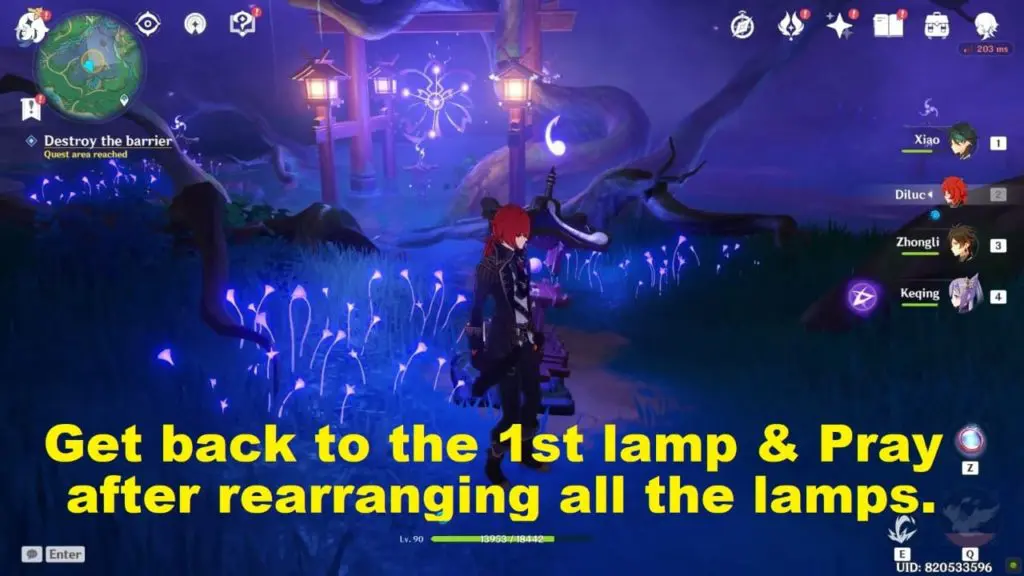
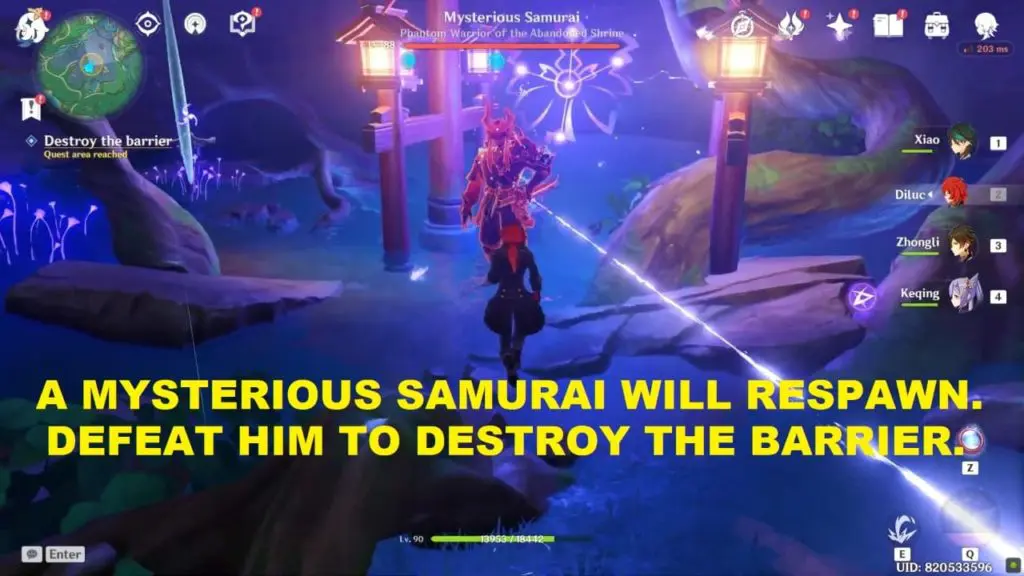
Now, get back to the first shrine and interact with it (pray). After which a mysterious Samurai (Phantom Warrior of the Abandoned Shrine) will appear. Defeat the Samurai to destroy the barrier and complete the world quest Sacrificial Offering.
ALSO READ
Araumi Cleansing Defilement Barrier Guide & Sacred Sakuna Cleansing Ritual
Hayashi of Tanuki in the Forest World Quest – Chinju Forest Destroy the Barrier Puzzle
Cleansing Defilement: Complete the Sacred Sakura Cleansing Ritual Puzzles
Sacrificial Offering: Destroy the Barrier Shrine Puzzle
Orobashi’s Legacy Part 1
Orobashi’s Legacy Part 2
Orobashi’s Legacy Part 3