This article shows how to solve all the 5 ‘Destroy The Barrier’ puzzles required for completing ‘Cleansing Defilement’ and ‘Sacred Sakula Cleansing Ritual’ World Quests in Genshin Impact 2.0.
Mt. Yougou Barrier (Sacrificial Offering)
Sacrificial Offering World Quest Complete Walkthrough
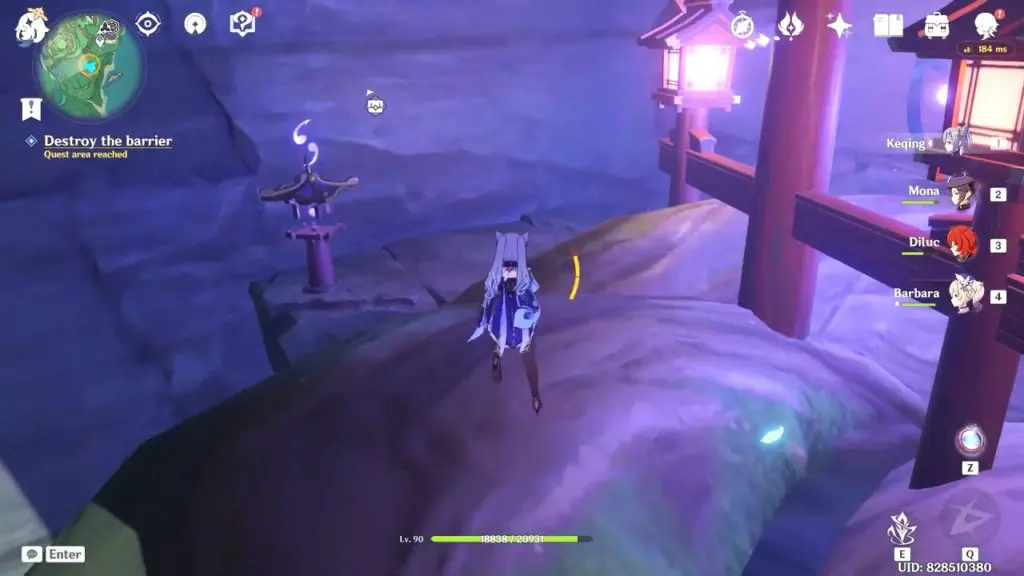
There are 5 shrines in the area. You’ll be able to interact with one of the shrines. Interact with the shrine (purify the shrine) using the ward that you found earlier. You’ll notice that a pattern forms in the central construct. You need to rearrange the order of all these shrines (number the shrines) so that the pattern of the shrines matches the pattern in the center.
NOTE: You can interact with the shrine to adjust (change) its order. The number of symbols above the shrine denotes the position (order) of the shrine in the pattern. For example, 3 symbols above a shrine means the shrine is in the third position in the pattern.

The shrine that you interacted with at first using the ward will be the first shrine of the pattern. This shrine will have only one symbol above it (which can’t be changed) meaning its order (position) in the pattern is one.

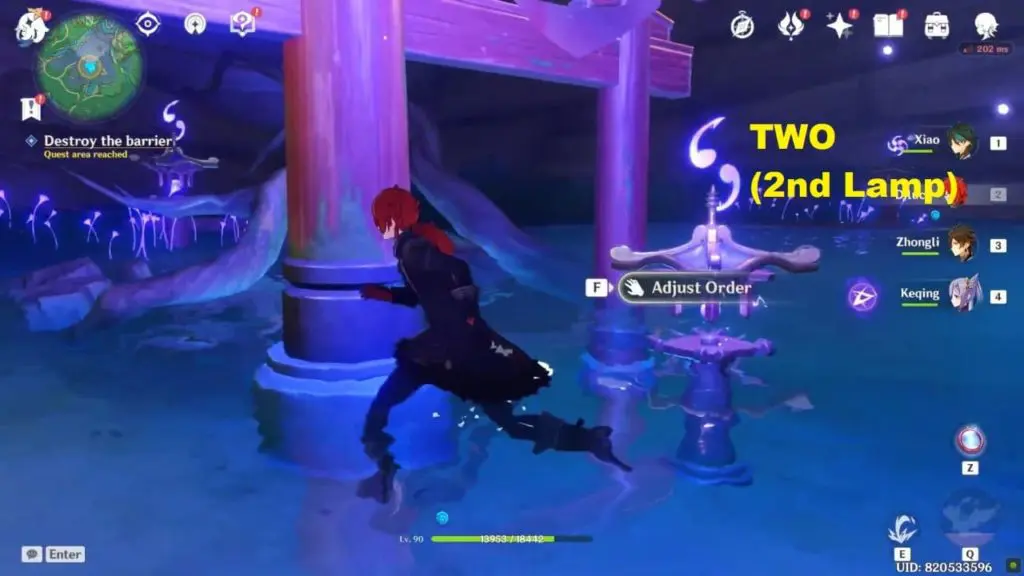
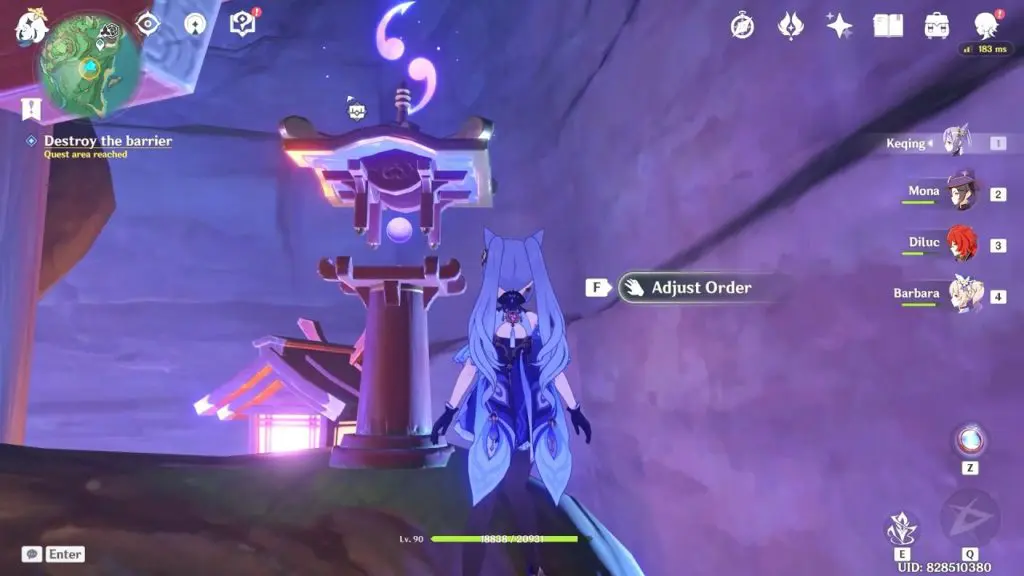
Get to the shrine under the central construct. According to the pattern, this shrine must be in second-order (2nd position). Interact with this shrine to change the number of symbols above it to TWO.
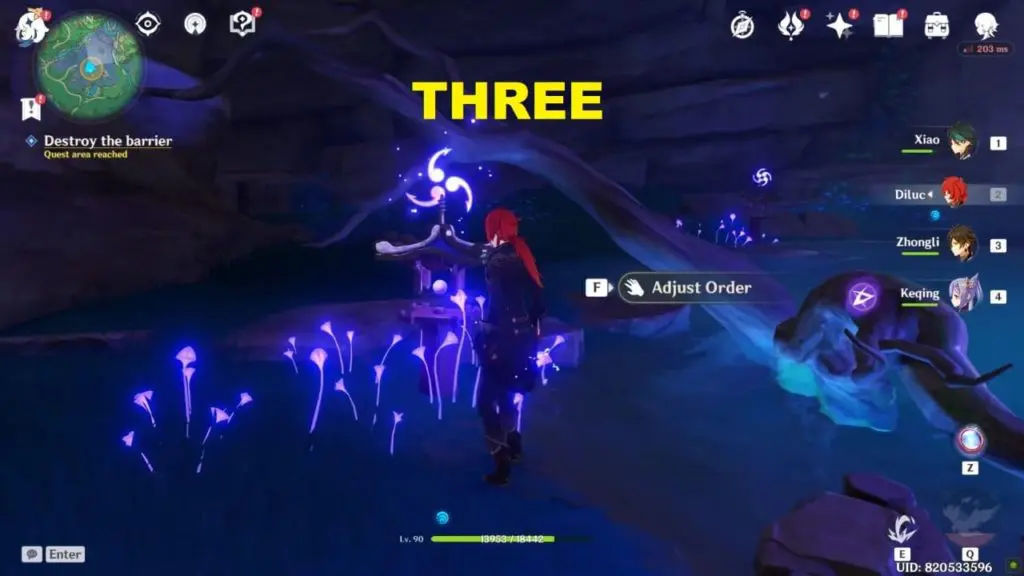
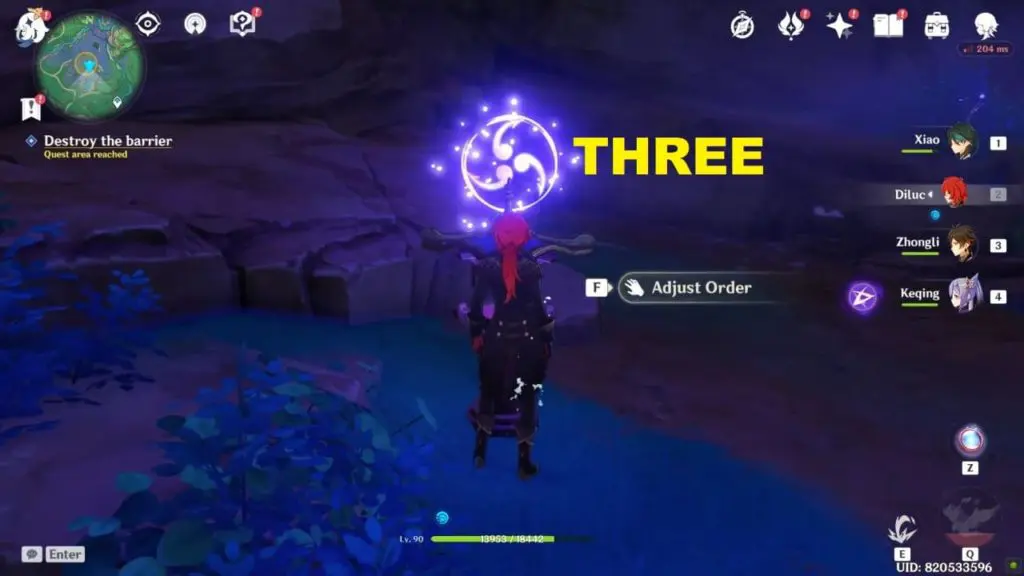
All the remaining three shrines in the area are in the third order (3rd position) in the pattern. Interact will the three remaining shrines and change the number of symbols above them to THREE.

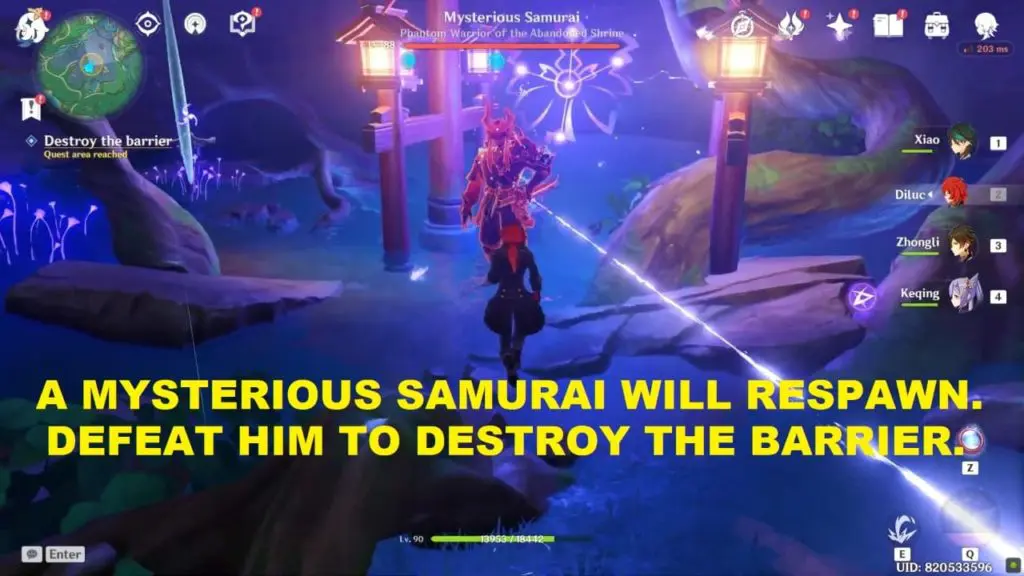
Now, get back to the first shrine and interact with it (pray). After which a mysterious Samurai (Phantom Warrior of the Abandoned Shrine) will appear. Defeat the Samurai to destroy the barrier.

Also Read: Genshin Impact 2.0: Inazuma Quest List & Walkthrough
Konda Barrier Puzzle (A Strange Story in Konda)
A Strange Story in Konda Complete Walkthrough
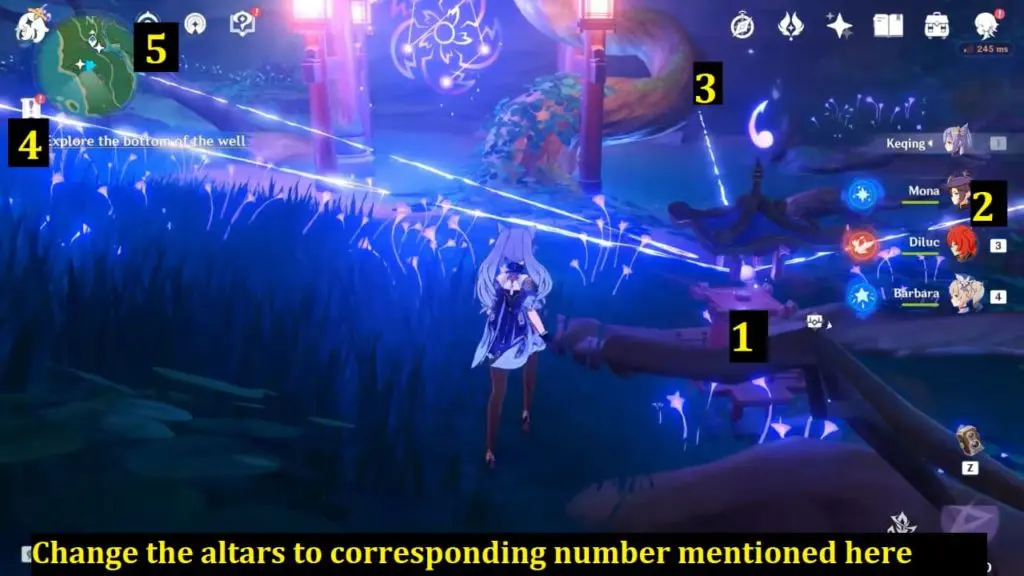
You can interact with five altars, each of which requires a number from 1 to 5. Because 1 cannot be modified, we shall begin there. Go to the altars-2 on the right from altar-1 while looking at the purple gateway pattern. The one closest to the altar-1 should already be a 2, so leave it alone. The one in the back corner should be a 3, so fix it. Return to the one and turn left. The first one on the left is supposed to be a 4, and the last one on the left is supposed to be a 5. Interact with the 1 once more to breach the seal and initiate a fight.
After defeating the opponent, summon the electromagnum near altar 2 to remove the barrier and enter the other side of the barrier to collect items from the chest.
Chinju Forest (Hayashi of Tanuki in the Forest)
Hayashi of Tanuki in the Forest complete walkthrough
Enter the cave and start the cleansing ritual. Adjust order on the first shrine as you enter to count 1.

Adjust the shrine at front of the previous one to count 4.
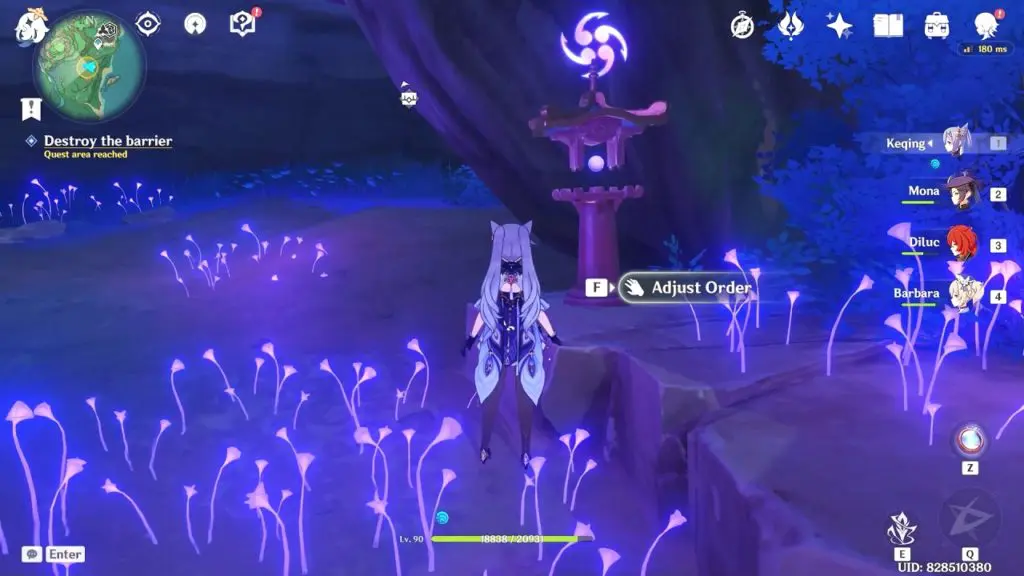
From the previous shrine, go to the left corner of the room and adjust the shrine to count 3.
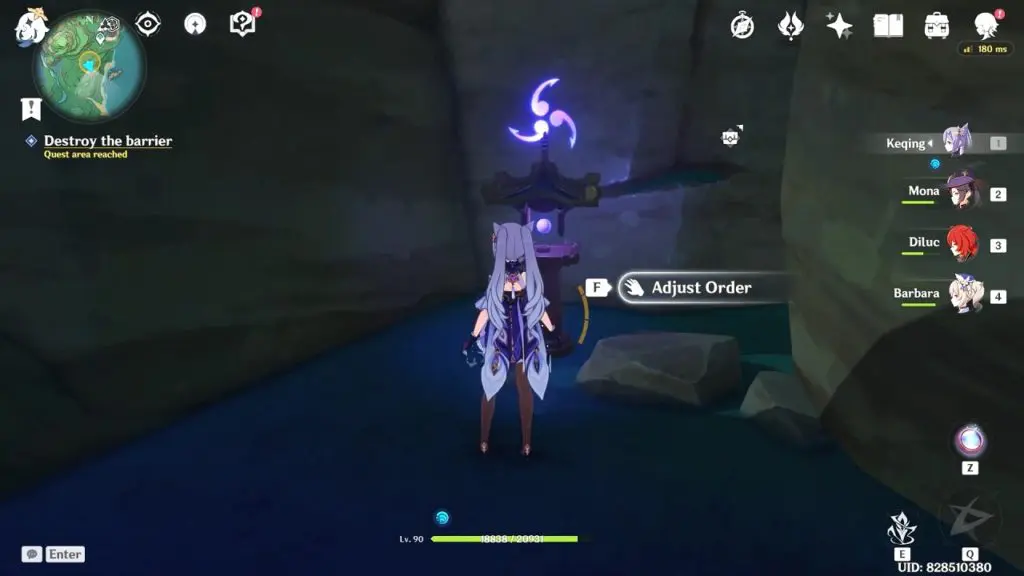
Climb above and ensure that the shrine is on count 2.
At the top, you will find another shrine at the top of a light. Adjust it to count 2.
Araumi (Cleansing Defilement)
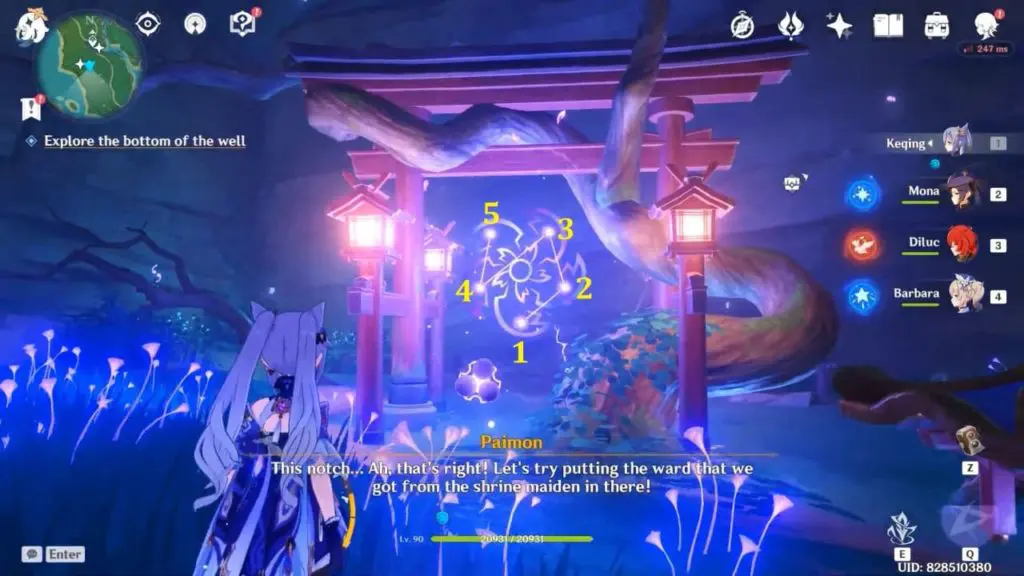
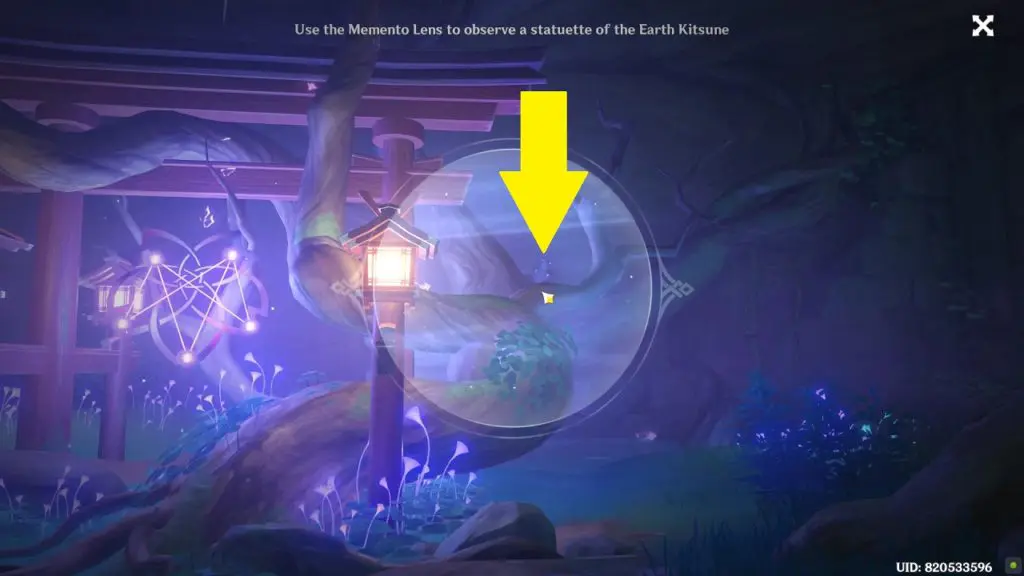
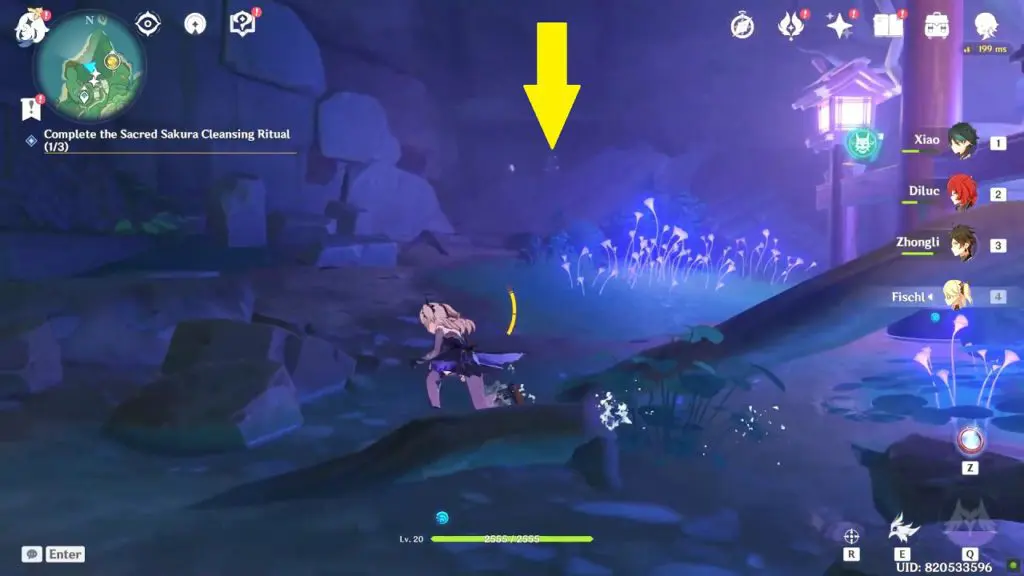
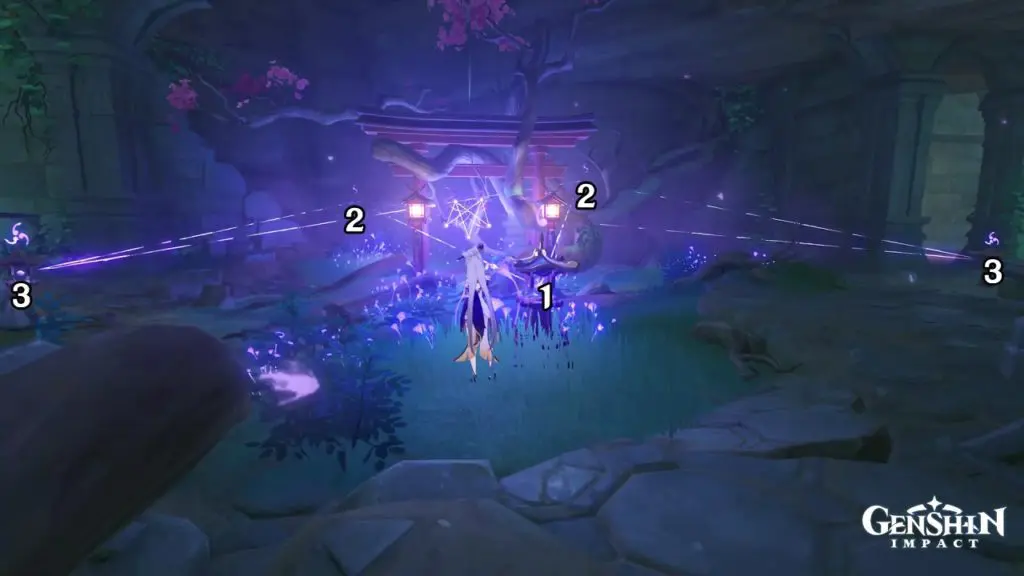
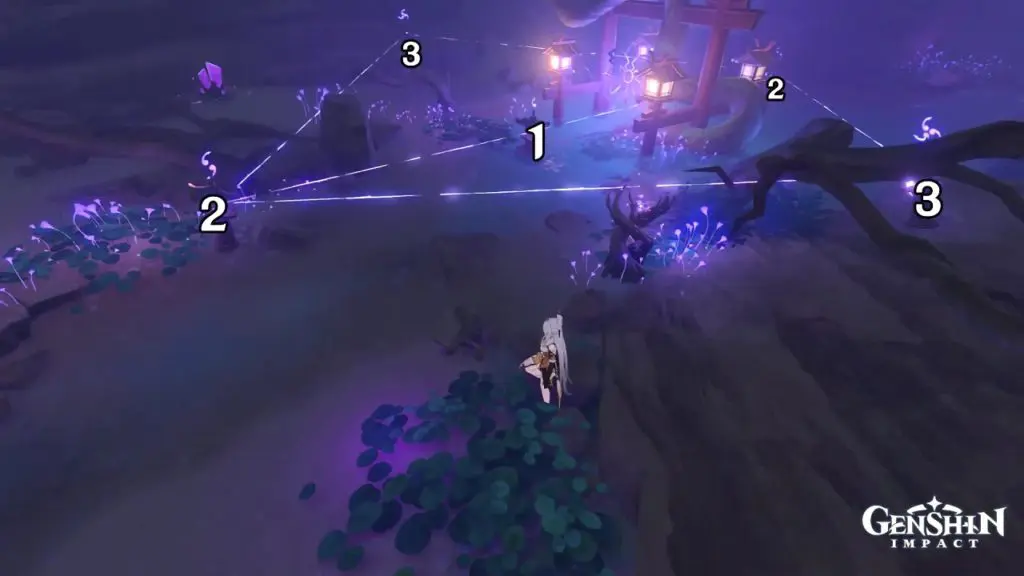
As you enter the puzzle area, interact with the shrine in front and use the Scroll-Shaped Ward to start the puzzle. There are two fox statues in the room that you need to observe with Memento Lens for the Shrines to appear. One fox is behind the barrier on the right side and the other on the left corner of the room (See first and second pictures below).
There is a total of five shrines in the room. Adjust the shrines to the sequences as shown in the third picture below. The numbers in the picture below represent the number of wings above the shrine. For example, if the number is ‘2’ that means you need to adjust the shrine so that 2 wings appear above it. Adjust the first shrine to count 1. Adjust the two shrines behind the barrier to count 2. Adjust the shrines on the left and the right side of the room to count 3. After completing the puzzle, Ochimusha will appear. Defeat it to complete Sacred Sakura Cleansing Ritual.
Kamisato Estate (Cleansing Defilement)
Kamisato Estate Complete Walkthrough
Adjust the five shrines to get the sequence as shown in the picture below. The numbers in the picture below represent the number of wings above the shrine. For example, if the number is ‘2’ that means you need to adjust the shrine so that 2 wings appear above it.
ALSO READ
Araumi Cleansing Defilement Barrier Guide & Sacred Sakuna Cleansing Ritual
Hayashi of Tanuki in the Forest World Quest – Chinju Forest Destroy the Barrier Puzzle
Cleansing Defilement: Complete the Sacred Sakura Cleansing Ritual Puzzles
Sacrificial Offering: Destroy the Barrier Shrine Puzzle
Orobashi’s Legacy Part 1
Orobashi’s Legacy Part 2
Orobashi’s Legacy Part 3